Bushcraft with Kids: Skills by Age, Knife Safety, Fire and the First Night Out
Bushcraft with kids means simple, real outdoor skills – carving a stick, lighting a small fire, building a den, reading tracks – taught in short, safe steps that match the child's age. Children from about 3 can join in with nature games and den building. Supervised tool work usually starts around 6–8 with a vegetable peeler or a round-tipped knife, and fire lighting always happens with an adult right beside them.
This guide gives you age bands, a knife-safety routine children can remember, clear fire rules, shelter and tracking games, tips for keeping little ones warm, fed and motivated, and a checklist for the first night outdoors. It builds on our bushcraft for beginners guide and the other bushcraft skills – scaled down to small hands and short legs.
Step by step
-
1

Start small and close to home
Pick a familiar wood near home, plan two to three hours and keep an easy way back. Short, successful trips build more enthusiasm than one long epic.
-
2

Agree the safety rules first
Walk the boundaries together, give every child a whistle and practise "stop, stay, whistle" before anyone goes exploring.
-
3

Teach knife use as a routine
Sit down, check the blood circle, cut away from the body and sheathe the blade before standing up. Start with a peeler, always supervised.
-
4

Light a small fire together
The adult owns the fire. Mark a safety ring, let children kneel to light it and keep water ready – only where fires are allowed.
-
5

Build a den and play
Build a stick den for a teddy, test it with a "rain shower" from a bottle, then play tracking and nature games.
-
6

Keep them warm, fed and proud
Snack every hour, add a layer before they get cold, give real jobs and head home while everyone is still having fun.
Which bushcraft skills suit which age?
Age bands are only a starting point. A careful seven-year-old who listens and sits still may be ready for a knife before a restless ten-year-old. Watch three things: can the child follow a two-step instruction, sit still for five minutes, and stop immediately when you say "stop"? If yes, they are ready for the next tool – with you right beside them.
| Age | Good skills and activities | Tools | Supervision |
|---|---|---|---|
| 3–5 years | Collect sticks and leaves, build dens for toys, find tracks in mud, listening and colour games, twist bread with an adult hand on the stick | Hands, magnifying glass, bucket | Constant, within arm's reach |
| 6–8 years | Peeler whittling, first fire with matches or a ferro rod, simple shelters, following a trail of markers, first knots | Vegetable peeler, then a round-tipped kids' knife while seated | One adult per one or two children during tool work |
| 9–11 years | Points and tent pegs, feather sticks, building a fire from tinder to fuel wood, tarp with help, compass basics, tracking | Fixed-blade or locking kids' knife with guard, small folding saw with gloves | Adult within reach during tool and fire work |
| 12–14 years | Simple spoon or spatula, fire in damp weather, pitching a tarp alone, map and compass, filtering water, cooking a meal | Bushcraft knife, folding saw; small hatchet only with one-to-one instruction | Nearby, regular check-ins |
| 15+ years | Planning trips, leading younger kids, overnighting with friends under agreed rules | Full kit after training, including an axe | Agreed rules, adult reachable by phone |
Guidelines only – maturity, coordination and the ability to follow rules matter more than the birthday.

Planning your first outing with children
The best first trip is almost boring for the adults: a wood you know, 20–30 minutes from home, with a track, a clearing and perhaps a stream. Plan two to three hours outdoors, including at least one long snack break. Young children walk slowly and stop often – a kilometre can take half an hour, and that is fine. Check the weather the evening before and again in the morning, and check when it gets dark with the sunrise and sunset calculator so you are home well before dusk (a short trip plan with a turnaround time helps). Agree beforehand that nobody approaches or follows wild animals; wildlife encounters explains what to do if you meet a boar, an adder or a herd of cattle.
Give the outing a simple mission that children can finish: "build a den for teddy", "find three different animal tracks", "light a fire and toast one twist bread each". A mission gives structure, and a finished mission feels like success. Keep one task in reserve for when energy dips.
Before you leave home
- Choose a familiar place with an easy way back to the car or home
- Check weather, wind and daylight; plan to be back an hour before dark
- Check local rules for fires, knives and camping
- Pack snacks and drinks for more time than you plan to be out
- Dress children in layers and pack a full set of spare clothes
- Tell someone where you are going and when you will be back
- Agree the mission and the safety rules at breakfast, not in the forest
Safety rules children can remember
Children remember a few short rules said the same way every time far better than long explanations. When you arrive, walk the boundaries of your area together and mark them – a coloured ribbon on trees at the edges works well. Then agree the core rules:
- Stay where you can see an adult. If you cannot see a grown-up, you have gone too far.
- Buddy system. Nobody leaves the group alone, not even for a pee.
- Stop, stay, whistle. If you are lost: stop, stay put, blow three times on the whistle and wait.
- Look, don't eat. No berries, leaves or mushrooms go into mouths – ever.
- Tools and fire only with a grown-up.
Give every child a loud whistle on a lanyard and practise with it at home. Three blasts is the widely used call for help; see distress signals for more. A bright jacket or hat makes a child far easier to find, and a small headlamp belongs in every child's pack, even on day trips.
If a child gets lost: stop, stay, whistle
 1Stop and hug a tree
The moment you cannot see the group, stop walking. Stay with one tree – "hug a tree" – because a child who keeps moving is much harder to find.
 2Whistle three times
Blow three long blasts, wait and listen, then repeat. A whistle carries much further than a voice and does not get hoarse.
 3Be seen and wait
Sit on your sit mat at the foot of the tree, keep your bright jacket on and answer calls. Adults search; children wait.
Knife safety for children
A knife is often the moment children feel they are doing "real" bushcraft – and the moment parents worry most. Safe knife use for kids rests on three things: the right tool, a fixed routine and an adult who is fully present. No phone, no side conversations: while a child carves, you watch the child.
Which knife for a child?
Start with a swivel vegetable peeler. It removes bark from a green stick, gives the feeling of carving and is very hard to hurt yourself with badly. When a child uses the peeler calmly and always pushes away from the body, move on to a kids' knife with a rounded tip and a finger guard. A short fixed blade or a locking folding knife is safer than a non-locking folder, which can close on small fingers. Keep it sharp: a sharp knife needs less force and slips less than a blunt one. Our guides to bushcraft knives and sharpening cover the details. A cut-resistant glove on the hand holding the stick is a sensible extra for beginners.
The knife routine for kids
 1Sit down first
Carving always happens seated – on a log, stump or sit mat, feet flat on the ground. A seated child cannot trip or walk into someone with an open blade.
 2Check the blood circle
Before opening the knife, stretch out the arm holding the closed knife and turn slowly: nobody may be inside that circle. If someone comes closer, the knife stops.
 3Cut away, beside the knee
Hold the stick to the outside of the knee and push the blade away from the body in short strokes. Never carve towards the thigh, between the legs or towards the holding hand.
 4Holding hand behind the blade
The hand holding the stick stays behind the knife, never in front of the edge. Rest the forearms on the knees for control.
 5Sheathe before you stand
Stopping, talking, standing up or handing over? Blade goes into the sheath or is closed first – every time. The adult keeps the knife between sessions.

A simple progression that works
Let children earn each step. Many groups use a "knife licence": after a session of calm, safe peeler work a child may try the knife; after several good sessions with the knife they may carve on their own at the carving spot, still watched. The first projects should be short and useful – a marshmallow stick, a tent peg or a butter spreader – so the child finishes something within one session. More projects are in our carving guide.
From peeler to first project
 1Peel with a peeler
Peel the bark from a green, thumb-thick stick of a known safe hardwood such as hazel. Push away from the body, stick resting on the knee.
 2Peel with the knife
Same job with a round-tipped knife: long, shallow strokes away from the body. The edge only needs to shave, not dig in.
 3Carve a point
Turn the stick a little after each stroke to make an even point. Short strokes, always away from the body and past the knee.
 4Finish a project
A tent peg, marshmallow stick or butter spreader. Check the work, praise it, and put the knife back in its sheath.
Campfire with kids: rules that keep everyone safe
For most children, a real campfire is the highlight of the day. It is also where the most serious accidents happen, so fire with kids follows fixed roles: the adult owns the fire – they choose the site, decide how big it gets and never leave it. Children help collect wood, build the lay and, when ready, light it while kneeling beside an adult.
Only light fires where it is allowed, and check fire bans and forest fire warnings before you go. Many forests forbid open fires completely; use a designated fire pit, a fire bowl on a campsite or a small camping stove instead. Our campfire safety guide covers site choice and putting a fire out properly. Where a fire is allowed, foil packets with kids make a safe, rewarding first cooking job.
Lighting a fire with children
 1Mark the safety ring
Lay a ring of sticks or stones about 1.5–2 m around the fire pit. Nobody steps inside unless the adult invites them; no running around the fire.
 2Collect three sizes
Children gather dead, dry wood from the ground: matchstick-thin, pencil-thick and thumb-thick. Sorting into piles makes a game of it. See natural tinder.
 3Kneel and light
The child kneels – never bends over from standing – with hair tied back, and lights the tinder with a long match or a ferro rod. The adult kneels right beside them.
 4Feed it, watch it, put it out
Add wood one piece at a time, keep water within reach and never leave the fire. At the end drown it, stir and drown again until everything is cold to the touch.
Good first fire projects are small and quick: a tiny fire in a fire bowl, a feather stick lit with a ferro rod, and then twist bread on a stick over the embers. Long sticks (1.5–2 m) keep children well back from the heat. Tie back long hair and avoid loose scarves and synthetic fleece near flames – it melts. The fire lay picker helps you choose a small, stable lay for the conditions.
Shelter building games
Den building is the perfect first shelter lesson because it combines play with real principles: a strong frame, a steep roof, thick insulation and a dry floor. Start small. A den for a teddy or a doll teaches all of it in 30 minutes, and the "rain test" at the end makes the result visible.
The teddy den challenge
- Find a spotFlat, dry ground, no dead branches overhead.
- Prop and ridgeA forked stick as a prop, a long stick as the ridge down to the ground.
- RibsLean sticks along both sides, close together.
- LeavesPile on dry leaves, thick as a child's arm is long.
- Rain testPour a bottle of water over the roof – is teddy dry?

Older children can scale up to a den big enough to sit in, a simple tarp shelter with a ridgeline, or a real debris shelter with an adult. Tarp pitching is a great way to practise knots such as the round turn and the taut-line hitch. Take natural dens apart at the end of the day and scatter the material, so the forest looks as you found it.
Tracking and nature games for kids
Games turn a walk into an adventure and quietly train the skills bushcrafters use: observation, patience, navigation and moving quietly (the calmest of them is a regular sit spot with children). They also fill the gaps while the fire burns down or the adults set up camp.
| Game | From age | How it works | What it trains |
|---|---|---|---|
| Colour and texture hunt | 3 | Find something rough, smooth, red, soft, older than you | Observation, vocabulary |
| Track detectives | 4 | Look for footprints in mud, sand or snow; press your own next to them | Tracking basics |
| Meet a tree | 5 | Blindfolded child is led to a tree, feels it, then finds it again with open eyes | Touch, memory, trust |
| Sit spot | 5 | Sit silently alone (within sight) for 3–10 minutes, then share what you heard | Patience, listening |
| Fox and rabbits | 6 | The "fox" stands blindfolded; the rabbits sneak up and touch him without being heard | Stalking, quiet movement |
| Compass treasure hunt | 9 | Follow a chain of bearings and paces to a hidden snack | Map and compass |
For older children, finding north without a compass – by the sun, a shadow stick or the stars – is a favourite; see natural navigation. Keep one firm rule for every game: look, touch gently, but nothing goes in the mouth.
Keeping kids warm, fed and motivated
Most outings with children end early not because of danger but because someone is cold, hungry or bored. Solve those three and you solve most problems.
Warm: layers, hats and dry socks
Children cool down faster than adults, especially when they stop moving, and they often do not say they are cold until they are miserable. Dress them in layers: a wicking base layer (wool or synthetic, no cotton), a warm fleece or wool mid layer and a windproof, waterproof jacket. A hat and gloves live in the pack even in spring and autumn. Check the back of the neck and the hands during breaks – cold hands or a cold neck mean add a layer now. Our layering guide explains the system; the wind chill calculator shows how much colder a breeze makes it feel.

Fed: snacks every hour
Plan a small snack every 45–60 minutes and a proper hot drink or meal at the fire. Easy wins are nuts (for children old enough to eat them safely), dried fruit, cheese, crackers, bread rolls and a little chocolate as a reward. A thermos of warm tea or hot chocolate works wonders on a grey day. For multi-day planning see our trail food planning guide; the calorie planner is designed for teens and adults, so for younger children simply pack generously. Children also forget to drink – offer water at every break; the water calculator helps with totals for longer trips.
Motivated: real jobs and a good ending
Give children real responsibility: navigator for the next junction, keeper of the whistle, chief firewood collector, twist-bread chef. Praise effort and careful work, not just results. End the trip on a high – while everyone still wants more – rather than pushing on until the first tears.
What keeps kids keen – and what puts them off
Motivation boosters
- A clear, finishable mission
- Real jobs with real responsibility
- Regular snacks and warm drinks
- Time for free play
- Ending while it is still fun
Motivation killers
- Long marches to reach a "better" spot
- Cold hands and wet feet
- Adults doing everything themselves
- Too many rules at once
- Carrying on after everyone is tired
Bushcraft with kids through the seasons
There is no bad season for bushcraft with children – only activities that suit the season better or worse. Adapting the plan to the weather is also a skill worth teaching: let older children look at the sky and help decide, using the basics from reading the weather.
| Season | Great activities | Watch out for |
|---|---|---|
| Spring | Birdsong sit spots, first green-stick whittling (bark peels easily), tracks in soft mud | Cold wind despite sunshine, wet ground, first ticks |
| Summer | Stream exploring, shade dens, twist bread, long evenings for a first overnight | Sun and heat at midday, ticks, wasps at the snack box, fire bans in dry spells |
| Autumn | Leaf dens (plenty of material), collecting cones and nuts for crafts, fungus spotting (look only) | Early dusk, storms and falling branches, wet leaves on slopes |
| Winter | Tracks in snow, small snow walls, fire and hot drinks, star-gazing before dinner | Cold hands and feet, very short days, ice on water |
Winter: short, warm and active
Winter outings with children work best as short trips of one to two hours with lots of movement and a fire or thermos in the middle. Tracks in fresh snow are the best tracking lesson of the year, because even small children can follow a fox or deer trail. Small snow walls and "snow sofas" are great fun, but children should never dig tunnels or caves into snowbanks on their own – they can collapse. Leave real snow shelters to adult-led groups with experience, and keep children off frozen lakes and ponds. Watch for white, waxy patches on cheeks, nose and fingers as an early sign of frostnip, and check that boots are not too tight – warm feet need room for thick socks; see boots and foot care. For nights in the cold, read winter camping first and start with a night in the garden.
Rainy days
Rain does not have to cancel the trip if everyone is dressed for it. Pitch a tarp first as a dry base, then turn the weather into the challenge: can the group get a fire going with split wood and feather sticks? Fire in wet weather is a proud achievement for older children. Keep the outing shorter, change wet gloves and socks early and have a warm drink ready. Heavy rain, strong wind or thunder are reasons to go home – a good lesson in itself.
Autumn and dark evenings
Autumn brings the best den material but also early darkness and storms. Check the trees above your play area for dead branches – the same widowmaker check adults use at camp – and avoid the woods on windy days. Give every child a headlamp and let them practise switching it on in daylight; headlamps and camp lighting explains which models suit small hands, and red light keeps night vision for a star-gazing session; night skills has more on dark adaptation.
The first overnight outdoors with kids
A first night outside is a big step for a child – and for parents. Make it easy to succeed and easy to stop. A night in the garden or on a campsite near the car is a perfect first overnight; if things go wrong, a warm bed is minutes away and nobody has failed.
Planning the first night out
- Rehearse at home Set up the tent or tarp in the garden or living room, try the sleeping bags and have a torch-lit dinner. New gear should never be new on the night.
- Choose a legal, easy site A campsite, a bookable trekking site or private land with permission. Rules for camping in the wild vary widely – see wild camping in Germany for an example.
- Get the sleeping system right A child-sized sleeping bag rated for the night temperature, an insulated sleeping pad and a warm hat. Oversized adult bags leave cold air pockets. The sleep system calculator and our sleeping gear guide help.
- Keep the evening routine Early dinner, toilet trip before bed, headlamp within reach, a favourite cuddly toy and a story. Change into dry clothes for sleeping.
- Have a plan B Agree beforehand that going home at night is allowed. A child who knows they can stop is far more likely to stay.
Groups, water play and toilet breaks: the practical questions
Running a session for a group of children
Leading a birthday party, a scout group or a school class is different from a family outing. A widely used principle in outdoor education is at least two adults per group, however small, so that one can deal with an injury or a lost child while the other stays with everyone else. For knife and fire work, the ratio from the age table applies – one adult per one or two children at the tool station – so a group session usually rotates: one small group carves with an adult, another builds dens, a third plays a tracking game. Clubs, schools and paid providers often have their own rules on ratios, first aid qualifications and parental consent; check them before you plan.
Before a group session
- Written permission from parents, including allergies, medication and an emergency phone number
- At least two adults, one with current first aid training
- Permission from the landowner for the site, fire and den building
- A briefing for helpers: boundaries, whistle signal, knife and fire roles
- Stations planned so no more than one or two children use tools per adult
- A plan B for rain and a meeting point if the group gets split
Water: play safely, drink from home
Streams are magnets for children, and shallow, slow water is a wonderful place to build dams and look for creatures. Keep an adult beside the water at all times, stay out after heavy rain when water rises and turns murky, and avoid deep pools, steep banks and weirs. Children should drink water brought from home. Building a DIY water filter from sand and charcoal is a great experiment that shows how water filtering works – but its water still needs boiling before anyone drinks it, which is a lesson in itself.
Toilet breaks in the woods
For many children the first "wild wee" is a bigger event than the campfire. Go together, choose a spot well away from paths, camp and water – at least about 60 m from streams and lakes – and show how to squat safely. For a poo, dig a small hole about 15–20 cm deep with a trowel and cover it afterwards; take used toilet paper and wipes home in a sealed bag. Hand sanitiser or soap and water before snacks is essential. Where there are toilets, use them – many popular forests already struggle with human waste.
Crafts for quiet moments
Not every child wants to carve or build all day. Twisting grass or cattail leaves into string – see simple cordage from grasses – threading leaf garlands, weaving small mats and making charcoal drawings with a cooled stick from the fire are calm, knife-free activities. A simple meal from campfire cooking, such as foil-baked apples, gives the whole group a shared finish.
What to pack for bushcraft with kids
Children should carry their own small pack – it gives them ownership – but keep it light: water, a snack, a whistle and a jacket. The adult carries the rest, including spare clothes for everyone. Use the Kit Builder for the adult kit and our bushcraft kit list for the details.
The child's own pack
- Water bottle and a snack
- Whistle on a lanyard
- Small headlamp
- Hat and gloves, even in spring and autumn
- Rain jacket in a bright colour
- Sit mat (foam)
- Small bag for "treasures" – feathers, cones, stones
The adult carries
- First aid kit with tick remover, burn dressings and personal medication
- Complete spare clothes for each child in a dry bag, plus spare socks
- Extra warm layer and emergency blanket
- Thermos with a warm drink and more food than planned
- Peeler and kids' knives, sheathed, in the adult's pack
- Water for the fire, lighter or ferro rod, small tarp
- Phone, map, wet wipes, rubbish bag
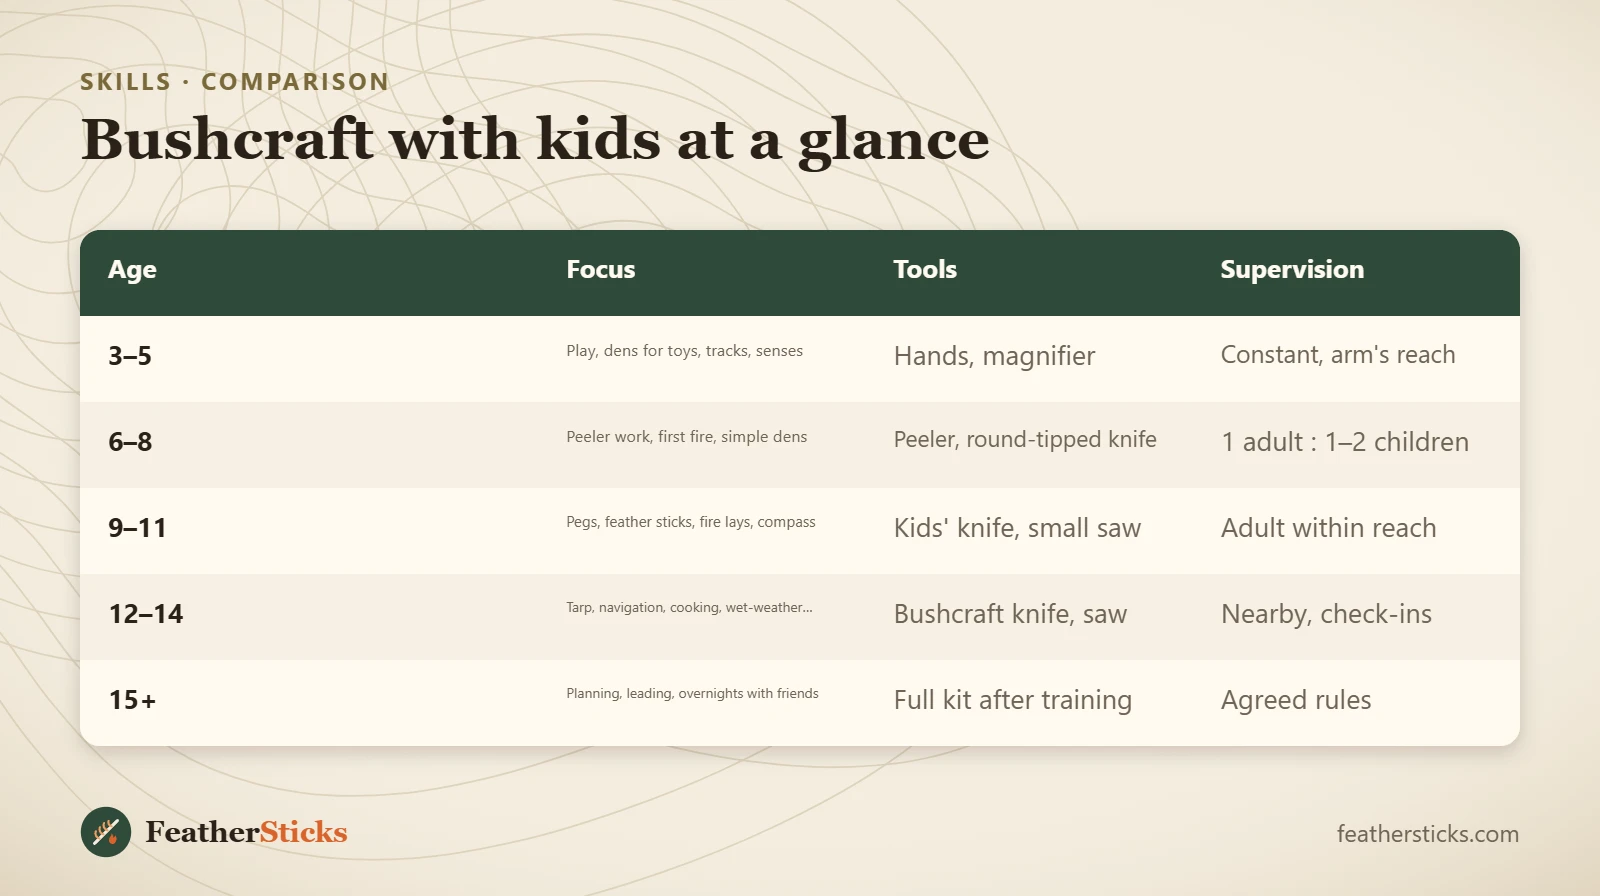
| Age | Focus | Tools | Supervision |
|---|---|---|---|
| 3–5 | Play, dens for toys, tracks, senses | Hands, magnifier | Constant, arm's reach |
| 6–8 | Peeler work, first fire, simple dens | Peeler, round-tipped knife | 1 adult : 1–2 children |
| 9–11 | Pegs, feather sticks, fire lays, compass | Kids' knife, small saw | Adult within reach |
| 12–14 | Tarp, navigation, cooking, wet-weather fire | Bushcraft knife, saw | Nearby, check-ins |
| 15+ | Planning, leading, overnights with friends | Full kit after training | Agreed rules |
Common mistakes
- Planning a long hike to a "perfect" spot instead of starting close to home.
- Letting children carve while standing, walking or sitting close together.
- Giving a blunt or non-locking folding knife to a beginner.
- Leaving a child alone near the fire, even for a moment.
- Waiting until children complain of cold before adding layers.
- Forgetting spare clothes – one wet sock can end the whole trip.
- Doing all the interesting jobs yourself instead of handing them over.
What you need
- Whistle and small headlamp for every child
- Swivel vegetable peeler for first carving
- Kids' knife with rounded tip, finger guard and sheath
- Cut-resistant glove for the holding hand
- Foam sit mats
- Spare clothes in a dry bag
- First aid kit with tick remover and burn dressings
- Thermos flask
FAQ
At what age can kids start bushcraft?
What is a good first knife for a child?
How do you teach knife safety to kids?
Can children light a campfire?
What should a child do if they get lost in the woods?
How do I keep kids warm when camping?
What bushcraft activities can kids do in winter?
How many adults do you need for a group of children?
How do kids go to the toilet in the woods?
Check yourself
Completed6 quick questions from this guide. Nothing is sent anywhere.
Related step-by-step guides
-
 1
-
 1
-
 1