Fire
How to Start a Fire in the Rain: Wet Weather Fire Guide
To start a fire in the rain, you need dry material, and in wet weather dry material is found inside wood, not on it. Collect dead standing wood, split it to reach the dry core, carve feather sticks, build on a platform off the wet ground, shelter the fire from direct rain and prepare two to three times more kindling than usual. With fatwood or a fire extender as backup, a fire in steady rain is achievable.
This guide explains where to find dry fuel, how to process it, how to protect the fire from rain, which fire extenders help and how to keep a fire alive once it burns. It builds on the basics of fire starting and our bushcraft for beginners guide.
Step by step
-
1
Collect dead standing wood
Gather dead branches still on trees and dead lower spruce twigs. Avoid wood lying on the wet ground.
-
2
Split to the dry core
Saw wrist-thick wood into lengths and split it into kindling. The inside is dry even after days of rain.
-
3
Shelter the fire site
Rig a tarp high above the fire site or use dense cover. Build a platform of split sticks on the wet ground.
-
4
Prepare tinder and extenders
Carve three feather sticks, add fatwood or birch bark, and keep a carried fire extender ready.
-
5
Light and feed patiently
Light low on the lee side, feed only split dry kindling and dry the next wood around the fire.
Why is it so hard to start a fire in the rain?
Water is the enemy of fire because it steals heat. Before wet wood can reach its ignition temperature of roughly 250–300 °C, all the water in and on it must first be heated and evaporated, and evaporating water takes a great deal of energy. A small tinder flame simply cannot supply enough heat to dry soaked kindling and ignite it at the same time. Rain also cools the flame directly, and wet ground draws heat from the base of the fire.
The good news: rain soaks the surface of wood much faster than its interior. A dead branch that has been rained on for a day is wet on the outside and in its outer millimetres, but dry inside. Thin twigs, leaves and wood lying on the ground are another matter: they are saturated. The whole strategy for wet-weather fire follows from this: find thicker dead wood that is off the ground, split it open, and protect the dry wood you have exposed.
The wet-weather fire strategy
- FindDead standing wood, fatwood, birch bark, sheltered fuel.
- SplitReach the dry core with saw, axe or batoning.
- ProtectTarp overhead, platform underneath, dry workspace.
- LightFeather sticks, fatwood dust or extender, lit low.
- SustainDry the next wood by the fire, build a coal bed.
Prepare before the rain arrives
The easiest wet-weather fire is the one you prepared for. If rain is forecast, collect tinder and kindling while it is still dry and store it under your tarp or in a bag. Pocket a handful of dry birch bark or dry grass during the day whenever you see it. Carry at least two ignition sources, because matches and ferro rods have different weaknesses: a ferro rod works when wet but needs fine tinder, while a lighter provides a sustained flame but can fail when cold or wet.
Your kit matters too. A good saw and knife let you reach the dry core of thicker wood; a tarp lets you work and light the fire out of the rain. Check our bushcraft kit list and plan the right fire kit with the Kit Builder.
Allow enough time, too. In the wet, finding wood, splitting and lighting can easily take 45 minutes, and in autumn and winter it may be dark by then. The sunset and daylight calculator shows when you should start at the latest. Splitting wood in the dark with cold, clumsy fingers is slow and considerably raises the risk of injury.
Wet-weather fire kit
- Ferro rod plus a lighter kept in a dry inside pocket
- Stormproof matches in a waterproof container
- Fire extender: petroleum jelly cotton pads, wax or tinder tabs
- A piece of fatwood in a zip bag
- Folding saw and fixed-blade knife (or small axe)
- Tarp and cord to create a dry work area
- A small bag of dry tinder collected earlier
- Sit mat or piece of foam to kneel on
How to find dry wood in the rain
Finding dry fuel is the most important skill for fire in wet weather. Look up and look inside, not down. These are the best sources, roughly in order of reliability:
Dead standing wood
Dead branches still attached to trees, and small dead trees that are still upright, shed rain and dry quickly in the wind. Even after long rain, their core is dry. A dead branch that snaps with a crack is usable; one that bends or feels spongy is not.
Dead lower branches of conifers
Spruce and pine drop their lower branches as they grow. The thin, dead, grey twigs close to the trunk under a dense canopy are often surprisingly dry and make excellent fine kindling. Snap them off close to the trunk, only from dead branches.
Fatwood and birch bark
Resin-rich fatwood from old pine stumps repels water and lights even when damp. Birch bark contains oily compounds that burn even when wet; peel it from dead, fallen birches, never from living trees. Both are the best natural tinder for rain.
Sheltered spots
Wood under overhanging rocks, beneath the lean of a fallen trunk, inside hollow stumps or under dense spruce often stays drier. The underside of a leaning dead log may be dry even when the top is soaked.
| Source | Dryness after rain | Use as | Notes |
|---|---|---|---|
| Core of split dead standing wood | Dry | Kindling, feather sticks, fuel | The most reliable source; needs saw and splitting |
| Dead lower spruce/pine twigs near the trunk | Often dry | Fine kindling | Snap only dead twigs; test with a crack |
| Fatwood from old pine stumps | Water-repellent | Tinder, extender | Shave, scrape dust, carve curls |
| Birch bark from dead, fallen birches | Damp but burns | Tinder | Oils burn when wet; shred finely |
| Wood under rock overhangs or leaning logs | Often dry | Kindling | Check for animal nests first |
| Thin twigs and leaves on the ground | Soaked | Not usable | Skip: they waste your tinder |
| Rotten, punky wood | Soaked like a sponge | Not usable | Crumbles and smoulders at best |

The snap test: bend a finger-thick dead stick. A clean, sharp crack means it is dry enough inside to use. If it bends, tears with a dull sound or feels cold and heavy, leave it. Train this on every walk in the rain and you will soon collect a good bundle in a few minutes.
Splitting wood to reach the dry core
Splitting is the heart of any rain fire. The thicker the dead wood, the larger its dry core. Wrist-thick to calf-thick pieces are ideal: thick enough to be dry inside, thin enough to process with a knife and baton. Cut them to length with a folding saw, split them with an axe or by batoning your knife, and keep splitting until you have a range of sizes.

Processing a wet log into dry kindling
 1Saw into lengths
Cut 25–30 cm sections from dead standing wood, 5–10 cm thick. Thicker pieces have a larger dry core.
 2Split into halves and quarters
Baton or chop through the centre, then quarter. Put the wet outer pieces aside to dry by the fire later.
 3Split the dry core further
Split the quarters into three piles: thumb-thick, pencil-thin and matchstick-thin. You need most of the thinnest size.
 4Carve feather sticks
Turn two or three thumb-thick pieces into feather sticks with 30–40 fine curls each, carved only from dry wood.
 5Make shavings
Shave a handful of fine curls off the driest pieces as extra tinder. Catch them on a dry surface, not the wet ground.
 6Sort and cover
Sort everything by thickness on a board or bark under the tarp, so you can grab the next size without searching.
What it should look like: freshly split faces are pale and feel dry, or at most cool, against your lips or the back of your hand. If even the core is dark and wet, the wood was rotten or lay on the ground: find another piece rather than trying to burn it.
Work on a dry surface such as a board, a piece of bark or your pack lid, not on the wet ground. Dry your hands on the inside of your jacket before handling tinder. The wet outer pieces of each log are not wasted: stack them near the fire later so they dry out and become fuel.
Choosing and sheltering the fire site
In rain, the fire site needs protection from above and below. From below, wet ground drains heat; from above, raindrops cool the young flame and soak the kindling.
Build a platform
Lay a platform of wrist-thick dead sticks tightly side by side, ideally in two crossing layers, or use a flat, dry stone. It lifts the tinder off the wet ground and lets air in from below. On snow, the platform is essential. More on platforms in our overview of fire lays.
Shelter from rain
A tarp pitched high above the fire site keeps rain off while you light and establish the fire. Keep at least 2 m of height between the fire and a synthetic tarp and pitch it at an angle so smoke can escape; lower it only while you light a small tinder bundle, then raise it. Natural cover also helps: the lee of a large boulder, a dense spruce canopy or an overhang. Watch for dead branches above you, which can fall in wind and rain. The site selection guide covers these hazards.
Shelter from wind
Rain rarely comes alone. Wind blows rain into the fire and carries heat away. Build on the lee side of a log, rock or bank, or set up a lean-to fire lay with a windbreak log. A small, sheltered fire is better than a big exposed one.
Building a platform on wet ground
 1First layer
Lay wrist-thick dead sticks tightly side by side across the wettest spot. Split sticks with the flat side up are best.
 2Second layer crosswise
Add a second layer at right angles. The two layers lift the fire well above standing water and let air in from below.
 3Tinder and extender on top
Place birch bark, fatwood dust or a carried extender in the middle of the platform, never directly on the wet ground.
 4Compact lay
Build a small teepee over the tinder, packed a little tighter than in dry weather, with an opening on the windward side for lighting.

Fire extenders: tinder that burns longer
In rain, your tinder flame has to burn long enough to dry and ignite damp kindling. A few seconds are rarely enough. Fire extenders are materials that burn for a minute or longer and bridge that gap. Natural extenders can be found in the forest; carried extenders are cheap insurance in your kit.
| Extender | Type | Burn time | Notes |
|---|---|---|---|
| Fatwood splinters and dust | Natural | Several minutes | Water-repellent; lights from a ferro rod |
| Birch bark | Natural | 30 s to 2 min | Burns when damp; shred for spark ignition |
| Conifer resin (from wounds on dead trees) | Natural | Minutes | Smear on kindling; do not harvest from living trees |
| Cotton pads with petroleum jelly | Carried | 1–3 min | Cheap, light; fluff out the fibres before lighting |
| Wax-based fire starters or tinder tabs | Carried | 3–8 min | Reliable in rain; check packaging |
| Candle stub | Carried | Long | Sustained flame to dry kindling; needs shelter |
Burn times vary with size and conditions; these are rough guides.
Building and lighting a fire in wet weather
Build a compact fire lay on your platform: a small teepee or a lean-to against a windbreak log works best. Pack it more tightly than in dry weather so the pieces heat each other, but leave enough gaps for air. Prepare two to three times more fine kindling than usual, because some of it will only dry and not burn at first.
Wet-weather fire build (top = added last)
- Stacked around the fire to dry, fed later as fuel.
- Only split pieces with dry faces, added once the fire is established.
- Split from the dry core; lots of it.
- Curls down, close to the tinder.
- Fatwood dust, birch bark, carried extender.
- Split sticks or a dry stone off the wet ground.

Light the fire low on the windward side so the wind pushes the flame into the kindling. Shield the young flame with your body or hat. When the tinder flares up, do not rush: add matchstick kindling first, a few pieces at a time, and wait until each layer burns before adding the next. Blowing gently at the base helps a struggling fire, but blowing too hard scatters the embers. Resist the temptation to add thick wood early; it smothers the flame and sends clouds of steam and smoke up.
Feeding a young fire in the rain
 1Light low, windward
Light the tinder at the bottom on the side the wind comes from, so the flame is pushed into the lay. Shield it with your body or hat.
 2Matchstick kindling first
Add matchstick-thin splits a few at a time, only where the flame already licks. Wait until each handful burns before adding more.
 3Pencil, then thumb
When the small wood burns strongly, step up to pencil-thick and then thumb-thick splits. Never skip a size: the jump is where wet fires die.
 4Coals and drying
Stand the wet outer pieces on end around the fire so they steam dry, and feed them only once the fire has built a bed of glowing coals.
| After about | What you should see | If not |
|---|---|---|
| 30 seconds | Tinder and extender burn with a steady flame | Add fatwood splinters or a second extender |
| 2 minutes | Matchstick kindling crackles, little steam | Split thinner and drier; check the shelter |
| 5 minutes | Pencil-thick wood burns on its own | Feed smaller pieces longer before stepping up |
| 10–15 minutes | First coals glow under the lay | Keep feeding small split wood; do not add round logs yet |
| 20+ minutes | Coal bed survives a heavy shower | Stack drying wood closer; keep someone tending |
Times are rough guides and vary with wood, rain and wind.
How to keep a fire going in the rain
Once the fire burns, your goal is a bed of hot coals. Coals store heat, dry the wood you add and keep the fire alive through heavy showers. A fire that is only flames and no coals will die the moment the rain gets heavier.
- Dry your next wood by the fire. Stack fuel on its end around the fire, or build a small drying rack, and rotate pieces so they steam dry before you feed them.
- Feed split wood. Split faces dry and catch much faster than round branches with wet bark.
- Feed small and often. Several small pieces burn better than one large wet log.
- Create a roof of fuel. In a log cabin or teepee lay, larger pieces over the top shed some rain from the core while drying out.
- Use hardwood for coals. Once the fire is established, dense hardwood like oak or beech builds a longer-lasting coal bed than softwood.
- Keep the fire tended. In heavy rain someone should stay with the fire; a neglected fire drowns quickly.
How much wood do you need? A fire in rain consumes more wood than in dry weather because part of the energy goes into drying. The firewood calculator gives a baseline; add a generous margin for wet conditions. If the rain turns cold and windy, check the wind chill calculator and put on dry layers before you get chilled: hypothermia is a real risk in cold rain, even above freezing.
When the fire will not catch: troubleshooting
Wet-weather fires fail for a handful of reasons. Before you use up all your tinder, stop, look and work through the questions below.
Why is my fire not catching?
Does the tinder flame burn for less than 30 seconds?
Yes → Add a fire extender, fatwood splinters or a candle stub.No → Tinder is fine; look at the kindling.Is the kindling hissing and steaming but not catching?
Yes → It is too thick or wet. Split it thinner, use only dry core pieces and add more fine kindling.No → Go to the next question.Does the fire start and then die out?
Yes → Too big a jump in size or too little kindling. Feed matchstick and pencil sizes longer before adding thumb-thick wood.No → Go to the next question.Is rain or wind hitting the fire directly?
Yes → Improve shelter: tarp higher over the fire, windbreak log, your body as a shield.No → Check air flow: the lay may be packed too tightly or sitting in water.
If everything fails and conditions are dangerous, prioritise staying warm and dry: shelter, dry clothing, insulation and food come first. A fire is valuable, but hypothermia is prevented by keeping dry and insulated. Once the fire has served its purpose, extinguish it completely: see campfire safety. Explore all fire skills to build a full toolkit.
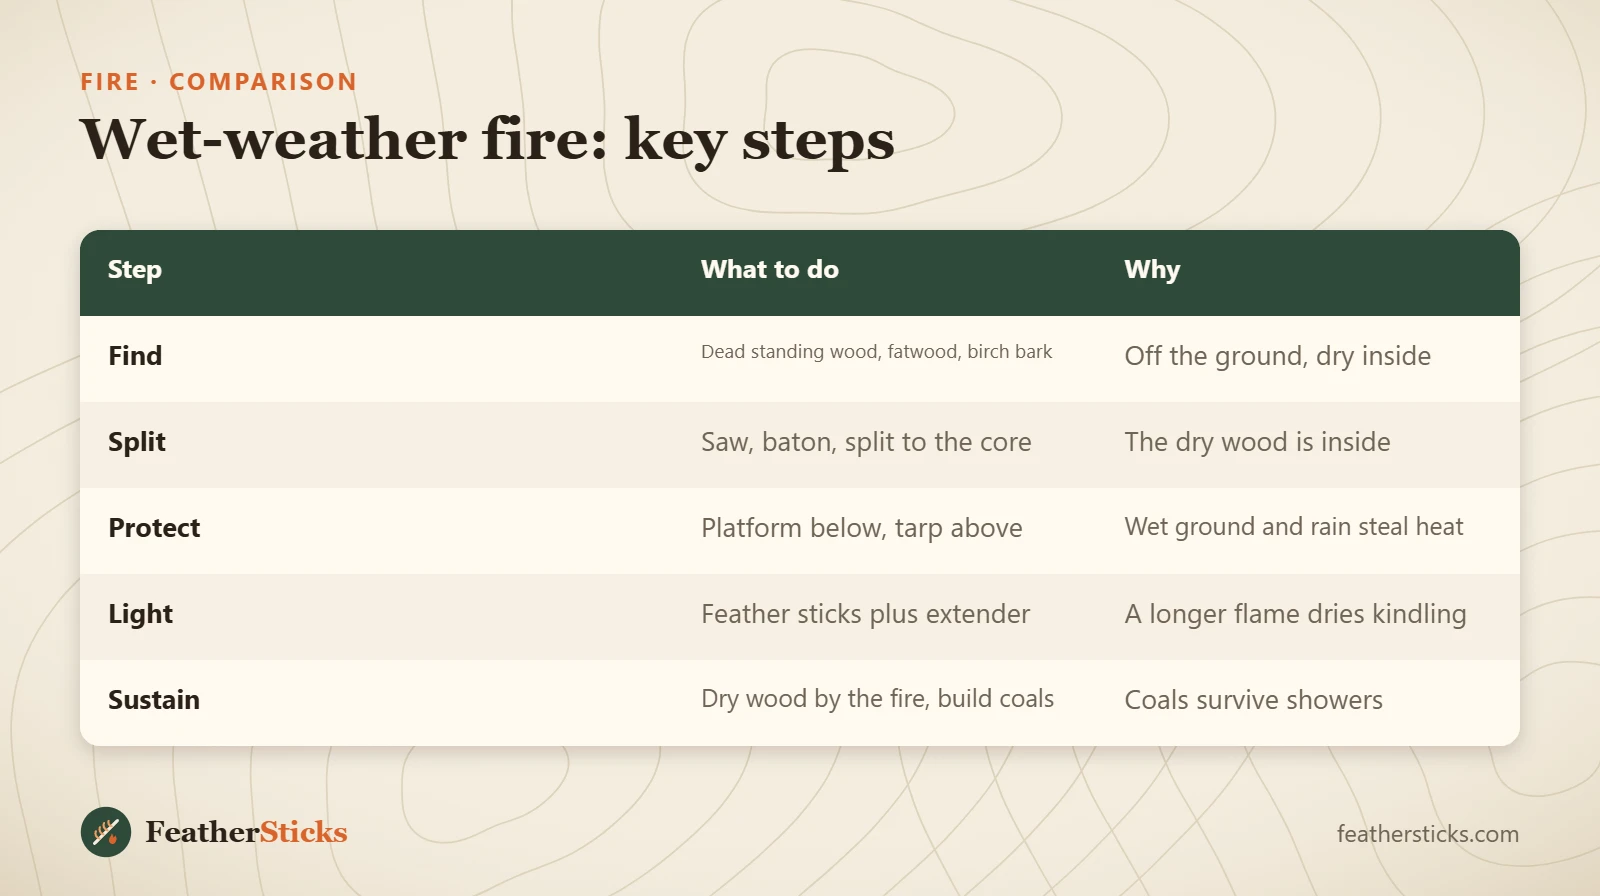
| Step | What to do | Why |
|---|---|---|
| Find | Dead standing wood, fatwood, birch bark | Off the ground, dry inside |
| Split | Saw, baton, split to the core | The dry wood is inside |
| Protect | Platform below, tarp above | Wet ground and rain steal heat |
| Light | Feather sticks plus extender | A longer flame dries kindling |
| Sustain | Dry wood by the fire, build coals | Coals survive showers |
Common mistakes
- Collecting wet twigs and leaves from the ground instead of dead standing wood.
- Skipping the splitting and trying to light round, wet branches.
- Building directly on wet ground or snow without a platform.
- Using up all your tinder on a lay with too little fine kindling.
- Adding thick wood too early and smothering the flame.
- Pitching a synthetic tarp too low over the fire.
- Getting cold and wet while fighting the fire instead of layering up first.
What you need
- Ferro rod and a lighter in a dry pocket
- Stormproof matches in a waterproof case
- Folding saw and fixed-blade knife
- Small axe or baton for splitting
- Carried fire extender (wax tabs, cotton with petroleum jelly)
- Fatwood in a zip bag
- Tarp and cord