Skills
Essential Bushcraft Knots: 16 Knots and Lashings for Camp
The essential bushcraft knots are a small, reliable toolkit: a fixed loop (bowline), a quick hitch to a pole (clove hitch), a tensioning system (trucker's hitch), an adjustable guyline (taut-line hitch), a sliding grip (prusik) and three lashings to build camp furniture. With these you can pitch any tarp, hang food and cookware, and lash tripods and frames.
This guide covers 16 knots and lashings in detail — what each one is for, how to tie it step by step, and how secure it really is — plus a big knot-for-task table that matches our interactive Knot Finder. Knots are part of the core bushcraft skills and one of the first things to learn in our bushcraft for beginners guide. Practise at home; you will use these knots on every trip.
Step by step
-
1
Learn the core five first
Bowline, clove hitch, trucker's hitch, taut-line hitch and prusik cover most camp jobs. Tie each one 20 times.
-
2
Start the ridgeline
Anchor one end with a Siberian hitch or round turn and two half hitches for a fast, releasable start.
-
3
Tension with a trucker's hitch
Its built-in pulley pulls the ridgeline drum-tight. Finish with slipped half hitches for quick release.
-
4
Attach and adjust the tarp
Prusik loops slide the tarp along the ridgeline; taut-line hitches adjust the guylines as the fabric stretches.
-
5
Dress, set and test
Arrange the turns neatly, pull every strand tight, leave a tail of 10× the rope diameter and load-test before trusting it.
Which knots do you need for bushcraft?
Sailors, climbers and scouts know hundreds of knots, but bushcraft needs surprisingly few. What matters is covering every job: making a loop, tying to a tree or pole, putting tension on a line, adjusting it later, joining two ropes, gripping a line and binding poles together. A good bushcraft knot has four qualities: it is easy to tie (also with cold, wet hands in the dark), it holds under load, it does not damage your cord, and it unties easily afterwards.
If you are new, learn the five marked "core" first — they cover a standard tarp shelter setup from start to finish. Add the others as your projects grow.
| Knot | Family | Main use | Priority |
|---|---|---|---|
| Bowline | Loop | Fixed loop around a tree, through a grommet, hanging a bag | Core |
| Clove hitch | Hitch | Quick tie to a pole, start and end of lashings | Core |
| Trucker's hitch | Tensioning hitch | Drum-tight ridgelines and loads | Core |
| Taut-line hitch | Adjustable hitch | Guylines to stakes | Core |
| Prusik | Friction hitch | Sliding tarp attachment on a ridgeline | Core |
| Round turn & two half hitches | Hitch | Secure anchor to trees, poles, rings | Next |
| Timber hitch | Hitch | Start a ridgeline or diagonal lashing, drag logs | Next |
| Siberian hitch | Hitch | Fast, releasable ridgeline start | Next |
| Figure-eight loop | Loop | Very secure fixed loop, easy to inspect | Next |
| Sheet bend | Bend | Join ropes of different thickness | Next |
| Double fisherman's | Bend | Permanent join, making prusik loops | Next |
| Marlinspike hitch | Hitch | Toggles, handles, ladder rungs | Later |
| Alpine butterfly | Loop | Mid-line loop that takes load in any direction | Later |
| Square lashing | Lashing | Poles crossing at right angles (tables, frames) | Next |
| Diagonal lashing | Lashing | Poles that cross at an angle or spring apart | Later |
| Tripod lashing | Lashing | Pot tripods, tripod shelters, drying racks | Next |
Knot terms explained: working end, bight, hitch and bend
Instructions only make sense once you know a few terms.
Knot vocabulary
- Working end
- The end you move to tie the knot
- Standing part
- The long, inactive part of the rope, usually taking the load
- Bight
- A U-shaped fold in the rope that does not cross itself
- Loop
- A bight whose legs cross
- Turn
- One pass of the rope around an object
- Round turn
- A full wrap plus a bit more, so the rope encircles the object completely
- Hitch
- A knot that ties a rope to an object (tree, pole, stake, another line)
- Bend
- A knot that joins two rope ends
- Lashing
- A binding of wraps and fraps that holds poles together
- Frapping turns
- Turns between two poles that tighten the wraps of a lashing
- Slipped
- Finished with a bight instead of the end, so a pull on the tail releases it
- Dress and set
- Arrange the parts neatly, then pull every strand tight


Reading the drawings: the standing part takes the load (grey arrow), the working end finishes in a round cap, a strand drawn on top passes over, and orange arrows show the next movement.
One rule applies to every knot here: leave a tail of at least ten times the rope diameter (4 cm on 4 mm cord) and dress the knot before you load it.
Which knot for which job? The knot-for-task table
Think in tasks, not in knots. The table below is the same logic used in our interactive Knot Finder: pick the job, check whether the knot must release quickly (for example with cold hands in the morning), and use the first choice. The alternatives also work and are worth knowing when the first choice does not suit your cord or anchor.
| Task | Best knot | Alternatives | Why |
|---|---|---|---|
| Start a ridgeline on a tree (quick release) | Siberian hitch | Timber hitch, round turn & two half hitches | Ties in seconds, releases with one pull on the slipped tail |
| Start a ridgeline (secure, no quick release) | Round turn & two half hitches | Bowline, timber hitch | The round turn takes the load, the half hitches cannot slip |
| Tension and tie off a ridgeline | Trucker's hitch | Taut-line hitch, round turn & two half hitches | Built-in pulley for a drum-tight line |
| Adjustable guyline to a stake | Taut-line hitch | Trucker's hitch, bowline | Slides to adjust, holds under load |
| Slide the tarp along the ridgeline | Prusik | Clove hitch, taut-line hitch | Grips under load, slides when unloaded |
| Fixed loop at the rope end (easy to untie) | Bowline | Figure-eight loop, Siberian hitch | Does not jam, unties after heavy load |
| Fixed loop at the rope end (maximum security) | Figure-eight loop | Bowline, Siberian hitch | Very secure and easy to check at a glance |
| Join two ropes (different thickness or quick release) | Sheet bend | Double fisherman's, two bowlines | Works with unequal ropes, unties easily |
| Join two ropes permanently (same thickness) | Double fisherman's | Sheet bend, two bowlines | Very secure, ideal for closed loops |
| Tie to a pole or branch (quick release) | Clove hitch | Round turn & two half hitches, timber hitch | Fast to tie and adjust |
| Tie to a pole or branch (secure) | Round turn & two half hitches | Clove hitch, timber hitch | Does not roll under changing loads |
| Hang a bag or food bag | Bowline | Clove hitch, round turn & two half hitches | Secure loop that unties easily — see food storage |
| Mid-line loop for a hook or tie-out | Alpine butterfly | Figure-eight on a bight | Takes load in three directions |
| Handle or toggle on a line | Marlinspike hitch | — | Falls apart when the toggle is removed |
| Bind two poles at 90° | Square lashing | Diagonal lashing | Strong, rigid joint |
| Bind poles crossing at an angle | Diagonal lashing | Square lashing | Pulls springy poles together |
| Pot or shelter tripod | Tripod lashing | — | Three legs from one binding |

Loop knots: bowline, figure-eight loop and alpine butterfly
Bowline — the king of loops
Use: a fixed loop at the end of a rope that does not slip or jam — around a tree to start a ridgeline, through a tarp grommet, around a food bag, or to create an anchor loop for a trucker's hitch. The bowline's great strength is that it unties easily even after a heavy load. Security: good under steady load, but it can shake loose when repeatedly loaded and unloaded, especially in stiff or slippery cord such as Dyneema. Back it up with a stopper knot (a double overhand around the loop leg) or a Yosemite finish when it matters. Commonly quoted retained strength is in the region of 60–75 % of the rope, depending on the test.
How to tie a bowline
- Make the hole. Form a small overhand loop in the standing part, with the part towards the working end lying on top.
- Up through the hole. Pass the working end up through the small loop from underneath ("the rabbit comes out of the hole"). For a loop around a tree, pass the end around the tree first.
- Around the tree. Take the working end behind the standing part ("around the tree").
- Back down the hole. Pass it back down through the small loop, alongside itself.
- Dress and set. Hold the loop and tail together and pull the standing part. The tail should end up inside the loop; leave at least 10× the rope diameter.
Bowline
1. Form a small overhand loop in the standing part — the "rabbit hole". The part leading to the big loop lies on top.
2. The rabbit comes up out of the hole and runs around behind the tree (standing part).
3. …and goes back down into the hole. Hold the tail and the loop together and pull the standing part to tighten.
Figure-eight loop — the secure loop
Use: when security matters more than easy untying — a loop you cannot afford to lose, a clip-in point, or a loop on slippery cord. It is easy to inspect because a correctly tied figure eight shows two neat parallel strands throughout. Security: very high; commonly quoted retained strength is around 75–80 %. Downside: after a heavy load, it can jam hard, which is annoying on thin cord.
How to tie it (on a bight): fold the rope into a bight about 30 cm long. Cross the bight over the doubled standing part to form a loop, pass it around behind the standing parts, and feed it down through that loop — the doubled rope now forms an "8". Dress all strands so they lie parallel without crossing, then pull each of the four strands tight. To tie it around a tree or through a ring, tie a loose figure eight in a single strand, pass the end around the object and retrace the eight exactly, parallel to the first pass (the "figure-eight follow-through").
Alpine butterfly — the mid-line loop
Use: a fixed loop in the middle of a line that can be loaded along the rope, towards the loop, or both. In bushcraft, it gives you a hook point on a ridgeline for gear or a lantern, a fixed tie-out point on a long guyline, or an anchor for a trucker's hitch that unties easily. It also isolates a damaged section of rope. Security: excellent, and it does not jam as badly as the figure eight.
How to tie it (twist method): make a bight and give it two full twists in the same direction so the rope forms a figure-eight shape with a small lower opening and a larger upper loop. Fold the upper loop down over the twists and feed it through the lower opening. Pull the new loop and both ends in opposite directions to set it. Practise with a diagram at hand the first few times.
Bowline vs figure-eight loop
Bowline
- Unties easily after heavy load
- Fast to tie, also one-handed with practice
- Can shake loose when unloaded
- Back up with a stopper on slippery cord
Figure-eight loop
- Very secure, easy to inspect
- Slightly stronger in most tests
- Jams after heavy load
- Uses more rope
Alpine butterfly
1. Twist a bight in the middle of the rope into a loop.
2. Twist it once more so it forms a figure 8 with two eyes.
3. Fold the top eye down over the lower eye and push it through, then pull the loop and both ends to set the knot.
Hitches for trees and poles: clove, round turn, timber, Siberian, marlinspike
Clove hitch — fast and adjustable
Use: a quick hitch to a pole, branch or stake, and the standard start and finish for square and tripod lashings. It is easy to adjust by feeding rope through, and it can be tied in the hand and dropped over a post. Security: moderate — under changing loads or on a rotating pole it can roll and slip. Secure it with one or two half hitches around the standing part when it must hold for a long time.
How to tie a clove hitch
- First wrap. Pass the working end around the pole.
- Cross over. Bring it across the standing part, forming an X on the front of the pole.
- Second wrap. Wrap around the pole again, next to the first turn.
- Tuck. Tuck the working end under the second wrap, so it exits beside the standing part but in the opposite direction.
- Set and secure. Pull both ends tight. Add a half hitch if the load will shift.
Round turn and two half hitches — the reliable anchor
Use: a secure, simple anchor to trees, poles, rings or a bag handle; a good ridgeline start when quick release is not needed, and a safe finish for many lines. The round turn takes most of the load through friction, so you can hold a heavy pull with one hand while tying with the other. Security: very good, and easy to untie.
How to tie it: wrap the working end twice around the anchor (a full round turn). Take the end around the standing part and back through the gap to make a half hitch. Make a second half hitch in the same direction below the first — together they form a clove hitch around the standing part. Slide the hitches snug against the round turn. For quick release, make the last half hitch slipped.
Timber hitch — grips under load
Use: attaching a rope to a log, tree or bundle of poles. It holds as long as the load is steady and falls apart almost by itself once the tension is released, which makes it perfect for starting a ridgeline on a big tree or beginning a diagonal lashing. Combined with a half hitch further along (the killick hitch), it is used to drag logs. Security: good under constant tension, poor when the load goes slack.
How to tie it: pass the rope around the tree. Take the working end around the standing part once, then twist it around its own part (the part encircling the tree) three to four times — five or more on smooth bark or slippery cord. Pull the standing part so the wraps bite against the tree.
Siberian hitch (Evenk hitch) — the fast ridgeline start
Use: a fixed start for a ridgeline that you can tie in a few seconds and release with a single pull on the slipped tail — ideal on cold mornings. It is widely taught for tarp pitching and is also the first choice in our Knot Finder when quick release is needed. Security: good under load; put a small stick through the bight as a toggle if you want it extra secure.
How to tie a Siberian hitch
- Wrap the tree. Pass the rope around the tree and hold the working end in your hand, standing part leading away from the tree.
- Palm over. Lay the working end across your open palm, with your hand beneath the standing part.
- Rotate. Rotate your hand around the standing part so the rope forms a loop around your hand.
- Catch a bight. With your fingers, pinch the working end behind the standing part and pull it back through the loop as a bight.
- Tighten and release. Pull the standing part to set the knot against the tree. To release, pull the tail.
Marlinspike hitch — handles, toggles and rungs
Use: a temporary hitch that holds a stick crosswise on a line — a handle for pulling a line tight, a toggle to attach a bag, or rungs of a rope ladder. Remove the stick and the hitch falls apart.
How to tie it: form a small loop in the line and fold it back over the standing part, so that one strand of the standing part lies across the middle of the loop. Push your stick over the edges of the loop and under that strand. Pull the line — the loop tightens around the stick.
Marlinspike hitch
1. Twist a small loop into the rope and lay it on top of the standing part.
2. Push the stick over one side of the loop, under the standing part and over the other side.
3. Pull the loop tight around the stick — now you can pull hard on the rope with a comfortable handle.
Tensioning knots: trucker's hitch and taut-line hitch
Trucker's hitch — the drum-tight ridgeline
Use: pulling a line really tight — ridgelines, bear-bag lines, loads on a pack or a sledge, a clothesline in camp. It works like a simple pulley: a loop in the standing part acts as a pulley wheel, giving you a theoretical 3:1 advantage (friction reduces it in practice). Security: excellent once tied off with two half hitches; slip the last one for a quick release. Tip: on synthetic cord the friction in the loop can glaze the fibres if you saw back and forth; pull steadily.
How to tie a trucker's hitch
- Make the pulley loop. About an arm's length from the anchor, form a fixed or slipped loop in the standing part — a slipped overhand, a directional figure eight or an alpine butterfly.
- Around the anchor. Pass the working end around the tree, stake or ring.
- Back through the loop. Feed the working end through the loop from the anchor side.
- Tension. Pull the working end towards the anchor. The loop acts as a pulley; pull until the line is as tight as you want.
- Pinch and tie off. Pinch the crossing to hold the tension, then tie two half hitches around both strands below the loop. Make the last one slipped.
Taut-line hitch — the adjustable guyline
Use: adjustable guylines. Tied around the standing part after passing the line around a stake, it can be slid to tighten or loosen the line but holds under load. Tarps stretch as they get wet or cold, so being able to re-tension guylines without untying is valuable. The Tarp Pitch & Cordage Planner tells you how many guylines and how much cord a pitch needs. Security: good on nylon, polyester and paracord; it tends to slip on very slippery, low-stretch cord such as Dyneema — use a mechanical line tensioner or a trucker's hitch there.
How to tie a taut-line hitch
- Around the stake. Pass the working end around the stake and back up alongside the standing part.
- Two inside turns. Wrap the working end twice around the standing part, working back towards the stake, inside the loop formed by the line.
- One outside turn. Bring the end across the wraps and make one more turn around the standing part above (outside) the first two, in the same direction.
- Set. Pull the working end tight, then dress the turns neatly.
- Adjust. Slide the knot up the standing part to tension the guyline, down to loosen it. It should hold wherever you leave it.
A classic tarp ridgeline with five knots
- AnchorSiberian hitch or round turn & two half hitches on tree 1
- AttachTwo prusik loops on the ridgeline for the tarp corners
- TensionTrucker's hitch on tree 2, finished with slipped half hitches
- Guy outTaut-line hitches to stakes on the corners and sides
- Fine-tuneSlide prusiks to centre and tighten the tarp; re-tension guylines at dusk
What a well-rigged ridgeline looks like
- Straight line from tree to tree, no visible sag before the tarp goes on
- Anchor turns lie side by side and do not slide down the trunk
- Trucker's loop about an arm's length from tree 2, slipped half hitches snug below it
- Prusik wraps neat and parallel, loops pointing to the tarp corners
- Each taut-line hitch still has room to slide up
- Every tail at least 10× the rope diameter
Friction hitch: the prusik knot
Use: a closed loop of thinner cord wrapped around a thicker line. When loaded, it grips; when unloaded, you can slide it by hand. On a tarp ridgeline, two prusiks let you position the tarp exactly and pull the ridge taut without retying anything. They also make adjustable hanging points for a lantern, pot or gear in camp. Security: depends on the diameter ratio — the loop cord should be noticeably thinner than the host line (for example 2–3 mm loops on a 4–5 mm ridgeline). If the two are similar in size, the prusik slips; add a wrap for more grip.
How to tie a prusik
- Make a closed loop. Tie a 40–60 cm length of thin cord into a loop with a double fisherman's knot.
- Lay it behind the line. Hold the loop behind the ridgeline, with the knot off to one side.
- Wrap through itself. Pass one end of the loop around the ridgeline and through the other end. Repeat so you have three wraps side by side.
- Dress. Arrange the wraps neatly and parallel, with no crossings, then pull the loop out from the middle.
- Attach. Clip or tie the tarp tie-out to the loop. Load it and check that it grips before you rely on it.
Hanging food, pots and gear from a line
The same knots keep your food bag, pot or lantern off the ground: a bowline holds the bag, a trucker's hitch tightens the line and a prusik gives a sliding hanging point. For food, follow the advice in food storage.
Hanging a bag from a line between two trees
 1Bowline round the neck
Pass the end round the neck of the bag or through its handle and tie a bowline. The loop must not slide shut.
 2Tension a line between two trees
Anchor on tree 1 with a round turn and two half hitches or a Siberian hitch, then tension with a trucker's hitch on tree 2 and tie off slipped.
 3Hang it from a prusik
Hang the bag from a prusik loop and slide it into position. Unloaded it slides; loaded it grips. If it creeps, add a wrap.
 4Lower it safely
Stand at the tree, never under the bag. Pull the slipped tail and let the line down under control.
Bends for joining rope: sheet bend and double fisherman's
Sheet bend — joins unequal ropes
Use: quickly joining two ropes, especially of different thickness or material — lengthening a guyline, joining paracord to natural cordage, or tying a line to a corner of a tarp or a blanket. Security: good under steady load; it can shake loose when unloaded and flogging. For slippery cord or large differences in diameter, use the double sheet bend with an extra turn. Make sure both short ends finish on the same side of the knot — the "left-handed" version is less secure.
How to tie a sheet bend
- Form a bight. Make a bight in the end of the thicker rope and hold it.
- Up through. Pass the end of the thinner rope up through the bight from underneath.
- Around behind. Take it around behind both legs of the bight.
- Tuck under itself. Tuck it under its own standing part, but over the bight — not through the bight.
- Set. Pull the thin rope's standing part while holding the bight. For a double sheet bend, make a second turn around the bight before the final tuck.
Double fisherman's knot — the permanent join
Use: a very secure join of two ropes of similar diameter, above all for making closed loops such as prusik loops and slings. Security: excellent — it is one of the most secure bends. Downside: after loading it is very hard to untie, so use it where you want a permanent connection.
How to tie it: lay the two ends side by side, overlapping by about 30 cm, pointing in opposite directions. Take one end and wrap it twice around both ropes, working back towards its own standing part, then tuck it through the two wraps (a double overhand around the other rope). Repeat with the other end in the mirror direction. Pull the two standing parts so the knots slide together. A correct knot shows four parallel lines on one side and two neat X shapes on the other. Leave tails of at least 2 cm.
Lashings: square, diagonal and tripod
Lashings bind poles together to build camp furniture: a pot tripod, a drying rack, a table, a raised bed frame or the framework of a lean-to shelter. Every lashing follows the same pattern: a starting hitch (clove or timber hitch), several tight wraps around the poles, a few frapping turns between the poles to tighten the wraps, and a finishing hitch (clove hitch). Use 3–5 m of cord for poles up to wrist thickness. Work on dead, fallen poles or wood you are allowed to use — cutting live saplings is prohibited in many forests.
Square lashing
Use: two poles crossing at or near a right angle — cross-bars, tables, frames, ladders. Strength: a well-tied square lashing is very rigid.
How to tie a square lashing
- Start. Tie a clove hitch on the upright pole just below where the cross-bar will sit. Twist the tail around the standing part.
- Wrap. Take the cord over the cross-bar, behind the upright, over the cross-bar on the other side and behind the upright again. Make 3–4 full wraps, pulling each one tight.
- Keep it neat. Lay the wraps outside the previous ones on the cross-bar and inside on the upright, so they do not ride over each other.
- Frap. Make 2–3 frapping turns between the poles, around the wraps, pulling hard to tighten everything.
- Finish. Tie off with a clove hitch on the cross-bar and tuck the tail.
Diagonal lashing
Use: poles that cross at an angle other than 90°, or poles that spring apart and must be pulled together — the diagonal braces of a frame, the X of a bipod, or a raised bed. The timber hitch at the start pulls the poles together before you wrap.
How to tie a diagonal lashing
- Start. Tie a timber hitch diagonally around both poles at the crossing and pull the poles together.
- First diagonal. Make 3–4 tight wraps along the same diagonal as the timber hitch.
- Second diagonal. Make 3–4 tight wraps across the other diagonal.
- Frap. Make 2–3 frapping turns between the poles to tighten both sets of wraps.
- Finish. Tie off with a clove hitch on one pole.
Tripod lashing
Use: three poles bound at the top to make a stable tripod — for hanging a pot over the fire (see campfire cooking), a water bag, a lantern, or as the frame of a tipi-style shelter. Tip: the lashing must not be too tight, or the legs cannot spread.
How to tie a tripod lashing — and hang a pot from it
 1Lay out the poles
Lay three poles side by side, with the middle pole pointing the opposite way so the legs cross neatly when spread. Use dead, fallen poles of similar thickness.
 2Start and weave
Tie a clove hitch on an outer pole about 30 cm below the tips. Weave the cord over and under the poles in a figure-eight pattern, or wrap loosely around all three — 5 to 8 turns in total.
 3Frap and finish
Make two frapping turns in each gap between the poles, then tie off with a clove hitch on the other outer pole.
 4Raise and spread
Lift the tripod and spread the legs by crossing the middle leg over. If the legs will not spread, the lashing is too tight — loosen the frapping turns and try again.
 5Load-test, then hang the pot
Press down hard on the top and check that no leg slips. Near the flames, hang the pot from a wire hook or chain rather than cord.
Rope and cord for bushcraft: which type for which knot?
A knot is only as good as the cord it is tied in. Different materials behave very differently: nylon stretches and absorbs water, polyester stays stable, Dyneema is incredibly strong but slippery, natural fibres grip well but are weaker and rot. Carry two or three types for different jobs. If you want to make your own, see our guide to natural cordage from nettle, lime bast and willow bark.
| Cord | Typical size | Strengths | Weaknesses | Best for |
|---|---|---|---|---|
| Paracord (nylon kernmantle) | About 4 mm | Versatile, inner strands usable for sewing and fishing, knots hold well | Stretches and sags when wet, relatively bulky; cheap copies are weaker than genuine Type III | General camp use, lashings, guylines |
| Tarred bank line | 1.5–2 mm | Grippy, knots hold superbly, compact, cheap | Low strength per strand, sticky tar | Lashings, tie-outs, repairs, small hangs |
| Braided polyester | 2–5 mm | Low stretch, UV-resistant, stays tight when wet | Stiffer, knots can loosen slightly | Ridgelines, guylines |
| Dyneema / UHMWPE | 1.5–3 mm | Extremely strong and light, almost no stretch | Slippery — many knots slip; low melting point | Ultralight ridgelines with extra-secure knots |
| Natural fibre (sisal, jute, hemp) | 3–8 mm | Grippy, biodegradable, cheap | Weaker, rots when stored wet | Lashings, crafts, fire-prone jobs |
| Homemade natural cordage | 2–5 mm | Self-made, biodegradable, a core skill | Variable strength, slow to make | Light tasks — how to make it |
A practical set for a first trip: 15–20 m of 4 mm paracord or braided polyester for the ridgeline, 10–15 m of 2–3 mm cord for guylines, four prusik loops and a small hank of bank line for lashings and repairs. The Kit Builder adds cordage automatically to your packing list, and our guide to choosing a tarp explains which tie-outs to look for.
Knot strength and safety: what knots can (and cannot) do
Every knot weakens a rope because it bends the fibres sharply and loads them unevenly. As a rough guide, knots reduce rope strength by around 20–50 %, depending on the knot, the material, how well it is dressed and how the test is done. Published figures vary widely, so treat any single percentage with caution. For bushcraft, what matters more is security — whether a knot stays tied under changing loads — and whether you can untie it afterwards.
| Knot | Security | Unties after load | Watch out for |
|---|---|---|---|
| Bowline | Good (steady load) | Very easy | Can loosen when unloaded; back up on slippery cord |
| Figure-eight loop | Very high | Hard after heavy load | Jamming on thin cord |
| Alpine butterfly | Very high | Fairly easy | Tie it correctly — practise with a diagram |
| Clove hitch | Moderate | Very easy | Rolls under changing load — add half hitches |
| Round turn & two half hitches | High | Easy | Half hitches must go the same direction |
| Trucker's hitch | High when tied off | Easy if slipped | Friction wear on the loop |
| Taut-line hitch | Good on grippy cord | Easy | Slips on Dyneema |
| Prusik | Good if diameters differ | Easy | Slips if loop cord is too thick |
| Sheet bend | Good (steady load) | Easy | Double it for slippery or very unequal cords |
| Double fisherman's | Very high | Very hard | Use for permanent loops only |

What a dressed and set knot looks like: it matches the diagram strand for strand, with parallel parts parallel, no slack loops and a compact shape that does not change when loaded. If it looks different, retie it — pulling harder on a wrong knot only makes a tight wrong knot.
How to learn knots fast — and troubleshoot the common failures
Knots are motor memory: you learn them by repetition, not by reading. Keep a 1.5 m piece of cord next to the sofa, then add difficulty — around a chair leg, with gloves on, with your eyes closed.
A 4-week knot practice plan
- Week 1: bowline, clove hitch, round turn & two half hitches — 20 times each per day
- Week 2: trucker's hitch, taut-line hitch, prusik — pitch a tarp in the garden with them
- Week 3: timber hitch, Siberian hitch, sheet bend, double fisherman's — make four prusik loops
- Week 4: square, diagonal and tripod lashing — build a pot tripod and a small camp table
- Ongoing: figure-eight loop, alpine butterfly, marlinspike — tie each one with eyes closed
- Test: use the Knot Finder and name the right knot for each task before you look
Dress, set and check: the routine for every knot
Every knot ends the same way: dress, set, check the tail, load-test. Here on a round turn and two half hitches holding a bag.
Dress, set and check a knot
 1Let the round turn take the load
Wrap the working end twice round the pole. The friction of the round turn holds most of the pull, so one hand is free to tie.
 2Two half hitches, same direction
Tie the first half hitch round the standing part, then the second below it in the same direction. Mirror-image hitches can slip.
 3Slide snug and set
Slide both hitches up against the round turn, then pull the tail and the standing part firmly. Every turn should lie flat, with no slack loops.
 4Check the tail, then load-test
The tail must be at least 10× the rope diameter — 4 cm on 4 mm cord. Load it firmly; if anything moves, retie it.
| Symptom | Likely cause | Fix |
|---|---|---|
| Slips or creeps | Slippery or stiff cord, too few turns, prusik loop too thick | Add a turn; thinner loop cord; on Dyneema a trucker's hitch or tensioner |
| Jams, will not untie | Figure eight or double fisherman's after heavy load | Use a bowline or slipped finish where you must untie; flex the knot to loosen it |
| Capsizes (changes shape) | Tied wrongly, loaded the wrong way, clove hitch on a rotating pole | Retie against the diagram; add half hitches or a stopper |
| Falls apart when slack | Bowline, sheet bend or timber hitch flogging unloaded; short tail | Longer tail, stopper knot, double sheet bend |
| Lashing wobbles | Wraps ride over each other, weak frapping | Lay wraps side by side, pull 2–3 frapping turns hard |
More troubleshooting
- The ridgeline sags overnight. Nylon stretches when it gets wet and cold. Use polyester for ridgelines, re-tension with the trucker's hitch before bed, and pitch the tarp slightly lower than you think.
- The prusik slides under load. The loop cord is too thick relative to the ridgeline, or too slippery. Add a fourth wrap or use thinner, softer cord.
- The taut-line hitch creeps. The cord is too slippery or stiff. Add an extra inside turn, or switch to a trucker's hitch or a line tensioner.
- The bowline loosened. It was loaded and unloaded repeatedly with a short tail. Leave a longer tail and add a stopper knot.
Four short practice drills
- Name the parts: point at standing part, working end, bight and turns in any knot
- Eyes closed: tie each core knot blind, then compare it with the diagram
- Gloves on: Siberian, trucker's and taut-line hitch in winter gloves
- Garden pitch: rig the full ridgeline, then strike it using only the slipped tails
Knots connect to almost every other skill. They hold your hammock and tarp, secure the frame of a debris shelter, hang a pot at the right height, keep food out of reach of animals and organise your camp setup. Even friction fire depends on cordage: the string of a bow drill must be tied tight enough to grip the spindle. Keep practising, and explore the rest of the skills section when your knots are automatic.
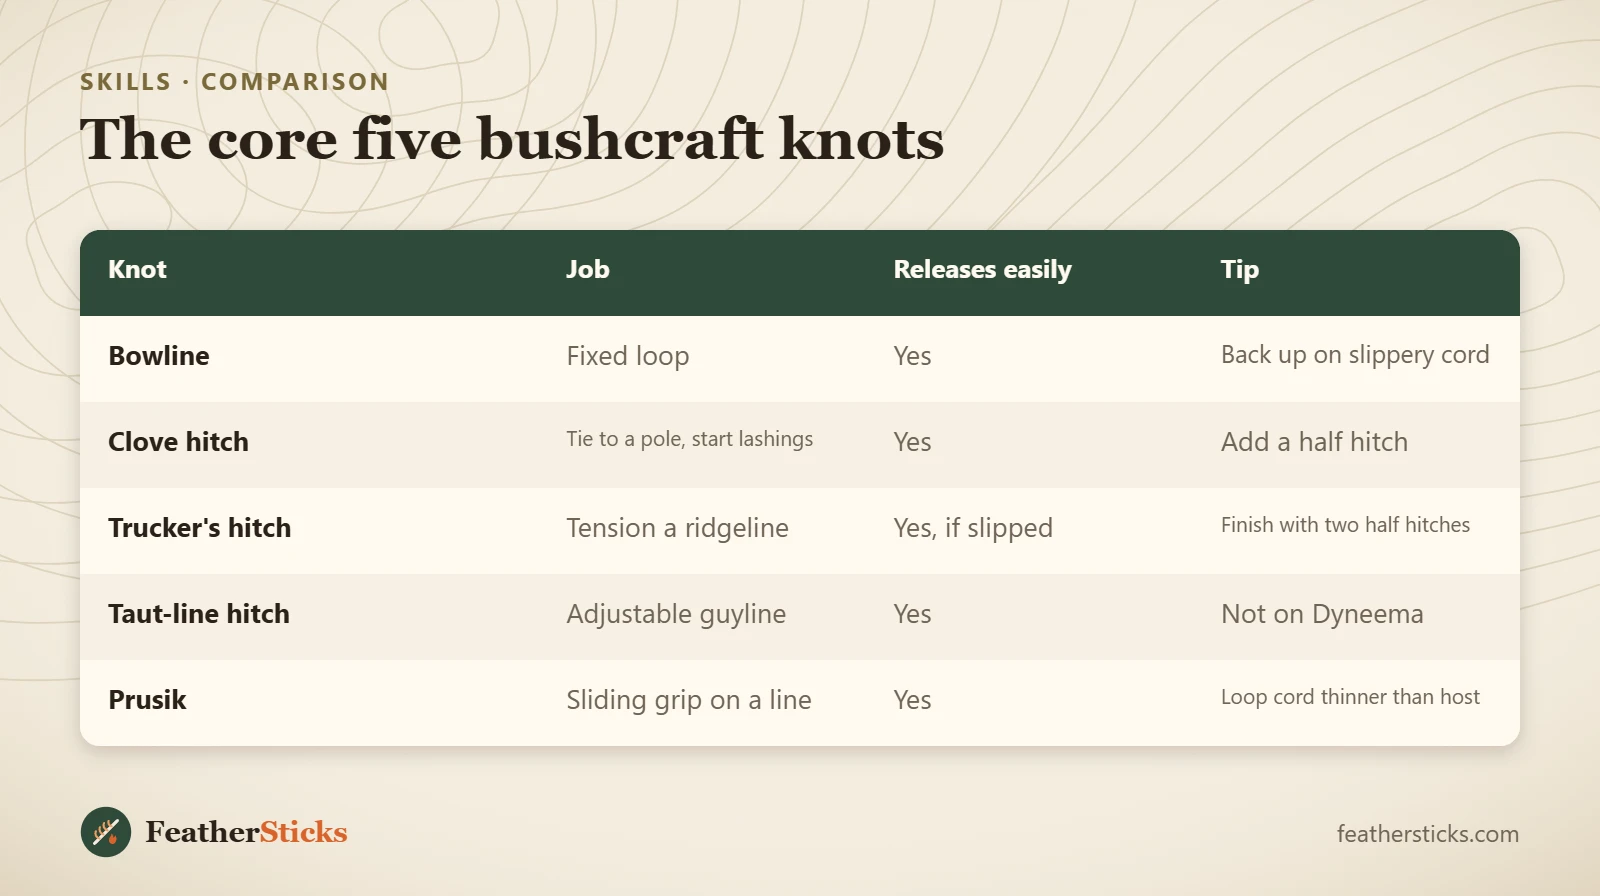
| Knot | Job | Releases easily | Tip |
|---|---|---|---|
| Bowline | Fixed loop | Yes | Back up on slippery cord |
| Clove hitch | Tie to a pole, start lashings | Yes | Add a half hitch |
| Trucker's hitch | Tension a ridgeline | Yes, if slipped | Finish with two half hitches |
| Taut-line hitch | Adjustable guyline | Yes | Not on Dyneema |
| Prusik | Sliding grip on a line | Yes | Loop cord thinner than host |
Common mistakes
- Leaving tails too short — at least 10× the rope diameter, more on slippery cord.
- Not dressing the knot: crossed strands can halve its security.
- Using a clove hitch alone where the load changes direction — it rolls off.
- Tying a prusik with cord as thick as the ridgeline, so it slides under load.
- Using nylon paracord for the ridgeline and wondering why the tarp sags in the rain.
- Trusting bushcraft knots and cord for climbing, tree climbing or lifting people.
- Learning knots from pictures only and never practising them with cold hands or in the dark.
What you need
- 15–20 m of 4 mm paracord or braided polyester (ridgeline)
- 10–15 m of 2–3 mm cord for guylines
- Four prusik loops of 2–3 mm accessory cord
- A hank of tarred bank line for lashings and repairs
- Small knife or cord cutter
- Lighter to seal synthetic cord ends