Gear
Choosing a Bushcraft Tarp: Size, Material, Tie-Outs & Weight
The best bushcraft tarp for most people is a square tarp of about 3 × 3 m with at least 16 reinforced tie-outs, made from polyester or silicone-coated fabric, weighing 400–900 g. That size pitches as an A-frame, lean-to or closed storm shelter for one person with gear, or tightly for two. Choose poly-cotton instead if you want to sit close to a fire, and go bigger (3 × 4 m or 4 × 4 m) for two people or a group.
This guide compares sizes, fabrics, waterproofing, tie-outs, colours and weights so you know exactly what to look for. Once you own a tarp, our tarp shelter setups and the tarp pitch & cordage planner show how to pitch it. Part of our gear guides.
Step by step
-
1
Pick the size
3 × 3 m for one person and gear, 3 × 4 m or larger for two, a 3.5 m diagonal or hex tarp over a hammock.
-
2
Choose fabric for your fire use
Synthetics are light but melt from sparks; poly-cotton is heavy but tolerates a fire nearby.
-
3
Count the tie-outs
Look for 16 or more reinforced loops, including ridgeline and mid-panel points for flexible pitches.
-
4
Check waterproofing and seams
Aim for 1,500–3,000 mm hydrostatic head and sealed or taped seams – or none at all.
-
5
Balance weight and budget
PU polyester is cheap and robust, silpoly light, DCF lightest and most expensive.
Why a tarp is the classic bushcraft shelter
A tarp is a sheet of waterproof fabric with attachment points. That simplicity is its strength: the same tarp becomes an open lean-to facing a fire on a mild evening, a steep A-frame in steady rain, or a low, closed storm pitch in wind. It weighs less than most tents, packs small and keeps you connected to the forest – you hear, smell and see what is going on around camp.
It also demands more skill. There is no floor, no insect mesh and no fixed shape, so site choice, knots and pitching technique matter. If you are new to it, read our bushcraft for beginners guide, learn a few essential knots and practise at home before relying on a tarp in bad weather.
Tarp vs tent
Tarp
- Lighter: ≈ 700 g for a 3 × 3 m polyester tarp
- Many pitches, adapts to terrain and weather
- Covered sitting space by the fire
- Good ventilation, little condensation
- Needs skill, trees or poles and a good site
Tent
- Heavier: ≈ 1.8 kg for a 1–2 person tent
- One shape, quick to pitch anywhere
- Floor and insect protection
- About 3 °C warmer inside, blocks wind
- Condensation, fire must stay far away
The Kit Builder reflects this trade-off: a tarp setup (tarp, 15 m cord, 8 stakes, groundsheet) weighs roughly 1.2 kg, a tent setup about 1.8 kg, and a tent adds around 5 litres of pack volume.
What size tarp do I need?
Size decides which pitches are possible and how much protection you get. A tarp that is too small forces you to pitch low and tight in rain; one that is too large is heavy, catches more wind and needs bigger spaces between trees. For bushcraft, a square tarp is more versatile than a rectangle: it can be pitched along its edge or diagonally, and folded into closed shapes.
| Size | People | Good pitches | Typical weight (polyester / silicone) | Notes |
|---|---|---|---|---|
| 2 × 1.5 m / poncho tarp | 1 (emergency) | Low lean-to, over a bivvy | 250–450 g | Backup or minimalist; little room in rain |
| 3 × 2 m | 1 | A-frame, lean-to | 400–700 g | Light, but storm pitches get tight |
| 3 × 3 m | 1 + gear, 2 tight | A-frame, lean-to, plough point, closed storm pitches, diamond | 450–1,000 g | The bushcraft all-rounder |
| 3 × 4 m / 3.5 × 3.5 m | 2 | A-frame with vestibule, lean-to by the fire | 600–1,300 g | Comfortable for two, good base camp |
| 4 × 4 m and larger | 3–4 (group) | Kitchen or group shelter, fireside lean-to | 1,000–2,000 g | Heavy, needs large tree spacing |
| Hammock tarp (hex / diamond, 3–3.5 m ridge) | 1 in hammock | Over a hammock, doors on the ends | 350–900 g | Ridgeline should be ≈ 30 cm longer than the hammock at each end |
Poly-cotton tarps of the same size weigh about two to three times as much as polyester ones.
Which tarp size fits you?
Do you sleep in a hammock?
Yes → Choose a hammock tarp (hex or diamond) with a ridge about 3–3.5 m long – see hammock camping.No → Go on to the next question.Will two people regularly sleep under it?
Yes → 3 × 4 m or 3.5 × 3.5 m, or 4 × 4 m for a group camp.No → Go on to the next question.Is minimum weight your top priority?
Yes → 3 × 2 m or a small 2.5 × 2.5 m tarp combined with a bivvy bag.No → The classic 3 × 3 m square – the most versatile choice.
Height matters as much as area. A 3 × 3 m tarp pitched as an A-frame with the ridge at about 1.2 m gives you a sleeping area roughly 3 m long and 1.5–2 m wide – enough for one person with gear under the roof. Pitch it lower in wind and rain and the usable floor shrinks. The tarp pitch planner calculates ridge height, floor space, cord length and number of stakes for each pitch and tarp size.
Tarp materials: polyester, silnylon, silpoly, DCF or canvas?
The fabric determines weight, how the tarp behaves in rain, how long it lasts and – critically for bushcraft – how close you can sit to a fire.
| Material | Weight 3 × 3 m | Stretch when wet | UV / durability | Fire tolerance | Price |
|---|---|---|---|---|---|
| PU-coated polyester | 700–1,000 g | Low | Good UV resistance; PU coating ages after years | Melts from sparks | Low |
| PU-coated nylon | 600–900 g | Noticeable | Strong, but UV weakens nylon | Melts from sparks | Low–medium |
| Silnylon (silicone nylon) | 400–600 g | High – re-tension in rain | Strong, tear-resistant; UV sensitive | Melts from sparks | Medium |
| Silpoly (silicone polyester) | 450–650 g | Very low | Good UV resistance | Melts from sparks | Medium |
| DCF (Dyneema composite) | 250–400 g | None | Very strong for weight, abrasion and folding wear | Melts, sensitive to heat | Very high |
| Poly-cotton / cotton canvas | 2,000–3,000 g | Low; cotton swells and seals when wet | Robust; can mildew if stored wet | Spark-resistant (not fireproof) | Medium–high |
Weights are typical ranges for a 3 × 3 m tarp without cords and stakes.
Polyester: the sensible default
PU-coated polyester is the most common bushcraft tarp fabric for good reason: it is cheap, hardly stretches when wet, resists UV well and forgives rough treatment. The 700 g tarp in the Kit Builder is a typical polyester 3 × 3 m. The PU coating can break down after many years, especially if stored damp and warm, which you notice as a sticky surface or a smell.
Silicone-coated fabrics: lighter
Silnylon is light and very tear-resistant, but nylon absorbs some water and stretches: a tarp pitched tight in the evening can sag by midnight in rain, so use adjustable guylines and re-tension. Silpoly keeps the low weight but stretches much less, which is why it has become popular. Seams on silicone fabrics cannot be taped; they are sealed with a silicone seam sealer.
DCF: the ultralight option
Dyneema composite fabric does not stretch or absorb water and is extremely light. It is also expensive, crinkly and sensitive to heat and sparks. For most bushcrafters who cook over a fire it is overkill; for long-distance walkers counting every gram it is excellent.
Poly-cotton and canvas: for the fire
Poly-cotton (a cotton/polyester blend) and cotton canvas breathe, do not rattle in wind and – most importantly – a stray spark usually leaves only a small mark instead of melting a hole. That makes them the choice for a lean-to facing a reflector fire. The price is weight: two to three kilograms for a 3 × 3 m, plus a large pack volume. They must be dried completely before storage or they will mildew.

How waterproof does a tarp need to be?
Waterproofness is measured as hydrostatic head in millimetres – the height of a water column the fabric resists before water passes through. For a tarp, which is pitched at an angle and not pressed on like a groundsheet, around 1,500 mm is a practical minimum and 2,000–3,000 mm gives a comfortable margin as coatings age. Much higher numbers mean heavier coatings and rarely help on a sloped roof.
Just as important are the seams. A tarp without a central seam (one piece of fabric) cannot leak there. Tarps with seams should have them taped (PU fabrics) or sealed with silicone sealer (silnylon and silpoly). Check the ridgeline seam in particular: it takes the most water. Poly-cotton works differently: the cotton fibres swell when wet and close the weave. Don't touch the inside of a wet canvas tarp – it can wick water through at that point.
Tie-outs, ridgeline and attachment points
Tie-outs are the reinforced loops where you attach guylines. Their number and position decide how many pitches you can create. A good bushcraft square tarp has:
- 4 corners and edge tie-outs every 60–100 cm (on a 3 × 3 m tarp typically 3 per side, 12–16 in total);
- ridgeline tie-outs along the centre line and ideally along both diagonals, so you can clip the tarp under a ridgeline or pitch it as a diamond;
- mid-panel pull-outs on the outside of the roof, which pull the fabric out, create more headroom and stop it flapping.

Look for tie-outs that are reinforced with an extra fabric patch and stitched through several layers – that is where a tarp fails in a storm. Webbing loops are stronger than small metal grommets, which can tear out. Adding short loops of cord to each tie-out saves time in the field. For the lines themselves, the Knot Finder suggests the right knot for ridgelines and adjustable guylines.
Preparing tie-outs and guylines
 1Cord loops at home
Tie a short loop of cord to every tie-out before the trip. In the field you then clip or hitch guylines to the loops in seconds – with cold fingers, too.
 2Adjustable guylines
Run each guyline to a stake with an adjustable knot, for example a taut-line hitch, or a small line tensioner. You can then tighten the tarp without re-pitching the stake.
 3Tension until drum-tight
Tension opposite corners alternately until the fabric is smooth with no wrinkles. A tight roof sheds rain and does not flap; a slack one collects water and noise.
 4Re-tension in rain
Silnylon in particular stretches when wet: check the tarp before going to sleep and after the first hour of rain, and take up the slack at the adjustable knots.
Tarp buying checklist
- Size fits your use: 3 × 3 m solo, 3 × 4 m or larger for two
- 16 or more reinforced tie-outs, including ridgeline and diagonal points
- At least 1–2 mid-panel pull-outs
- Hydrostatic head 1,500–3,000 mm, seams taped or sealed
- Fabric matches your fire habits (synthetic vs poly-cotton)
- Weight within your target – see the Kit Builder
- Colour chosen for your setting (camouflage vs visibility)
- Stuff sack large enough to pack the tarp wet in a hurry
Tarp weight: how light is light enough?
Weight differences between fabrics are large, but put them into context: the tarp is just one part of your shelter system. With 15 m of cord (≈ 150 g), 8 stakes (≈ 120 g) and a groundsheet (≈ 200 g), a 700 g polyester tarp becomes a 1.2 kg shelter.
Typical weight of a 3 × 3 m tarp by fabric
For a weekend with short walking distances, a heavier but robust polyester or poly-cotton tarp is perfectly reasonable. For long routes, a silpoly tarp saves around 300–400 g compared with PU polyester at similar durability. Our bushcraft kit list shows how the tarp fits into your total base weight, and the backpack guide how much volume a canvas tarp takes up.
Tarp colour: olive, coyote or bright?
Most bushcraft tarps are olive, green or coyote brown. Muted colours blend into the forest and disturb other visitors and wildlife less – many bushcrafters value a low-impact, discreet camp. They also make the light under the tarp calm and dim.
Bright colours (orange, yellow, light grey) are easier to find in dense forest, visible to rescuers in an emergency and make the space underneath brighter on grey winter days. A useful compromise is a muted tarp plus a small bright item – a bandana or signal panel – in the pack. Whatever the colour, the principle of leaving no trace applies: pitch only where it is allowed and leave the site as you found it.
Pitching and site: getting the most out of your tarp
A great tarp pitched badly still leaks. Look for level, slightly raised ground between two trees about 4–5 m apart, check for dead branches overhead and avoid hollows where water and cold air collect – our guide to choosing a camp site covers the details. Rig a tight ridgeline, angle the low side into the wind and tension until the fabric is drum-tight.
Choosing the spot for your tarp
 1Two trees 4–5 m apart
For a 3 × 3 m tarp, look for two sturdy trees about 4–5 m apart, so the ridgeline has room on both sides of the tarp. Protect the bark with wide straps or padding under the line.
 2Look up
Check the crowns above you for dead branches and leaning dead trees. Wind can bring them down at night – move rather than hope.
 3Slightly raised ground
Pick level ground that is a little higher than its surroundings. Hollows collect rain water and cold air; stream banks are colder and damper.
 4Low side into the wind
Find out where the wind comes from and pitch the low, closed side of the tarp towards it. The open side faces away from the weather – and towards the fire, if you have one.
The three pitches every tarp owner should master are the A-frame for rain, the lean-to for fireside evenings and a closed storm pitch for wind. Step-by-step instructions are in tarp shelter setups. Underneath, your sleep system does the rest; under an open tarp, the sleeping bag calculator counts about 1 °C of shelter benefit compared with sleeping in the open.

| What you see | Likely cause | What to do |
|---|---|---|
| Water pools on the roof | Roof too flat or slack | Steepen the pitch, re-tension, use a mid-panel pull-out |
| Drips along the ridgeline | Water runs along the ridgeline or an unsealed seam | Add drip lines (a short cord hanging from the ridgeline outside the tarp); seal the seam at home |
| Fabric flaps and cracks in wind | Loose guylines, high side facing the wind | Tension evenly, lower the windward side, add stakes |
| Tarp sags overnight | Wet nylon stretches, knots slipped | Re-tension with adjustable knots; consider silpoly or polyester |
| Rain blows in underneath | Pitch too high or open side to the weather | Lower the edges, turn the open side away from the wind, close one end |
| Condensation on the underside | Humid, still night, pitch closed and low | Leave ends open for airflow, pitch higher when it is dry |
Before you pitch anywhere, check the rules: in many countries sleeping in the forest requires the landowner's permission, and rules differ between regions. For Germany see wild camping in Germany.
Caring for your tarp
Shake off dirt and needles before packing, and dry the tarp completely at home before storing it – loosely rolled or folded in a dry place, out of direct sunlight. Damp storage ruins PU coatings and grows mildew on poly-cotton. Clean with lukewarm water and a sponge; avoid detergents and washing machines, which damage coatings.
Folding and packing a tarp
 1Shake it off
Before taking the tarp down, knock off needles, leaves and water. If it is wet, shake the drops off while it is still pitched – it will dry much faster at home.
 2Fold in half
Fold it in half with the dirty underside inside, so the next time you unpack it the clean side faces up.
 3Fold to sack width
Fold again into thirds or quarters until the strip is about as wide as the stuff sack is tall.
 4Roll up
Roll it up tightly towards the stake loops, pressing the air out as you go. Keep the guylines coiled on top so they do not tangle.
 5Into the stuff sack
Slide the roll into a stuff sack large enough to take the tarp wet and in a hurry. At home, unpack and dry it completely before storing it.
Repair small holes with a matching repair tape (silicone fabrics need special silicone-compatible patches or sealer) and re-seal seams when they start to drip. Check tie-outs after storms and restitch any that have started to tear – the canvas needle from your 10 C's is exactly for this.
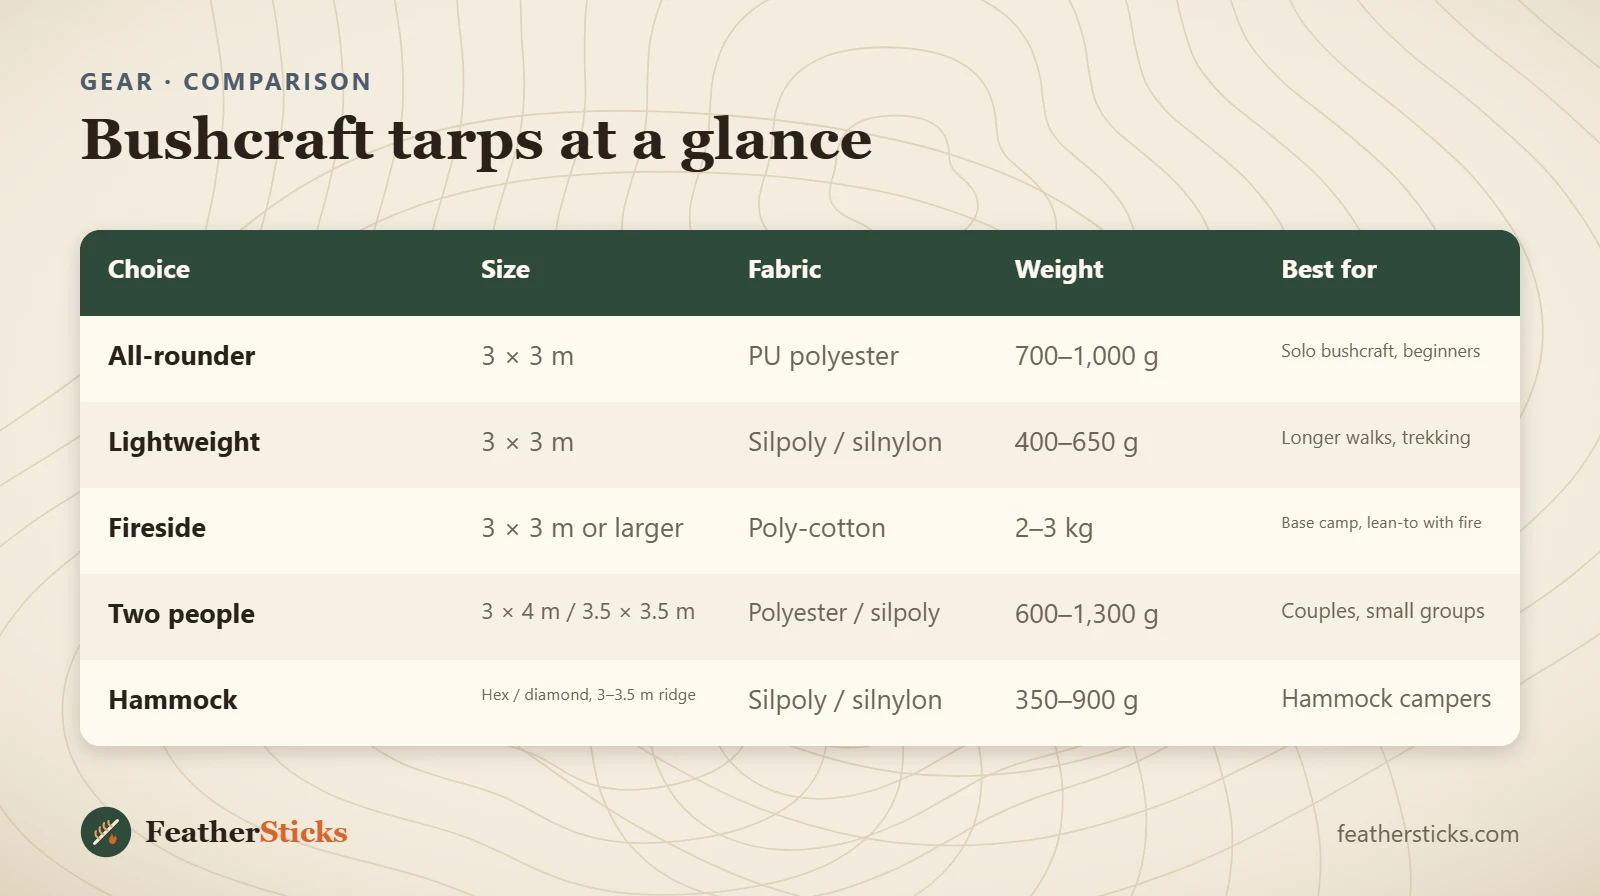
| Choice | Size | Fabric | Weight | Best for |
|---|---|---|---|---|
| All-rounder | 3 × 3 m | PU polyester | 700–1,000 g | Solo bushcraft, beginners |
| Lightweight | 3 × 3 m | Silpoly / silnylon | 400–650 g | Longer walks, trekking |
| Fireside | 3 × 3 m or larger | Poly-cotton | 2–3 kg | Base camp, lean-to with fire |
| Two people | 3 × 4 m / 3.5 × 3.5 m | Polyester / silpoly | 600–1,300 g | Couples, small groups |
| Hammock | Hex / diamond, 3–3.5 m ridge | Silpoly / silnylon | 350–900 g | Hammock campers |
Common mistakes
- Buying a tarp that is too small – it forces low, cramped pitches in rain.
- Choosing a tarp with only corner tie-outs, which limits the pitches you can create.
- Lighting a fire close to a nylon or polyester tarp.
- Pitching silnylon tight in the evening and not re-tensioning when it stretches in rain.
- Storing a tarp damp, which ruins coatings and causes mildew.
- Ignoring seam sealing on silicone-coated tarps.
What you need
- Tarp 3 × 3 m (or size to suit)
- Ridgeline cord 10–15 m, 3–5 mm
- 6–8 guylines of 2–3 m with line tensioners
- 8–10 stakes
- Prusik loops or tarp clips
- Groundsheet
- Seam sealer and repair tape