Shelter
How to Build a Debris Shelter: Dimensions, Insulation & Safety
To build a debris shelter, you prop a strong ridgepole on a stump or tripod, lean ribs along both sides to form a narrow, body-sized tent, and bury the whole frame under an arm’s length of dry leaves. Your body heat warms the tiny air space inside while the thick debris insulates like a giant sleeping bag. It is the classic no-gear survival shelter for cold nights in deciduous woodland.
This guide explains the design, gives a dimensions table and insulation thicknesses by temperature, shows realistic build times, and covers when a debris hut is the right choice — and the safety issues, from hypothermia to ticks. For every other shelter type, visit the shelter hub.
Step by step
-
1
Choose a dry, safe spot
Pick level, raised ground near plenty of dry leaves, with no dead branches overhead and no water channels or hollows.
-
2
Set the ridgepole
Rest a strong dead pole, your height plus 60 cm, on a stump or tripod at 60–90 cm. Let the other end slope to the ground.
-
3
Add ribs and lattice
Lean sticks along both sides 15–30 cm apart, steep and close to your body width. Lay brushy twigs over them so leaves cannot fall through.
-
4
Pile on the insulation
Heap dry leaves 60–90 cm thick over the entire frame, then weigh them down with sticks. Thicker is warmer.
-
5
Stuff the bed and door
Fill the inside with 20–30 cm of compressed dry leaves for a bed and pull a leaf-stuffed door plug in behind you.
What is a debris shelter and how does it keep you warm?
A debris shelter — also called a debris hut or leaf hut — is a small, closed shelter made entirely of natural materials: a ridgepole, ribs and a thick shell of dead leaves, grass, bracken or needles. It works on the same principle as a sleeping bag. Trapped still air in the loose debris insulates, and the interior is so small that your own body heat is enough to warm it.
That is the key design idea, and the one beginners most often get wrong: a debris shelter must be tight around your body. A roomy hut feels good while building, but every litre of extra air space must be heated by you, all night. Think of it as a sleeping bag you crawl into, not a cabin you sit in.
Because it needs no gear, the debris hut is a staple of survival and bushcraft training. It is also hard work: expect to move several cubic metres of leaves. If you carry a tarp, a tarp shelter plus a warm sleep system is quicker and lower-impact; the debris hut is for when you have no gear, want to practise, or need insulation beyond what you carry.
Debris shelter: pros and cons
Pros
- Needs no gear beyond hands (a saw helps)
- Very warm when built thick enough
- Blocks wind completely
- Works without a fire
- Materials are abundant in autumn woodland
Cons
- 2–4 hours of heavy work
- Wet leaves insulate poorly
- Cramped; no room to sit or cook
- Ticks, insects and rodents in leaf litter
- Disturbs the forest floor; must be dismantled
When should you choose a debris shelter?
A debris shelter is the right choice when you are cold, have no sleeping bag or tent, and are in woodland with lots of dry leaf litter — typically deciduous forest from autumn to spring. It is also the best shelter for nights when fire is impossible or forbidden, because it does not depend on one.
It is a poor choice in heavy rain without a waterproof layer, where leaf litter is thin or wet, on frozen ground with snow cover (a snow shelter may work better), or when you have a tarp and a sleeping bag anyway. Also consider time: if you have less than three hours of daylight left, a debris hut may not be finished. Check sunset with the daylight calculator and start early.
Debris shelter, lean-to or tarp?
Do you have a tarp and a warm sleeping bag?
Yes → Pitch a tarp — faster and lower-impact.No → Continue to the next question.Is plenty of dry leaf litter within 30 m?
Yes → Continue to the next question.No → Improve an existing natural shelter or build a smaller lean-to with a fire.Can you safely and legally keep a fire going all night?
Yes → A lean-to with a long fire is an option — but it needs lots of wood and a fire watch.No → Build a debris shelter: warmth without fire.Are there at least 3 hours of daylight left?
Yes → Start now; gather debris first.No → Build a minimal version: smaller frame, all effort on insulation and bed.
Debris shelter dimensions: how big should it be?
Size the shelter to your body, not to comfort. Lie down on the ground where the shelter will be, mark your length and shoulder width, and build around that outline. The table gives typical dimensions for an adult of about 1.80 m.
| Element | Dimension | Rule of thumb |
|---|---|---|
| Ridgepole length | 2.4–2.8 m | Your height + 60–100 cm |
| Ridgepole thickness | 8–12 cm | Must carry a person’s weight plus wet debris |
| Entrance height (high end) | 60–90 cm | About knee to hip height; enough to crawl in |
| Interior width at shoulders | 60–75 cm | Shoulder width + 10–20 cm |
| Interior length | 2.0–2.1 m | Your height + 20–30 cm |
| Rib spacing | 15–30 cm | Closer ribs hold debris better |
| Rib angle | 55–70° | Steep sides shed water and hold more debris |
| Debris shell | 60–90 cm+ | At least an arm’s length (see insulation table) |
| Bed | 20–30 cm compressed | Heap 50 cm+ loose; it will pack down |
The frame should be narrow enough that you touch both walls when you roll over. A larger interior means a colder night.

Frame design options
- Stump or fork support: rest the high end of the ridgepole in the fork of a low tree or on a stump. Fastest and very stable.
- Tripod support: lash two short poles into an inverted V (a bipod) and rest the ridgepole in the crotch, or lash a small tripod. Use a shear lashing or a few turns and a clove hitch — see our knots guide.
- Two-sided A-frame: two forked poles at the entrance, one ridgepole to the ground. Stable, but needs more material.
Whichever you use, test the frame by climbing on it with your full weight before adding ribs. A collapsing ridgepole under half a tonne of wet leaves is a real danger.
How to build a debris shelter step by step
Work in this order: frame, ribs, lattice, bed, shell, door. Gather materials as close to the site as possible, and gather more than you think you need. A folding saw from our saw guide speeds up the frame, and a knife from our knife guide helps with trimming — but everything can be done by hand with dead wood.
Part 1: the frame
 1Clear and mark the site
Remove sharp sticks and stones, lie down where the hut will be and push a stick into the ground at your head and your feet. The interior will be your height plus 20–30 cm. Check overhead for dead branches.
 2Set the ridgepole
Rest the high end on a stump, fork or bipod at 60–90 cm; the low end goes on the ground just beyond your feet. Climb on it with your full weight — if it bends or slips now, it will fail under wet leaves.
 3Place the ribs
Lean dead sticks against both sides every 15–30 cm at 55–70°, leaving only the entrance open. Keep their feet inside your marked outline: if you can sit up inside, it is too big.
 4Add a lattice
Lay brushy twigs, thin branches or fallen conifer boughs across the ribs. Gaps larger than your fist let the debris fall in and leave cold spots.
Part 2: bed, shell and door
 1Stuff the interior bed
Fill the floor with at least 50 cm of loose dry leaves, grass or bracken, crawl in and compress it. Keep adding until you cannot feel the cold ground through it — usually 20–30 cm compressed.
 2Build the shell
Pile debris over the frame from the ground up, at least 60–90 cm thick all round. Compress it as you go and keep adding; this is the longest part of the job.
 3Weigh it down
Cover the shell with dead sticks and branches so wind cannot strip the leaves, then add a steep outer layer of bracken or boughs laid tips down to shed rain.
 4Make a door plug
Heap a large pile of leaves just inside the entrance, or stuff a jacket or a bag with leaves, and pull it in behind you. A gap at the door is the most common cold spot.
What the finished hut looks like: a long, low mound of leaves, about 2–2.5 m wide and highest at the entrance, with no ribs poking out, sticks lying over the whole surface and a dark, narrow opening just big enough to crawl through. If it looks like a small tent with a leaf coating, it is too thin; if you could sit inside, it is too big. Most first huts need another 30–50 % more debris than the builder thinks.
| Task | Time | Notes |
|---|---|---|
| Site selection and clearing | 10–20 min | Do not skip the look overhead |
| Frame: ridgepole and support | 20–30 min | Longer without a saw |
| Ribs and lattice | 30–45 min | 30–40 ribs needed |
| Gathering and piling debris | 1.5–3 h | By far the biggest job; faster with a tarp or jacket as a carrying sheet |
| Bed and door plug | 20–30 min | Test and top up before dark |
| Total | 2–4 h+ | Two people roughly halve the time; scarce leaves double it |
How thick should debris insulation be?
Thickness is warmth. The most common reason a debris hut fails is too little insulation, both over and under the sleeper. The classic rule of thumb is "at least an arm’s length" of debris on the shell — roughly 60–90 cm — and more for colder nights. Dry, fluffy leaves insulate far better than damp, matted ones, and debris always compresses, so err on the thick side.
| Expected low | Shell thickness | Bed (compressed) | Extras |
|---|---|---|---|
| Above +10 °C | 30–45 cm | 15–20 cm | Normal clothing |
| +5 to +10 °C | 45–60 cm | 20–25 cm | Hat, dry spare layer |
| 0 to +5 °C | 60–90 cm | 25–30 cm | Insulated jacket; stuff interior gaps with leaves |
| 0 to −5 °C | 90 cm+ | 30 cm+ | Fill most of the interior air space with loose leaves |
| Below −5 °C | 1 m+ | 30–40 cm | Consider not relying on a debris hut alone |
Guidance values for dry leaf litter and an adult in dry clothing. Wind, wet debris and exhaustion all require more. These are not guarantees; test the shelter before nightfall.
Debris shelter cross-section (top = outside)
- Dead sticks and branches that hold the debris down in wind.
- Bracken, boughs or bark laid like tiles, tips down.
- 60–90 cm+ of dry leaves, grass or needles — the main insulation.
- Steep ribs every 15–30 cm, twigs on top.
- Only just larger than your body, warmed by body heat; wear dry clothing layers.
- 20–30 cm compressed leaves between you and the ground.

Three checks before dark
 1Arm's length everywhere
Push a stick or your arm into the shell at several points: you should not reach the lattice before your shoulder touches the leaves. Top up the thin spots — usually the upper sides and the foot end.
 2No light from inside
Crawl in while it is still light and look around. Every glimmer of daylight is a thin spot; mark it and add leaves from outside.
 3The roll test
Lie on your back and roll to each side. You should touch both walls. If you can roll freely, stuff loose leaves into the space around you to shrink the air volume.
The bed is at least as important as the shell. Cold ground pulls heat out by conduction far faster than air, which is why the insulation under you must be thick and dry. If you have a foam pad or a sleeping bag, use them inside the hut — they multiply its warmth. To understand the principles behind pads, bags and R-values, see our sleeping gear guide or run your conditions through the sleeping bag calculator.
Best and worst materials
Beech and oak leaves are ideal: they are dry, curly and trap air well. Dry grass, bracken and conifer needles work too. Avoid wet or rotting leaves, which hold water and conduct heat away, and never strip moss or cut green branches for insulation. In wet weather, collect from under conifers or the lee side of logs, where litter stays drier, and add a steep outer rain skin.
Debris shelter safety: hypothermia, ticks and collapse
A debris hut can save a life, but it has specific risks. Take them as seriously as the building itself.
Ticks and other wildlife
Leaf litter is prime tick habitat. Ticks can transmit Lyme disease and, in parts of Europe including much of southern Germany, tick-borne encephalitis (TBE). Wear long trousers tucked into socks, use a repellent, and check your whole body — especially groin, armpits, back of knees, hairline and behind the ears — the next morning and again later. Remove ticks promptly with fine tweezers or a tick card and watch the bite site for a spreading red rash or flu-like symptoms. Public health agencies such as the CDC and national health institutes publish current tick risk information. Leaf piles also shelter mice, spiders and insects; shake out your clothing and gear.
Collapse, fire and site hazards
- Collapse: test the ridgepole with your full weight and use only sound dead wood. Wet debris is very heavy.
- Fire: a debris hut is a pile of dry tinder. Never make a fire inside or close to it, and keep candles and stoves outside. If you have a fire nearby, keep it well away, small and attended — see our campfire safety guide.
- Site: no dead branches overhead, no dry streambeds or flood zones, no hollows where cold air and water collect. See choosing a camp site.
- Communication: tell someone where you are and when you expect to return, and carry a whistle and head torch. Wind makes cold more dangerous — check the felt temperature with the wind chill calculator.
Before you crawl in for the night
- Frame tested with full body weight
- Shell at least an arm’s length thick everywhere, no light showing through
- Bed thick enough that you cannot feel the cold ground
- Door plug ready inside the entrance
- Dry clothes on, wet layers stored separately
- Water, head torch, whistle and knife within reach
- Someone knows where you are
Common problems, rules and leaving no trace
| Symptom | Likely cause | Fix |
|---|---|---|
| Cold from below | Bed too thin or compressed flat | Add 20 cm of loose leaves under you; the bed matters more than the shell |
| Cold draught at the head | Door plug missing or loose | Stuff the entrance tighter; pull a leaf-filled jacket in behind you |
| Cold all over despite a thick shell | Interior too big, damp leaves or wet clothes | Fill the air space with loose leaves, change into dry layers |
| Leaves falling on your face | Lattice too open | Add more twigs from outside before piling more debris |
| Drips in rain | Shell too thin or too flat on top | Thicken and steepen the top, add tiles of bracken or bark tips down |
| Frame creaks or sags | Weak or rotten ridgepole | Get out, replace the ridgepole — never sleep under a sagging frame |
Practice drill: the two-hour hut
On a dry autumn afternoon, with permission and close to home, build a hut against the clock: 20 minutes for the frame, 90 minutes for debris, 10 minutes for the bed and door. Then lie in it for half an hour at dusk. You will learn how much debris "enough" really is — nearly always more than you piled — and the next hut will be warmer. Dismantle it afterwards and scatter the leaves.
Most failed debris huts share the same problems: too big inside, too thin a shell, too little bed, and started too late. If you wake up cold, add more debris to the bed first, stuff loose leaves into the interior space around you, and plug the door better. Rain dripping through means the shell is too thin or too flat — steepen and thicken it, and add a tiling layer of bracken or bark.
Building a debris shelter disturbs the forest floor, which is home to insects, fungi and seedlings. Practise only where you have the landowner’s permission, use dead material only, avoid protected areas and breeding seasons, and take the shelter apart when you leave: scatter the leaves widely and return the poles. In Germany the rules for overnight stays and shelter building depend on the federal state — see wild camping in Germany. Elsewhere, check national access rules. For a gentler overnight option, combine a hammock or tarp with a good sleep system and follow the low-impact habits in our camp setup guide.
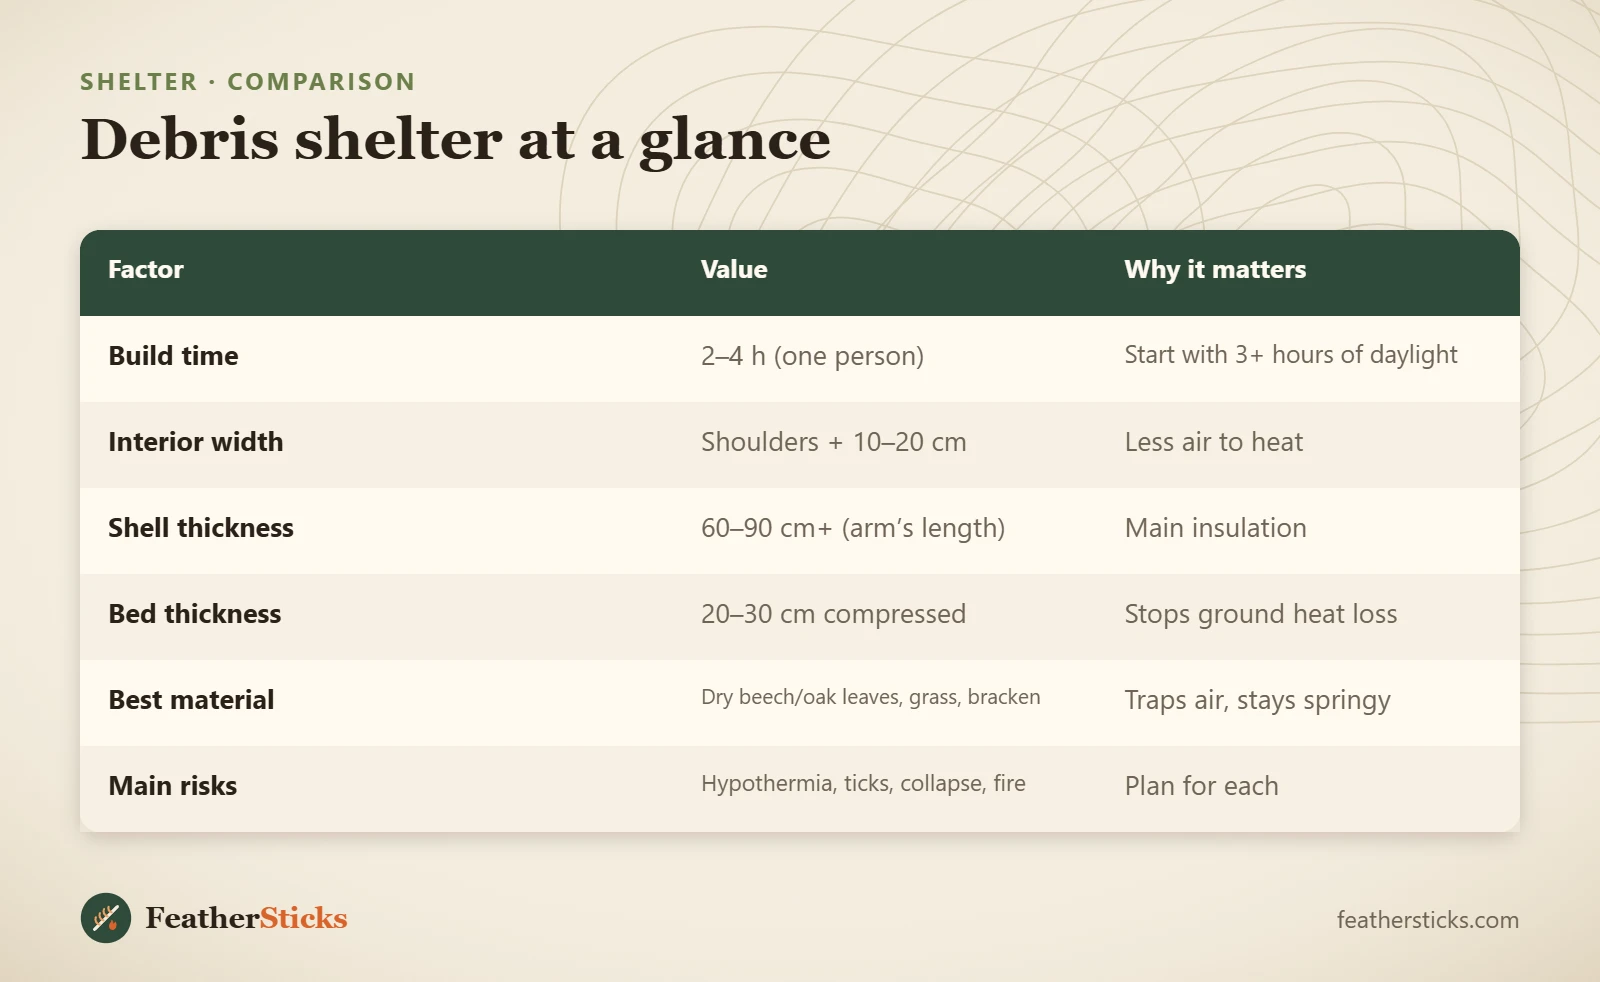
| Factor | Value | Why it matters |
|---|---|---|
| Build time | 2–4 h (one person) | Start with 3+ hours of daylight |
| Interior width | Shoulders + 10–20 cm | Less air to heat |
| Shell thickness | 60–90 cm+ (arm’s length) | Main insulation |
| Bed thickness | 20–30 cm compressed | Stops ground heat loss |
| Best material | Dry beech/oak leaves, grass, bracken | Traps air, stays springy |
| Main risks | Hypothermia, ticks, collapse, fire | Plan for each |
Common mistakes
- Building the interior too large, so body heat cannot warm it.
- A shell that is far too thin — you should not see light through it.
- Skimping on the bed; the cold ground steals more heat than the air.
- Using wet or rotten leaves that hold water instead of air.
- Sweating while building and then lying down in wet clothes.
- Starting too late in the day and finishing in the dark.
- Lighting a fire inside or next to the highly flammable shelter.
What you need
- Folding saw (optional but saves time)
- Knife
- Gloves for gathering debris
- Tarp or large bag to carry leaves
- 3–5 m of cord for lashing the support
- Tick repellent and tick tweezers
- Head torch and whistle