Camping in the Rain: How to Stay Dry, Warm and Cheerful
Camping in the rain comes down to one rule: protect the dry things first and let everything else get wet. Choose ground that drains, put the tarp up before you unpack anything, keep a sealed "dry set" of clothes for sleeping only, and accept that your outer layers will be damp. Do that and a rainy night becomes cosy rather than miserable.
This guide is the system that ties our rain skills together: reading the forecast, choosing the site, the pitching order, packing, clothing, condensation, cooking, sleeping and drying out afterwards. It builds on how to set up a tarp shelter and sits in our shelter section. If you stay several days in one spot, the base camp weather routine adds the daily rhythm.
Step by step
-
1

Read the forecast and decide
Check rain, wind and temperature for the whole trip. Steady rain is manageable with a plan; storm warnings or heavy cold rain are reasons to postpone.
-
2

Pick a site that drains
Choose a slight rise, away from hollows, rising streams and dead branches. Water must be able to run past your shelter, not into it.
-
3

Pitch the tarp first
Keep your shell on and the pack closed. Rig the ridgeline, hang the tarp, stake the windward side low, add drip lines. Only then unpack.
-
4

Floor and gear under cover
Lay the groundsheet so it ends inside the tarp edge. Bring in the pack, pad and sleeping bag once the roof is done.
-
5

Wet outside, dry set inside
Hang wet clothes and boots at the edge. Change into the dry set, kept sealed all day, and wear it only for sleeping.
-
6

Pack up wet, dry out at home
Pack the wet tarp separately from dry gear. At home, hang everything up and let it dry fully before storing it, or mildew follows.
How to stay dry camping in the rain: the short version
Nobody stays completely dry for days in steady rain, and trying to is what makes people miserable. The practical goal is smaller and achievable: one dry place to sleep, one dry set of clothes, a dry way to cook and a dry way to get warm again. Everything else may be damp.
Think of your camp as three zones. The wet zone is the edge and the outside: boots, rain gear, firewood, the cooking area. The dry zone is under the roof: pad, sleeping bag, the sealed dry set. Between them is a short transition where you take off wet layers before you step into the dry zone. Most rain-camping disasters come from letting the wet zone creep into the dry one — one soaked jacket thrown on the sleeping bag.
The rain-camping system
- DecideForecast, route, and a clear go or postpone call.
- SiteSlight rise, no hollow, no dead wood overhead.
- Roof firstTarp up before the pack opens.
- SeparateWet zone outside, dry zone and dry set inside.
- RecoverWarm food, dry clothes, dry out afterwards.
Should you go? Reading the forecast and deciding
The best rain-camping skill is deciding whether to camp in it. Look at three numbers for your exact area and every day of the trip: rain amount and timing, wind and temperature at night. Our guide to reading the weather explains the signs in the sky; forecasts from your national weather service are better for the numbers. Look again the evening before you leave and again that morning, because rain bands shift.
Light, steady rain with moderate wind and mild temperatures is a good first rain trip. Heavy rain, strong gusts, thunderstorms and near-freezing wet weather are different: they demand more gear, more experience and more margin. A storm warning from the weather service is not a challenge. Postponing is a legitimate bushcraft decision, and for trip planning it is the cheapest safety margin you have.
Go or postpone?
Is there a storm, thunderstorm or severe weather warning for the area?
Yes → Postpone, or stay somewhere with solid shelter.No → Next question.Is the night temperature near freezing with wet weather?
Yes → Only go with a proven cold-wet kit and experience; otherwise postpone. See hypothermia.No → Next question.Do you have a roof you can pitch fast, a sealed dry set and a sleeping system rated for the night?
Yes → Go, with a short route and an easy exit.No → Fix the kit first, or do a close-to-home test night.
Plan the route for rain
Rain slows everything: paths turn muddy, streams rise and light fades early. Shorten the day, reach camp with spare daylight (the daylight calculator shows how much), avoid river crossings and flood-prone valley floors, and tell someone your plan, as in navigation basics. Your first rainy night should be close to home, not a three-day trek.
Choosing a campsite in the rain
In dry weather you pick a camp for the view. In rain you pick it for where the water goes. Our general guide to campsite selection covers the basics; rain adds a few hard rules.

Rain-site checklist
- Slight rise or gentle slope — water runs past, not into, the camp
- No hollows, dips, dry stream beds or flat ground at the bottom of a slope
- Well above and away from streams that can rise within hours
- No dead branches or dead trees overhead; wet, heavy wood and wind drop limbs
- Not directly under the biggest trees: drip from the canopy is heavier than rain
- Some wind shelter from a bank, dense trees or rocks
- Soil that drains: avoid clay hollows, bare roots and black wet moss
Why not under big trees?
A canopy catches rain and releases it later in large, heavy drops, long after the shower has stopped. Standing under a thick tree can mean more noise and more drips than open sky. A light tree cover that breaks up wind is fine; the biggest, oldest trees are the ones with dead limbs. Always look up before you decide, a habit from camp setup that matters double in wet, windy weather.
Streams, slopes and cold air
A stream that is ankle-deep at lunch can be impassable at midnight if rain falls upstream. Camp clearly above the bank. On slopes, pitch across the contour. Cold, damp air also settles in hollows at night, so the slightly higher spot is warmer too.
Respect land rules: where wild camping is restricted, use official sites. See wild camping for how rules differ between countries and regions, and never dig trenches around a shelter in protected ground.
How to set up camp in the rain: tarp first, then everything else
This is the heart of the article. The core idea: nothing dry gets unpacked until a roof is over where it will go. Tents invite you to do the opposite, because you pitch the tent in the rain and everything gets wet while you work. With a tarp you can do it in the right order, and with a bit of practice the whole sequence takes 10 to 15 minutes.
Wear your shell and keep the pack closed with its liner and lid sealed. Have the cord and tarp in outside pockets or at the top of the pack so you do not need to open it. The pitching itself is covered in the tarp shelter guide; here is the rain version. If you are still choosing a tarp, see tarps compared and use the tarp pitch planner to check sizes and heights.
Pitching order for a rainy camp
 1Shell on, pack closed
Put on the rain shell before you start working, not after you are wet. Leave the pack closed and liner folded over; the dry things stay dry for another quarter of an hour. Pick the two trees now.
 2Ridgeline first, taut
Rig the cord between the trees, tight and slightly sloping to one side so water leaves. A trucker's hitch or similar adjustable knot lets you tension it with cold, wet hands. A slack line drips water into the shelter.
 3Tarp over the line, centred
Drape or clip the tarp over the cord and centre it, so both sides hang equally. Do not stake yet; just get the roof over the ground. From here you could already unpack under it.
 4Windward side low, lee side higher
Stake the side the weather comes from low, nearly to the ground, then the lee side higher and open. Tension each corner in turn until the fabric is drum-tight, because slack fabric pools water and flaps in wind.
 5Drip lines on the ridgeline
Tie a short cord to the ridgeline at each end, outside the tarp, hanging down. Water that would run along the cord into the shelter drips off the tail instead. Check them; this is the main "drips from the ridgeline" fix.
 6In first, then shell off
Step under the roof, then take off your wet shell and hang it at the edge. Only now open the pack and lay out the pad and bag. This order keeps rain off everything you need to sleep.
Which pitch in rain?
An A-frame is the standard choice: two sloping sides shed water in both directions and the ridge height can be adjusted. In heavy wind and rain lower the ridge and point the narrow end at the weather. A lean-to has a big open side and is a poor choice in wind-driven rain. See lean-tos for when they work.

Diamond and plow pitches handle gusts well because one corner sits low; a hammock under a big enough tarp, as in hammock shelter, also works. Which system copes best with rain is compared in tent vs tarp vs hammock.
Storm pitch choices, guylines and drip lines
Rain finds the weakest point: a dip in the ridgeline, a slack edge, a guyline that runs water towards the shelter. Water clings to cord and runs along it, which is exactly why a ridgeline drips into your shelter. The cure is cheap: a drip line, a short cord or strip tied around the ridgeline just outside the tarp. The water follows the cord down and falls off its end, a hand's width or two away from the fabric, instead of running along the line onto your bag. A tail of roughly 20–30 cm does the job.
The simplest improvement to wet-weather performance is tension. A tarp that sags between pegs makes puddles that become heavy, then sag more, then tear out a peg. If you must leave a pool, lower the nearest corner so it drains. Re-tension in the evening and again after the first hour of rain, because wet cord and wet fabric stretch.
The ground: groundsheet, pad and where the water goes
You can build a perfect roof and still wake up wet from below. Water runs across the ground in rain, and a groundsheet is a waterproof tray that catches it if you let it. The golden rule: the groundsheet must end inside the tarp edge. If it sticks out, the rain that falls from the roof lands on the overhang and runs inwards towards your pad, so the groundsheet becomes a gutter that feeds water under you.
Groundsheet: wrong, fix, right
 1Wrong: it sticks out
The sheet reaches beyond the tarp edge. Drips from the roof land on it and run inwards under your pad. This is the typical cause of "water under the groundsheet".
 2Fix: fold the edge under
Fold the overhanging margin back under the sheet itself, or simply move the sheet inwards, until its edge sits a hand or two inside the line where drips fall.
 3Right: drips land outside
Water falls off the tarp edge onto the ground, runs away downhill and never touches the sheet. Pad, bag and pack sit on a dry island.
What to put on the ground
Underneath, use a groundsheet as large as your sleeping place and no larger. A cheap polythene sheet, a footprint or a spare tarp panel all work. Sleep on a sleeping pad: the pad insulates from cold, wet ground, which loses heat faster than air. Foam pads do not mind a damp edge; air pads need a dry spot for their valve. Keep the pack on the pad's foot end or on a dry bag or slab of foam, not directly on wet soil.
A flat stone or log in the doorway keeps muddy boots off the sheet. Leave no trace: do not dig trenches or cut living branches.
Packing for rain: dry bags, liners and the dry set
Pack covers fail: wind turns them, straps leave gaps, and the back panel soaks up water. The reliable approach is a pack liner, a heavy-duty bag inside the pack, plus dry bags for the things that must never get wet. Pack covers are an extra, not a plan. Our backpack guide covers fit and capacity; the systems below are about water.
A packing system that survives rain
 1Pack liner inside the pack
A heavy-duty liner (not a thin bin bag you will tear) lines the main compartment. Fold or roll the top closed. Everything dry goes inside it.
 2One job per bag
Use coloured dry bags: one for sleeping gear, one for the dry set, one for food. You can find each in the dark and open one at a time without exposing the rest.
 3Wet gets its own sack
A separate stuff sack, or the outside pocket, is for wet shell, towel and socks. Never push a dripping jacket into a dry bag, however tired you are.
 4Roll down, then clip
Fold the top over at least three times and clip the ends together. A dry bag only works if it is closed properly; one fold is not enough.
The dry set
This is the most important habit in the whole article. The dry set is a base layer, dry socks, a warm layer and a hat that go into a sealed dry bag at home and never come out until you are in your sleeping place, not for a cold hike, not for a quick stop, not to dry your hands. At night you change into it, and in the morning you put it back in the bag and put on the damp day clothes again. It is unpleasant for about two minutes and keeps you warm for the rest.
The same applies to the sleeping bag: it travels in its own dry bag inside the liner, and comes out only under the finished roof. Dry down insulation that gets wet clumps and loses most of its warmth; synthetic fill copes better but still gets heavy. See sleeping gear for the details.
Wet-weather packing checklist
- Pack liner (heavy duty) plus pack cover as a bonus
- Sleeping bag in its own dry bag, inside the liner
- Dry set sealed: base layer, socks, warm layer, hat
- Separate wet sack for shell, towel and used socks
- Phone, map, lighter and first aid in small sealed bags
- Food in a dry bag; paper and cardboard packaging out
- Tarp and cord reachable without opening the main compartment
- Headlamp in a pocket you can reach with gloves on
Clothing in the rain: shell, venting and wet feet
There are two schools: stay dry as long as you can, or accept getting wet and stay warm. In practice you do both. Our clothing guide covers layers; here is the rain-specific strategy.
Rain shell or get wet?
A rain jacket keeps rain off but not sweat in. In steady effort a shell can leave you as wet from the inside as from the outside. The solution is venting: open the front zip and any underarm zips, push up the sleeves, push back the hood and take off the warm layer before you sweat. Stop for a short break rather than overheating and then stopping soaked and cold. In warm rain, light layers and getting damp are fine as long as you can put on dry warm clothes at camp.
The key rule is that wool and synthetics keep some warmth when damp; cotton does not. Jeans and cotton T-shirts are the worst thing you can wear in a cold rain. Keep one merino or synthetic layer next to the skin, a fleece or wool mid layer, and the shell on top. Hats and gloves matter: a dry hat in the evening is worth more than another sweater.
Wet feet
Feet stay wet in rain whatever the boots promise, because water runs down the legs into the boots. Waterproof boots keep water out but also keep it in once it has entered. The practical answer is dry socks at camp and a spare pair for the next day, plus a routine: take wet socks and boots off at the edge of the dry zone, dry the feet, put on the dry-set socks and, if you have them, light camp shoes. Prolonged wet, cold feet can cause skin damage; see footwear and hygiene for foot care, and get dry as soon as you stop.
Condensation: why it drips inside, and how to prevent it
You wake up damp but the roof did not leak. That is condensation: your breath and body release moisture, which meets a cold surface (tarp, tent wall, bivvy shell) and turns into droplets. In wet air, the air inside is often almost as humid as outside, so it condenses easily. The answer is ventilation and distance, not more sealing.

A tarp is the best defence because it is open: air flows through the ends and under the edges, so moisture escapes. Leave a gap between the edge and the ground of at least a hand's width where possible; in storms close one side but keep a gap to the lee. Breathe out away from the sleeping bag, not into it, and do not cook or boil water inside a closed shelter. Wet clothes drying inside raise the humidity as well, so hang them at the edge, not above your bag.
In a bivvy bag, the problem is hardest: the fabric is right next to you. Keep the hood open as far as the rain allows, with a small opening over your face or a hoop to hold the fabric off, and use a tarp over the bivvy so you can leave the hood open. See bivouac and bivvy bags for the details, including breathable versus non-breathable fabrics. If you wake with a damp bag, shake out droplets and wipe the inside before you go back to sleep.
In a tent, open the vents and keep the sleeping bag off the walls (more in vestibules, ventilation and condensation). A bit of damp is normal in wet weather.
Cooking in the rain: under, next to or away from the tarp
A hot meal is the best morale tool in rain, and also a hazard in a cramped shelter. Two dangers matter: fire and carbon monoxide. Burning fuel consumes oxygen and releases carbon monoxide, an invisible gas that can build up in closed, low spaces. Fabric melts and burns, and a flare-up near a tarp or sleeping bag is a real risk.
The safe rule is simple: do not run a stove or fire under low fabric or inside a closed shelter, and do not cook inside a tent or bivvy. Cook at the open side of the tarp, outside the fabric, with plenty of clear space above, in the lee of the wind. The tarp gives your hands and the stove protection from rain, but the flame stays well away from fabric. Never leave a lit stove unattended and keep fuel away from your sleeping area. Read camp stoves for the details of stove choice, stability and fuel handling.

Fire in the rain
Open fires in rain are harder, and in many places restricted or banned. If fires are allowed and you want one, use dry fuel from the inside of dead standing wood, split to expose dry cores, and follow wet-weather fire lighting and fire safety. Never build a fire under overhanging branches or close to the tarp, because sparks melt holes in fabric. A gas or liquid-fuel stove is the reliable way to get hot water in rain, and it is far safer to keep it separate from the sleeping zone.
Rain-proof meals
Choose one-pot food: porridge, soups, instant meals, hot drinks. See food storage and campfire cooking. Keep food in dry bags; wet weather does not stop animals visiting.
Bonus: collect rainwater at camp
You already have a roof and a pot: use them. Water leaves your tarp along the ridgeline and the low corner. A drip line tied to the lowest tie-out, with its end in a clean pot, turns the same rain that threatens your camp into drinking water. The first few minutes of run-off rinse dust and debris from the fabric, so let them run to waste first. The detail, with yield figures and safety, is in collecting rainwater. Treat the water before drinking, for example by boiling, and see hydration for how much you need. Hot drinks are particularly good in cold rain. Do not lower your shelter or compromise the sleeping place to collect water: sleeping dry is more important than a full bottle.
Keeping the sleeping bag dry and warm
A damp sleeping bag is the failure that ends a rainy trip. The rules are mostly about discipline. Keep the bag in a dry bag until you are under the finished roof. Lay out the pad first, then the bag, and keep it off the edges of the groundsheet, tarp walls and your wet clothes. Do not put wet clothes into the bag to dry them with your body: you add water you cannot remove, and the bag loses more warmth than your body can give back.
Before bed, eat, drink something warm and warm up with light movement. Get into the dry set, then the bag, with the hat on and your breath out of the bag. The sleep system calculator and sleeping gear help you match the bag to the night.
In the morning, shake the bag, air it under the tarp while you eat, and pack it before anything else. Keep it in the dry bag for the walk, even if it feels slightly damp. Dry it fully as soon as you get home.
Evening routine at a glance
- Eat and drink
- Warm meal and hot drink before bed
- Change
- Into the dry set, wet clothes at the edge
- Insulate
- Pad first, bag on top, hat on
- Ventilate
- Breathe out of the bag, keep a gap open
Hypothermia in cold rain: the real risk
Hypothermia does not need freezing temperatures. Cold rain, wind and exhaustion can lower body temperature at 5 to 10 °C. Wet clothing conducts heat away much faster than dry clothing, and wind makes it worse; the wind chill calculator gives a feel for it. Early signs are shivering, clumsy hands, irritability and poor decisions. Do not ignore them.
The answer is early action: stop, get out of the wind under the shelter, put on dry insulating layers, eat and drink something warm and sweet, and warm up gradually. Change out of wet layers into the dry set at once. If shivering does not stop, speech slurs or the person becomes confused or drowsy, it is an emergency: call for help (112 in the EU, 911 in North America) and keep the person insulated from the ground and the wind. Our hypothermia guide explains recognition and treatment in detail. Know it before you need it.
Camping in the rain with kids
Children get cold faster than adults and tell you later. Keep your first rainy trips short, close to the car or a hut, and plan for an easy exit. See bushcraft with kids for age-appropriate activities. Give each child their own dry set, hat and warm layer, a rain jacket and waterproof boots or spare socks. Check hands and feet regularly, and offer warm drinks and snacks often.
Make the wet part fun: a puddle outing before changing, hot chocolate at the shelter edge, stories and card games under the tarp. Keep the stove and sharp tools away from play areas. If a child is shivering, pale or unusually quiet, warm them at once and end the day.
Troubleshooting: what to do when it goes wrong
Even careful campers get wet. These are the usual symptoms, their causes and quick fixes. Make a habit of walking round the camp with a headlamp in the first hour of rain and fixing small problems before they get big.
| Symptom | Likely cause | Quick fix |
|---|---|---|
| Water under the groundsheet | Sheet sticks out past the tarp edge; site in a dip | Fold the margin under; move the sleeping place; tilt the tarp edge so water runs away |
| Drips from the ridgeline | Water runs along the cord onto the fabric or bag | Tie drip lines outside the tarp at both ends; tension the ridgeline |
| Tarp pools water | Slack fabric, low corner missing | Re-tension; lower one corner so the pool drains; empty by hand |
| Damp sleeping bag | Condensation, wet clothes in the bag, bag touched the wall | Ventilate; keep wet clothes out; air the bag; use the dry set next time |
| Drips from the roof in gusts | Rain driven under the open edge | Lower the windward edge; turn the narrow end into the wind |
| Wet firewood | Wood lay on the ground or under open sky | Split to dry cores; keep a pile under the tarp edge; use a stove instead |
| Cold, wet feet | Water in boots, no dry socks | Dry feet, put on dry-set socks, add camp shoes or bags |
| Wind pulls pegs | Soft, wet soil; short pegs; too much angle | Longer pegs, buried stick or stone, lower the ridge, add a guyline |
Packing up wet and drying gear at home
Breaking camp in the rain is where good habits pay off. Pack in reverse order of the pitch: sleeping gear and dry set first, while the tarp still gives you a dry space. Then the pad, the pack contents, last of all the tarp itself. Shake it, fold it into a separate bag and keep it away from the dry bags, because a wet tarp soaks everything it touches. Your wet clothes go into the wet sack, not back into the dry set.
At home, do not leave wet gear in its bag. Damp fabric left in a stuff sack for a few days grows mildew, which smells, stains and slowly damages coatings and seams. Hang the tarp up in a garage, loft or on a line, turn dry bags inside out, loosen cords, open the pack's pockets and stand boots with paper inside, away from direct heat. Let the sleeping bag hang or lie loose until it is fully dry, and store it uncompressed, as described in sleeping gear. See tool care for oiling knives and axes after wet use.
After the trip
- Hang the tarp and let it dry completely before folding
- Turn dry bags inside out and air them
- Empty and air the pack, including pockets
- Dry the sleeping bag loose, then store it uncompressed
- Stuff boots with newspaper; no direct heat
- Clean and lightly oil metal tools
- Restock the dry set and note what failed
Practice drills and building up to a real rain trip
Learn to pitch in the rain when nothing is at stake. Drill the 15-minute pitch (pack on, shell on, tarp, drip lines and groundsheet before the pack opens), test the dry set for an hour in the rain, and spend a night in the garden to see where it drips. Our first overnight guide helps you plan it; practise tasks with a headlamp too, see night skills.
Build up gradually: light rain close to home first, then longer trips, then cold or windy weather. Check your rain kit with the Kit Builder and the kit list. On a tight budget, budget kit shows where to spend; bushcraft basics covers the foundations.
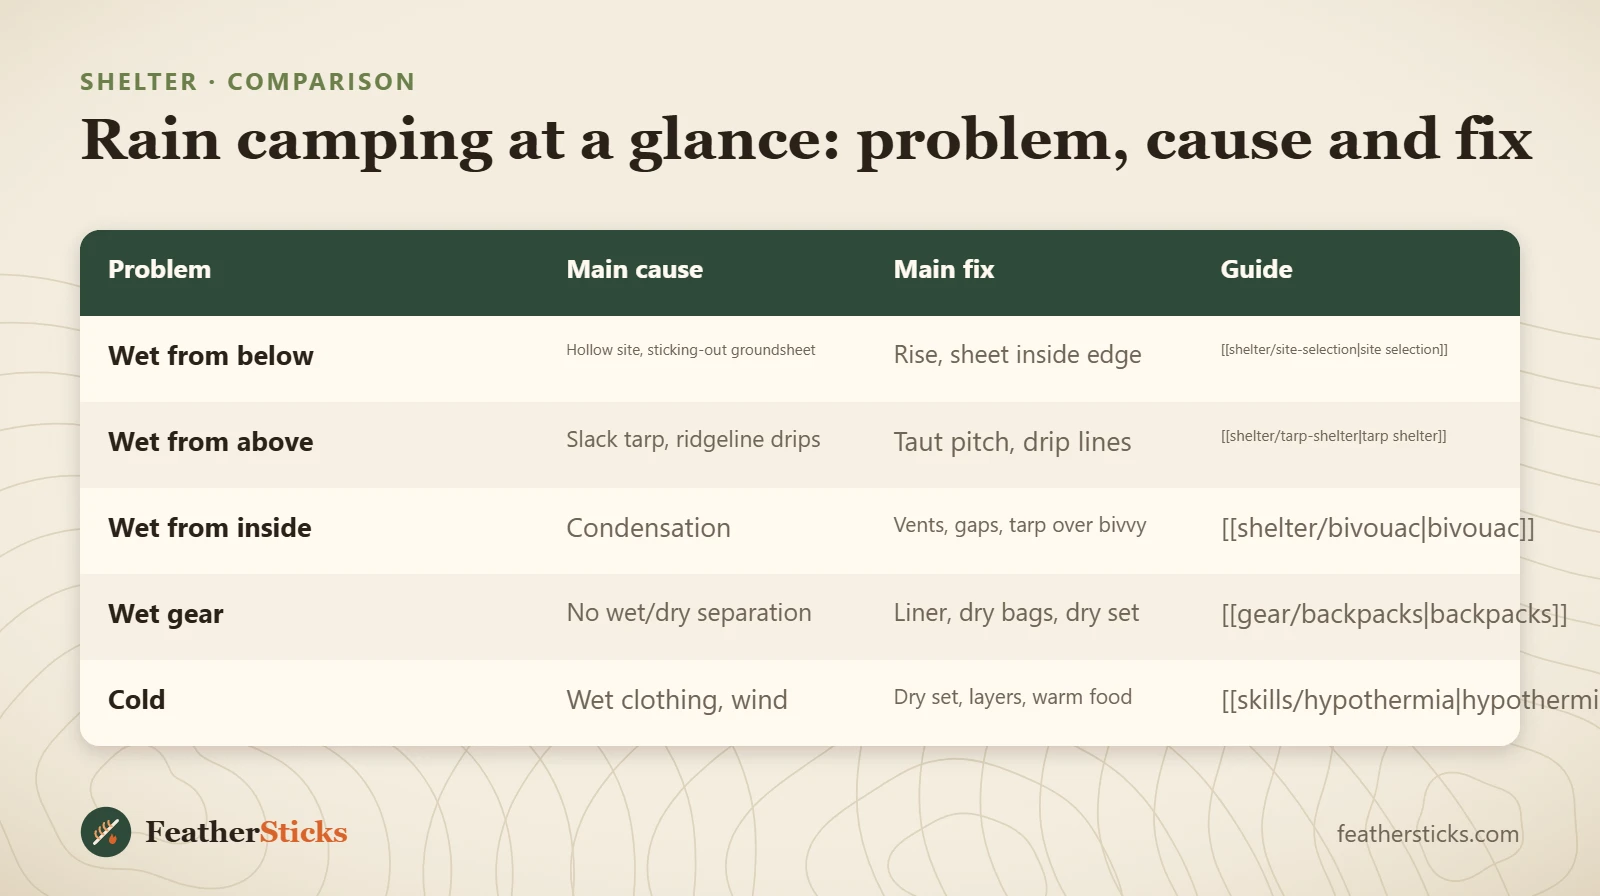
| Problem | Main cause | Main fix | Guide |
|---|---|---|---|
| Wet from below | Hollow site, sticking-out groundsheet | Rise, sheet inside edge | [[shelter/site-selection|site selection]] |
| Wet from above | Slack tarp, ridgeline drips | Taut pitch, drip lines | [[shelter/tarp-shelter|tarp shelter]] |
| Wet from inside | Condensation | Vents, gaps, tarp over bivvy | [[shelter/bivouac|bivouac]] |
| Wet gear | No wet/dry separation | Liner, dry bags, dry set | [[gear/backpacks|backpacks]] |
| Cold | Wet clothing, wind | Dry set, layers, warm food | [[skills/hypothermia|hypothermia]] |
Common mistakes
- Unpacking the pack in the rain before the tarp is up, so the sleeping bag is wet before the roof exists.
- Letting the groundsheet stick out past the tarp edge, which turns it into a gutter under your pad.
- Wearing the dry set during the day, so nothing is dry when you actually need it.
- Cooking or running a stove under low fabric or inside a tent: fire and carbon monoxide risk.
- Sealing every opening in a shelter and waking up to condensation dripping on the sleeping bag.
- Camping in a hollow or beside a stream because the spot looked flat and sheltered.
- Wearing cotton in cold rain, which stays wet and cold and steals body heat.
- Stuffing a wet tarp into a bag and leaving it for days, which means mildew.
What you need
- Tarp with enough coverage for the pitch, plus a groundsheet cut to size
- Cord for a ridgeline, guylines and drip lines, plus spare pegs
- Heavy-duty pack liner and several dry bags
- Rain shell with a hood, plus a warm hat and spare socks
- Dry set (base layer, socks, warm layer, hat) in a sealed bag
- Wet sack or stuff sack for dripping gear
- Stove and fuel for reliable hot water; headlamp
FAQ
How do I stay dry when camping in the rain?
How do I set up camp in the rain without getting everything wet?
Is it better to camp in a tent or under a tarp in the rain?
Why is my tent or tarp wet inside when it did not leak?
Can I cook under my tarp in the rain?
How do I keep my sleeping bag dry in the rain?
How do I avoid hypothermia in cold rain?
What should I do with wet gear after camping?
Check yourself
Completed6 quick questions from this guide. Nothing is sent anywhere.
Related step-by-step guides
-
 1
-
 1
-
 1