Setting Up a Base Camp: Layout, Structures and Routines for a Multi-Day Bushcraft Camp
A bushcraft base camp is a camp you keep for several days and nights: a fixed place with a sleeping area, a kitchen, a water routine, a work area and a latrine, from which you cook, learn, build and explore. The long term camp setup differs from a one-night camp in one way above all: because the same patch of ground is used again and again, planning, routines and tidiness matter far more than speed.
This guide covers when a base camp makes sense (and when it is not allowed), how to pick a site for several days, how to lay out the zones, which simple structures are worth building and how to take them down again, how to run water, fire, food and tools over days, and how to leave the ground as you found it. It builds on camp setup and choosing a camp site and belongs to the shelter pillar of our bushcraft basics.
Step by step
-
1

Get permission first
Most wild-camping rules allow one night only. A base camp needs the landowner's consent or a designated site.
-
2

Choose a site for days
Level, drained ground, no dead wood overhead, camp 60 m or more from water, and enough dead wood nearby.
-
3

Lay out the zones
Sleep upwind, fire and kitchen downwind, work area, food store, wash stand and latrine kept apart.
-
4

Build removable structures
Tarp kitchen, pot tripod, table and drying line from lashed poles – all built to come apart.
-
5

Run daily routines
Fixed times for water, wood, meals and a short evening check keep a long stay safe and tidy.
-
6

Strike camp, restore the ground
Fires cold, pits filled, structures taken down, litter spread: the site should look unused.
When does a base camp make sense – and when is it allowed?
A base camp pays off when you stay in one place long enough that improving the camp saves more effort than it costs. As a rule of thumb that starts with the second night. Typical cases are courses and workshops, group and family trips, a long weekend on private land, and projects such as learning to build lashed furniture or to cook properly over a fire.
- Multi-day stays: a fixed kitchen, a drying line and a woodpile make days two and three easier than day one.
- Groups and courses: shared zones, roles and a rota keep ten people from tripping over each other.
- Skill building: a camp that stays put lets you practise lashings, whittling and campfire cooking without packing up every morning.
- Families with children: a stable, fenced-in-by-routine camp is calmer than daily moves; see bushcraft with kids.
In practice, the legal routes to a multi-day camp are: a campsite or group site, private land with the owner's written or clearly given consent, a course or club ground, and, where it exists, a designated bushcraft area. When you ask a landowner, say how many people come, for how long, what you will build, whether you want a fire and how you will leave the place. A clear plan makes a yes much more likely. Where permission includes structures, agree what stays and what goes – ideally everything goes.
'Choosing the site for several days
A site that is fine for one night can turn into a problem on night three. Walk the area before you unpack and use the site-selection checklist; for a base camp, a few points matter more than for a short stay.
| Criterion | What to look for | Why it matters over days |
|---|---|---|
| Water access | A source within walking distance, but camp, washing and latrine 60 m or more from it | You will fetch water several times a day; closeness without distance harms the water and the bank |
| Drainage | Slightly raised, level, no hollows or channels | One rainy night shows every low spot; repeated trampling turns wet ground to mud |
| Overhead hazards | No dead branches, broken tops or leaning dead trees within falling distance of any zone | The longer you stay, the more weather the trees see – see widowmakers |
| Wind | Some shelter from the prevailing wind, open enough for smoke to clear | Decides where sleep and fire go |
| Firewood | Dead wood within a short walk, in several directions | Gathering from one spot strips it; a wide area spreads the impact |
| Ground | Durable surface such as leaf litter or needles; avoid moss, flowering meadow, wet soil | Camps wear ground out; durable surface recovers faster |
| Wildlife | Not on game trails, wallows or next to dens | Animals keep to their routes for the whole stay – see wildlife at camp |
| Legal | Permission and agreed fire rules in writing or clearly confirmed | Nothing spoils a base camp like being asked to leave on day two |
Building the layout in plan view (not to scale)
 1Read the site first
Mark the stream, the wind direction and every hazard. A dead tree rules out the ground beneath and around it for the whole stay – treat it as a no-go zone, not as a spot "just for tonight".
 2Place the sleeping zone
The best, flattest, best-drained ground goes to the beds, upwind of the fire and kitchen. Tents, tarps and hammocks stand in a loose group with room between them for guylines and a clear walkway.
 3Fire and kitchen downwind
Fire at least 5 m from tents and hammocks and at least 3 m from synthetic tarps, downwind of the beds; the kitchen sits beside it. Only where fire is allowed at all – otherwise the kitchen is a stove corner.
 4Work area and food store
The work area gets a clear circle on level ground, away from paths. The food store is separate from the beds, downwind of them, so smells and animals are drawn away from where you sleep.
 5Wash stand and latrine
Wash stand between kitchen and latrine, so hands are washed on the way back. Washing and latrine are 60 m or more from water, the latrine also well away from camp and paths, downhill and downwind where possible.
Firewood supply: plan the stay, not the evening
A fire that burns for hours each day consumes a lot of dead wood. As a planning rate, the firewood calculator works with roughly 1.5 kg of dry wood per hour for a small cooking fire and about 3 kg per hour for an actively fed evening fire, before corrections for wet wood, cold or wood type. Multiply by the number of days and people and you see why base camps must manage wood: a four-day stay with a daily two-hour cooking fire and a four-hour evening fire needs well over 60 kg of dry wood at these base rates.
Gather only dead, fallen wood, from a wide area, and only where collecting is allowed. Do not strip the ground around camp – walk further each day instead. If the owner allows it, a pile of already-cut wood or a bought bundle is often the most sustainable choice for a group. The less you burn, the less you carry: a small fire, a stove for routine cooking and a fire only for the evening is a sound plan.
Camp layout: six zones in a plan
A base camp has the five zones of any well-organised camp – sleep, fire, kitchen, water and latrine – plus a work area and a food store. The logic is the same as for one night: smoke and sparks away from the beds, food and waste away from the water, and a clear route between zones. What changes is that you walk these routes dozens of times, so layout mistakes become expensive.

| Zone | Where | Distance | Rule |
|---|---|---|---|
| Sleeping | Best ground, upwind of the fire | 5 m or more from the fire for tents and hammocks, 3 m or more for synthetic tarps | No food, no cooking, nothing smelly |
| Fire & kitchen | Downwind of the beds, on mineral soil or a fire pit | Fire under no tarp, 3 m or more from the kitchen fly | Water and a shovel in reach – see building a fire pit |
| Work area | Level, clear, away from paths and the beds | Clear circle of two axe lengths around the block | Tools only here; see the tool rules below |
| Food store | Away from the beds, downwind, shaded | Not at the sleeping zone | Sealed, off the ground – food storage |
| Washing | Between kitchen and latrine | 60 m or more from any water | Grey water strained and scattered widely |
| Latrine | Downhill and downwind, off paths | 60 m or more from water, camp and paths | Cat holes or an agreed trench – hygiene |
The distances are the site-wide rules used throughout this guide; local rules and the landowner can require more.
Paths, lighting and the night walk
Over several days, people take the same routes in the dark: bed to latrine, kitchen to bed. Keep these paths clear, mark guylines with light cord or cloth, and let each person carry a headlamp. A small red or dim light at the latrine path and at the kitchen entrance prevents falls. Avoid paths that cut across the fire zone, and keep the walkways to water and latrine apart from each other so the shortest route never leads through the kitchen.
Groups: shelters in an arc
With a group, place the shelters in a loose arc around a shared fire and kitchen, each at the safe distance, with the open side of the arc towards the kitchen and the food store on the far side. Children sleep nearest the adults and furthest from the fire. If the group is large, split it into two or three small clusters rather than one long line, so every cluster has its own walkway. A large tipi, lavvu or Kohte can also serve as the shared group shelter.
Group roles and a camp rota
A camp for more than three or four people runs better with clear jobs. Without them, the same two people do everything and the rest stand around. A rota also protects the site: wood and water are fetched evenly, not always from the same corner.
| Role | Job | Safety point |
|---|---|---|
| Camp lead | Plan of the day, weather check, final say on safety | Knows where everyone is; carries the first-aid kit location |
| Water crew | Fetch, treat and label water; keep the clean and raw containers apart | Always two people at the water, never alone in the dark |
| Wood crew | Gather and sort dead wood, keep the woodpile dry | Carry in daylight; saws and axes only in the work area |
| Kitchen crew | Cook, wash up, keep the kitchen clean | Hands washed before food; no pots on the ground |
| Fire keeper | Light, feed, bank and put out the fire | Never leaves a burning fire unattended |
| Camp tidy | Sweep for rubbish, check guylines, check the latrine and wash stand | Finds the lost knife before someone steps on it |
Write the rota on a board of bark or cardboard and hang it at the kitchen. Rotate roles each day so everyone learns each job; children can do simple versions, such as sorting kindling or counting pegs. A ten-minute meeting after breakfast to fix the plan, and a short check at dusk, is the whole management a base camp needs.
Camp structures you build and take down again
The point of a base camp structure is convenience, not permanence. Everything below is built from dead poles and cord, uses no nails or cuts into living trees, and is taken down without a trace. Where you do not have permission to cut even dead wood, use poles you bring or fallen deadwood the owner allows you to collect.
Tarp kitchen (cooking fly)
A tarp stretched over the kitchen gives dry working space in rain and shade in sun. Pitch it with the low side towards the wind and the high side open, on two poles or between trees, with guylines pegged out. Use it for a stove and prep table. The fire stays outside and downwind: a synthetic tarp must not hang over a fire, and the fire sits at least 3 m from its edge. See the tarp setups for pitches.

Pot tripod and hanger
A tripod with an adjustable pot hanger lifts the pot above the fire and lets you raise it for gentle simmering. It needs three straight, dead poles of about 2 m and 4–5 cm thick (typical values) and 6 m or so of cord; see the lashings guide for the tripod lashing and cord lengths. Check the hanger and pot weight, and never leave a pot on a tripod over an unattended fire.
Building a pot tripod
 1Choose three poles
Dead, dry, straight, about 2 m long and 4–5 cm thick, all of similar size. Cut them to length with a saw, only from wood you are allowed to take.
 2Lash the tops
Lay the poles side by side with the tops level, start with a clove hitch and make loose wraps, then frapping turns, as in the tripod lashing. The wraps must stay loose so the legs can spread.
 3Stand and spread
Stand the tripod up and walk the legs out to about 1–1.5 m apart. Press each foot into the ground and check that all three legs carry weight and nothing wobbles.
 4Hang the pot
From the apex, hang a cord with a notched stick or a hook so the height can be changed. Keep the pot well above the flames for simmering, lower for boiling, and take it off the hanger before you tend the fire.
Camp table and wash stand
A camp table is two lashed pairs of legs joined by a crossbar, with a top of straight poles or thin split pieces, built at a comfortable working height. A wash stand is a small tripod with a water bag or bottle hanging from the apex and a basin beneath on a log. Both are made with square and tripod lashings; the lashings guide shows each one wrap by wrap, and whittled pegs and hooks replace extra cord.

Drying line, gear rack and raised bed
- Drying line: a cord between two healthy trees or poles, under a tarp for rain. Hang wet clothes, cloths and towels on it so they do not mildew; see camping in the rain.
- Gear rack: a simple frame or a line under the tarp keeps packs and tools off the ground and findable.
- Raised bed: a pole frame lifts the sleeper off cold, damp ground but cuts into the site and needs more wood. Build one only where it is explicitly allowed and you have a long stay; otherwise use a pad and groundsheet.
Choose lashing cord and the pole sizes from the lashings article, and test every structure by loading it low before you trust it. Take down every structure on departure and return the poles to the woodland floor, or pack them out if the owner asks.
The tool area and its safety rules
A base camp means more cutting, sawing and splitting than a night out, and often more people. A fixed tool area is the best safety measure you can take: all cutting happens there, nowhere else.

- One block, one circle. Put a chopping block in a level spot and keep a clear circle of two axe lengths around it. Only the person working is inside; see axe safety.
- The blood circle for knives. Whenever someone uses a knife, nobody stands within reach of an outstretched arm plus blade; knife safety explains the grips.
- Saws. Keep the guard hand clear of the blade path and put the saw back in its sheath after every cut; see saw safety.
- Sheaths and a home for tools. Every tool has a place – a block, a rack, a peg – and goes back after use. Nothing is left stuck in a log or lying in the leaf litter.
- No tools in the dark, tired or hurried. Most cuts happen at the end of the day.
- Know your limits and the law. Check the local knife rules in knife laws. First aid for cuts is in first aid for bushcraft.
The water system: collection, treatment, storage
Over several days water becomes a system, not a trip to the stream. Camp is 60 m or more from the source, so decide how it gets to camp, who treats it, where clean and raw water are kept, and where waste water goes. Estimate your need with the water calculator, then add the cooking and washing water.
The water chain
- CollectFetch raw water in a clean collapsible container, in pairs, in daylight.
- SettleLet it stand so silt sinks and pour off the top.
- TreatBoil or filter at the water station – purification methods.
- StoreTreated water in marked, covered containers, off the ground.
- DrainWaste water strained and scattered 60 m or more from the source.
Boil water at a rolling boil for 1 minute, or 3 minutes above 2,000 m, or use a filter or purifier suited to the source; the boiling calculator shows the numbers. Keep the raw and treated containers clearly different in colour or shape. Rain falling on a tarp can add a safe-to-collect supply if you use clean containers and still treat it; see collecting rainwater. In a long stay, a tarp set up to catch rain is the most efficient bonus source – but not a plan on its own.
Wash hands before cooking and after the latrine at a fixed station with soap, and use the wash stand for faces, dishes and cloths. Scrape food scraps into the waste bag, wash dishes in a basin and strain the water through a cloth or mesh before scattering it widely, at least 60 m from any water. Hygiene outdoors has the details for latrine and washing.
Food storage, wildlife and the clean camp
Over several days, animals learn where your camp is and what it smells of. A clean camp is the best protection: cook away from the beds, wash up straight after the meal, seal all food and rubbish and store them away from where you sleep. Food storage at camp explains containers, bags and bear country, and wildlife at camp covers boar, fox and others. Use the food planner to plan calories and quantity for the stay.
- Keep one sealed food store, not scattered snacks in the tents.
- Rubbish is tied up and stored with the food, then taken out each day or at the end.
- Dogs sleep in or beside the shelter and are tied or under control; see camping with dogs.
- Where the owner or a park prescribes a distance or a container, follow it.
Managing the fire over several days
A fire used for days needs more discipline than one used for an evening. Use one fixed fire place – an existing ring or a built fire pit – on mineral soil, and keep it small. Never use two or three scattered rings. Check the fire danger and bans every morning: a ban that appears on day two means the stove takes over.
- One fire keeper at a time who never leaves a burning fire and keeps water or a shovel at hand; see campfire safety.
- Small fires: a compact fire uses less wood; add a grill or a stove for routine meals.
- Stop feeding early and let the fire burn down before bed; at night the fire must be out or banked safely under supervision.
- Sparks and wind: in strong wind or dry spells, do not light it.
- Ash: cold ash is collected and, where allowed, scattered thinly or packed out. Do not leave hot embers.
A daily routine for a multi-day camp
A routine is the difference between a base camp that feels calm on day four and one that falls apart. The table is a model, not a rule: shift the times with daylight, weather and the group.
| Time of day | Job | Check |
|---|---|---|
| Morning | Weather check, fire lit by the fire keeper, water fetched and treated, breakfast | Sleeping gear aired, wet clothes on the line, food sealed again |
| Late morning | Wood gathering and processing, projects, skills practice | Tools only in the work area; stock of dry wood for the evening |
| Midday | Lunch, rest, a short walk around camp | Guylines, structures, latrine and wash stand checked |
| Afternoon | Projects, exploration, second water run in daylight | Weather and wind change; tarps re-tensioned |
| Evening | Fire and dinner while it is light, wash-up, food away | Everything edible stored, fire attended or out |
| Night | Small circle at the fire, then bed | Fire out or banked safely; headlamps in reach; latrine path clear |
Plan the stay with the longer view in mind: long days and warm nights in summer ask for different routines than short, cold days; see bushcraft through the seasons. Always have an exit plan: where the nearest road is, who has a phone, how to call 112, and what the rule is if somebody gets lost. A short safety talk on day one, and again with newcomers, covers it.
Weather and the rain plan
A multi-day camp will see more than one kind of weather. Check the forecast each morning and decide whether the plan holds. A rain plan makes a wet day pleasant: a tarp over the kitchen and over the main gathering place, a drying line under cover, dry firewood stored in advance, and an indoor activity ready. The detailed techniques are in camping in the rain; reading the sky helps too, see reading the weather.
| Condition | Action |
|---|---|
| Rain | Move cooking under the fly, keep tinder and wood dry, re-tension tarps, check drainage |
| Strong wind | Lower the pitches, check pegs, no fire, move away from dead or tall trees |
| Thunderstorm | Leave exposed spots and open ground; stay away from lone trees and metal poles; take shelter and wait |
| Heat and dry spell | Shade, more water, check for fire bans, extra care with any fire |
| Cold night | Insulation, hot drink before bed, a dry set of clothes; see hypothermia |
Striking camp and leaving no trace
After several days the ground shows it: bare patches, worn paths, a fire scar, holes. Leaving no trace now means actively repairing, not just packing. Plan one to two hours for striking camp and start early; a wet tarp, a cold fire and a long site check take longer than you think.
Restoring the ground
 1Fill every hole
Fill latrine holes and soak pits completely with the soil you dug out, press it down and put the litter and turf back on top. The fire pit goes last, once it is cold.
 2Loosen and cover
Rake or loosen worn, compacted spots with a stick and scatter leaf litter, needles or twigs over them so the ground can recover.
 3Return what you moved
Stones, logs and seats go back to where they lay; take down every structure and put the poles back on the woodland floor or take them away.
 4Compare with arrival
If you took a photo on arrival, compare. Walk the site in lanes for pegs, cord ends and small litter and look back once from the path.
Striking camp in order
- Breakfast, then water and last wash-up Eat and fill bottles while the kitchen still stands.
- Put the fire out completely Drown, stir and feel until the ash is cold; see campfire safety.
- Take down the structures Untie lashings, take down the tarp kitchen and tripod, coil the cord.
- Pack the sleeping gear and shelters last Shelters keep your gear dry until the end.
- Pack out all waste Rubbish, micro-litter, ash where required, used toilet paper.
- Restore the ground Fill holes, spread litter, return stones; then walk the site in lanes.
Where the stay left deeper marks, tell the owner honestly what you did and offer to come back and check. For general principles see bushcraft basics and Leave No Trace in campfire safety.
Base camp checklist
Before you go
- Permission or a designated site confirmed, fire rules known
- Group size, roles, rota and emergency plan agreed
- Water, food and firewood plan for the whole stay
- Tarps, cord, pegs, saw, shovel, first-aid kit, headlamps
- Waste bags and a plan to carry rubbish out
On arrival and daily
- Hazards overhead checked, wind and slope read, zones marked
- Sleep upwind, fire and kitchen downwind, work area clear, food store apart
- Camp, washing and latrine 60 m or more from water
- Raw and treated water clearly separated
- Tools only in the work area, fire attended, food sealed each evening
On departure
- Fire cold to the touch, ash dealt with
- All structures down, poles returned, cord and pegs collected
- Holes filled, ground loosened and covered with litter
- All waste packed out, final sweep done in lanes
| Topic | Rule of thumb |
|---|---|
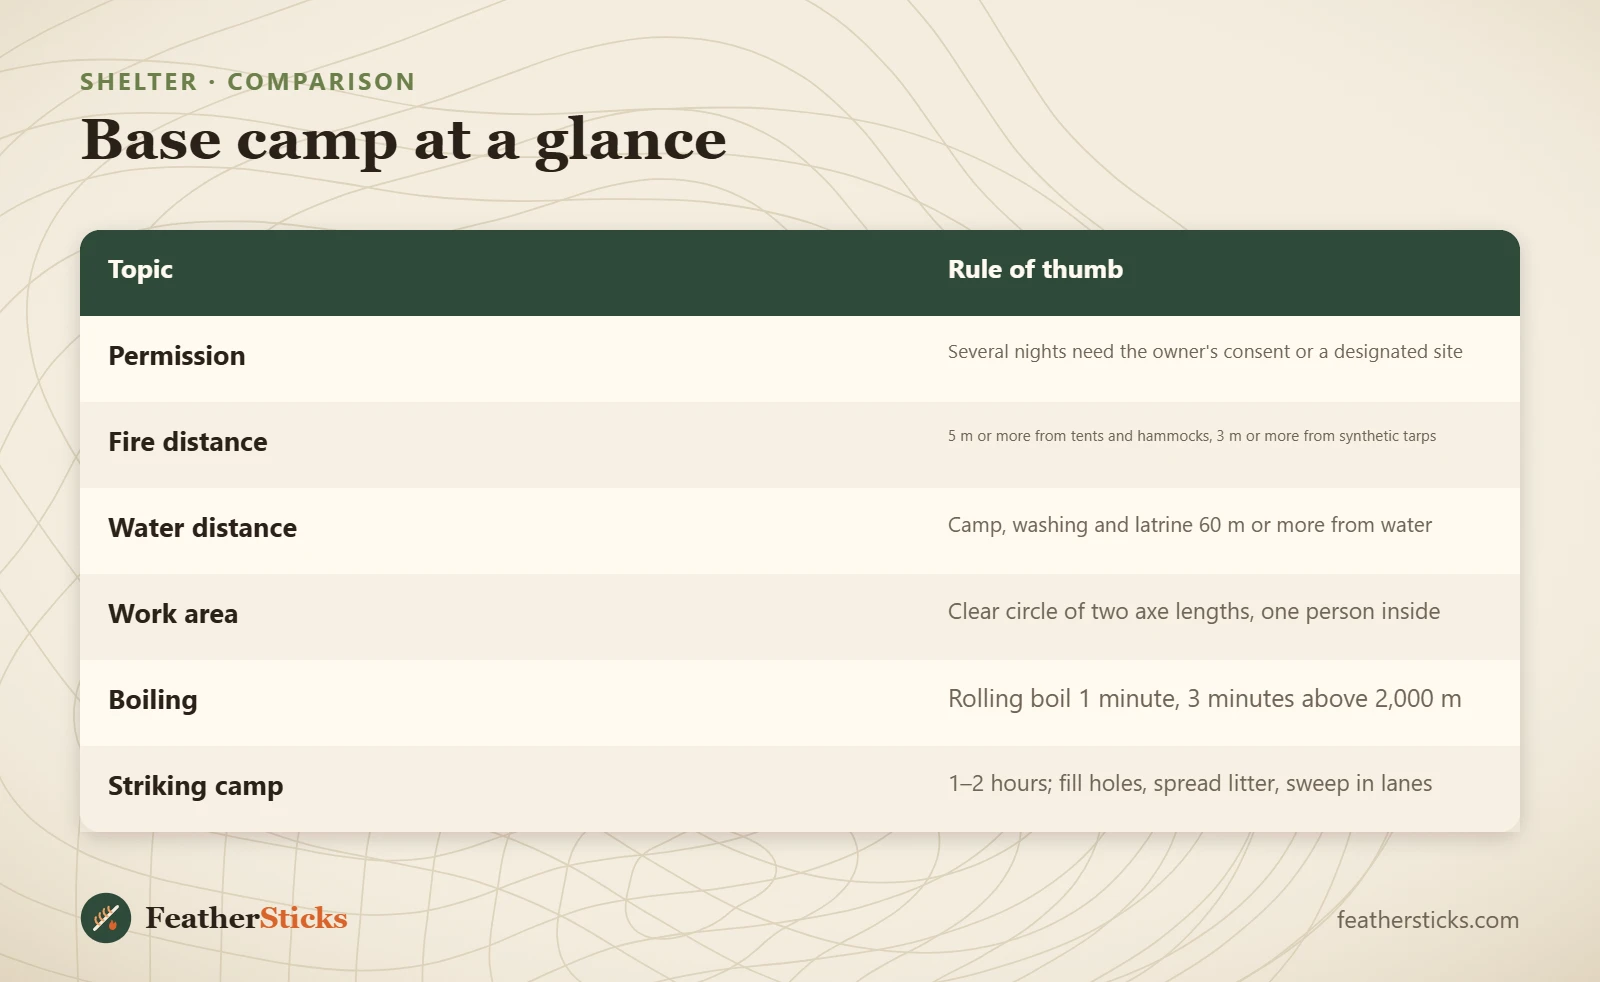
| Permission | Several nights need the owner's consent or a designated site |
| Fire distance | 5 m or more from tents and hammocks, 3 m or more from synthetic tarps |
| Water distance | Camp, washing and latrine 60 m or more from water |
| Work area | Clear circle of two axe lengths, one person inside |
| Boiling | Rolling boil 1 minute, 3 minutes above 2,000 m |
| Striking camp | 1–2 hours; fill holes, spread litter, sweep in lanes |
Common mistakes
- Staying several nights without permission because "it was fine for one night".
- Placing the fire, kitchen or latrine too close to water or to the beds.
- Gathering all firewood from the ground around camp instead of a wide area.
- Leaving tools out and letting everyone cut wherever they stand.
- Mixing raw and treated water containers in a busy kitchen.
- Storing food in the tents and so inviting animals night after night.
- Building structures that cannot be taken down, or leaving them behind.
- Skipping the restoration: holes open, litter not spread, a bare fire scar.
What you need
- Tarps, cord and pegs for kitchen and shelters
- Folding saw, knife, and an axe where allowed
- Collapsible water containers, filter or pot for boiling
- Shovel or trowel, waste bags, soap and a wash basin
- Sealed food containers, rope for hanging bags
- Headlamps, first-aid kit, whistle
FAQ
What is a bushcraft base camp?
Can I set up a base camp anywhere in the woods?
How far should a base camp be from water?
How much firewood do I need for several days?
What camp structures are worth building?
How do I keep a base camp safe with children?
How do I leave no trace after several days?
How long does it take to set up and strike a base camp?
Check yourself
Completed6 quick questions from this guide. Nothing is sent anywhere.
Related step-by-step guides
-
 1
-
 1
-
 1