Tipi Tent Camping: Tipis, Lavvus and How to Pitch Them
Tipi tent camping means sleeping in a cone-shaped tent held up by a single centre pole or a frame of poles that meet at the top. The shape gives you standing headroom in the middle, sheds wind from every side and suits groups and long stays. Pitching a tipi tent is simple once you know the trick: peg the base out in an even circle first, then raise the pole and tension everything evenly.
This guide covers the whole family — the traditional Plains tipi, the Sami lavvu, modern one-pole tipi tents and the German canvas Kohte and Jurte — with honest pros and cons, canvas vs synthetic fabrics, a step-by-step pitch, wind and rain, condensation and the narrow cases where a fire inside is acceptable. It is part of our shelter guides and builds on bushcraft basics and choosing a tent.
Step by step
-
1

Pick flat, sheltered ground
Choose a level spot that takes pegs, away from dead branches, hollows and the bottom of slopes.
-
2

Peg the base in an even circle
Zip the door shut, peg it on the lee side, then the opposite peg, then the sides, then fill in the rest.
-
3

Raise the centre pole
Crawl in, set the pole tip into the apex and push the pole upright onto a foot plate or flat stone.
-
4

Re-tension evenly
Walk round and re-set every peg at about 45° so the walls are smooth and the pole stands straight.
-
5

Guy out, windward first
Peg out the guylines from the panel points, starting on the windward side, and tension them evenly.
-
6

Open vents high and low
Open the top vent or smoke hole and leave a small gap at the base so moist air can leave.
What is a tipi tent? Tipi, lavvu and their relatives
A tipi tent is a cone or pyramid of fabric around a central apex. In modern outdoor tents that apex sits on one centre pole, and the fabric is stretched out to a circle (or a many-sided polygon) of pegs. Because the walls pull evenly in all directions, the tent stands firm without the bent poles of a dome or the hoops of a tunnel. The height is in the middle: you can kneel, sit or often stand there, while the low edges are used for sleeping and storage.
Several quite different traditions share this basic shape. Telling them apart helps you choose — and avoids confusing a light synthetic tipi with a canvas tent that was built around a fire.

| Type | Structure | Typical material | Typical use today |
|---|---|---|---|
| Plains tipi | Many long poles, cover wrapped round, two smoke flaps set with outside poles | Canvas (historically hides) | Cultural use, long-stay camps, events |
| Lavvu | Lower cone on several poles, wide base, smoke opening | Canvas or synthetic | Northern camps, groups, winter base camps |
| One-pole tipi tent | Single centre pole, pegged circle or polygon | Synthetic or poly-cotton | Trekking, family camping, hot tents with a stove jack |
| Kohte | Buttoned canvas panels, hung from a tripod or line, cross sticks in the smoke hole | Black cotton canvas | Scout and youth groups, hikes, camps |
| Jurte (youth-movement) | Vertical walls plus cone roof from the same panel system | Black cotton canvas | Group tent, camp kitchen, meeting tent |
Designs vary widely between makers and groups; always follow the instructions for your tent.
Where tipis, lavvus and Kohten come from
The tipi is the dwelling of the Plains peoples of North America, built to be moved. Its framework of many poles carries a cover that was originally made from hides and later from canvas. Two smoke flaps at the top are set with separate poles so the opening can be turned away from the wind, which keeps the central fire drawing. An inner lining along the lower wall creates a draught behind it and keeps cold air and drips away from the people inside. The tipi is part of living cultures, not a camping brand; outdoor shops borrow the name for a shape, and it is worth knowing the difference.
The lavvu comes from the Sami of northern Scandinavia and the Kola peninsula. It is usually lower and broader than a tipi, which makes it steady in the strong winds of open fells. Traditionally a few interlocking poles form the frame and more poles lean against them; a fire burns in the middle under the smoke opening. Many modern "lavvu tents" keep the low shape but use a single centre pole.
The Kohte is a German tent from the youth movement of the late 1920s. It is generally credited to Eberhard Koebel ("tusk") and was inspired by northern tents; its name is taken from kota, a Finnish word for a hut or tent. A Kohte is made of black cotton canvas panels that are buttoned together, so each member of a group can carry one panel. The Jurte was developed later within the same movement from the same idea: panels for a cone roof plus panels for vertical walls. It borrows its name from the Central Asian yurt but is a different tent. Both are still widely used by scout and youth groups, which have a lot of practical experience with them — including the small fire inside, discussed below.
Tipi vs tunnel tent: pros and cons
A tipi is neither better nor worse than a dome or tunnel tent; it solves different problems. Its strengths are headroom, simplicity and steady behaviour in wind from changing directions. Its weaknesses are wasted floor space at the low edges, the need for a large flat pitch and a lot of pegs, and — for canvas versions — weight.
Tipi tents: honest trade-offs
Pros
- Standing or sitting headroom in the centre
- Sheds wind evenly from all sides when pegged well
- One pole, few parts, quick to understand
- Room for groups, gear and a cooking area
- With a stove jack or traditional canvas design: space for heat
Cons
- Low edges: usable floor is smaller than the footprint
- Needs a large, level, peg-friendly site
- Many pegs; freestanding pitches are impossible
- Centre pole in the middle of the living space
- Canvas versions are heavy and slow to dry
| Tipi tent | Tunnel tent | |
|---|---|---|
| Headroom | High in the centre, low at the edge | Moderate along the length |
| Wind | Even from all directions when pegged evenly | Strong end-on, weak broadside |
| Space per weight | Good for groups, less efficient for one or two | Very good for one to three people |
| Pitch needs | Large round flat spot, many pegs | Long narrow spot, fewer pegs |
| Group use | Sleeps in a circle, central gathering space | Sleeps side by side, little communal space |
| Heating | Possible only with a stove jack or traditional canvas fire design | Not designed for heating |
Weight is the big divider. A synthetic one-pole tipi for two or three people can be about as light as a tunnel tent of similar floor area. A canvas lavvu or Kohte for a group weighs several kilograms and more — shared between many people that is fine, carried alone it is not. Check the numbers for your trip with the Kit Builder, and compare with the wider options in tent vs tarp vs hammock.
Canvas or synthetic? Tipi tent materials
The fabric decides almost everything else: weight, how the tent handles condensation, how it ages and whether any kind of heat inside is even worth considering. The general trade-offs are the same as in our tent fabric guide; here is what they mean for cone tents.
| Material | Strengths | Weaknesses | Fire behaviour |
|---|---|---|---|
| Cotton canvas | Breathes, less condensation, quiet in wind, traditional for Kohte and Jurte | Heavy, absorbs water, slow to dry, mildews if stored damp | Spark-resistant, not fireproof: embers can still burn holes |
| Poly-cotton | Breathable, lighter and more durable than pure cotton | Still heavy, needs careful drying | Spark-resistant, not fireproof |
| Coated polyester | Light, stays taut when wet, dries fast | Condensation on the inside, louder in wind | Melts and burns from sparks — no fire anywhere near it |
| Silicone-coated nylon/polyester | Very light, small pack size | Sags when wet (nylon), condensation, slippery seams | Melts and burns — no fire anywhere near it |
New cotton canvas often weeps a little in its first heavy rain until the fibres swell and the needle holes close; many makers recommend a first pitch in rain or a thorough wetting and drying before the first trip. Follow your tent's instructions. Synthetic tipis need no weathering but suffer more from UV in long pitches.
What size tipi do you need?
Capacity labels on cone tents are optimistic, because the sloping walls take headroom at the edge. Plan by the circle, not by the number on the bag.
- Sleeping like spokes: in larger tipis people lie radially, heads to the wall and feet towards the centre, or the other way round. Each sleeping mat then needs most of the radius, plus room around the pole.
- Sleeping side by side: in small tipis two people lie parallel on one side of the pole. Check the diameter against your mat length and how much the wall slopes over your head.
- Gear and wet kit: boots and packs go in the low ring near the wall or under a porch; the centre stays free for moving and, in heated designs, for the stove or fire area.
- Heat: a tent with a stove or a fire needs much more space than one without, because sleeping places must stay well away from the heat source.
As a rule of thumb, choose one size bigger than the label for comfort and for wet days. For winter use, add your sleep system to the plan with the sleeping bag and R-value calculator.
Pitching a tipi tent step by step
The most common mistake is to put the pole up first and then try to peg out a sagging cone. It works the other way round: circle first, pole second, tension third. Practise once in a garden or park before a trip; that is also the moment to check that all pegs and the pole sections are in the bag.
Pegging the base out in an even circle
 1Lay it flat, door zipped, door to the lee
Spread the tent on the ground, close the door zip (pegging with an open door strains the zip and distorts the circle) and turn the door away from the wind.
 2Door peg, then the opposite peg
Peg the corner below the door, then pull the opposite corner straight across until the floor or base is just taut and peg it. This line fixes the diameter.
 3Then the two sides at 90°
Peg the corners halfway between, at right angles to the first line, with the same tension. The base should now look like a square inside a circle.
 4Fill in the rest evenly
Peg the remaining corners. The outline should be a regular polygon with no folds. Leave pegs a little loose; you will re-set them once the pole stands.
For large canvas tipis without a floor, groups often mark the circle first: a stake in the centre and a cord the length of the radius serve as a compass, and the pegs go on the line. It is the same principle as above, just more precise.
Raising the pole and tensioning
Crawl in through the door with the pole, set its tip into the apex cup or grommet and push the pole upright. On soft ground, put a foot plate, a flat stone or a piece of board under it so it does not sink, which would slacken the whole tent overnight. Adjustable poles are set to the length the maker gives; with a fixed pole, the base circle decides the tension, so re-set pegs rather than forcing the pole.
Tension, guylines and vents
- Re-set every peg Walk round and re-drive each peg at about 45°, with the head leaning away from the tent, until the walls are smooth and the pole stands vertical. Uneven tension shows as diagonal creases and a leaning pole.
- Guy out windward first Peg out the guylines from the panel points on the windward side first, then the rest, at the same tension. Learn an adjustable hitch such as the taut-line hitch or use the tensioners supplied.
- Vents and door Open the top vent or smoke hole, and lift the base or door slightly if the design allows, so air can enter low and leave high. Re-check tension after an hour and after rain.
What a good tipi pitch looks like
- Pole vertical, standing on a firm base
- Walls smooth, no diagonal creases
- Base a regular circle or polygon, all pegs at about 45°
- Door closes without strain on the zip
- Guylines evenly tensioned, windward side checked twice
- Vent open, small air gap at the base
Pegs matter more in a tipi than in a dome, because they carry the whole structure. Carry a few spares and match them to the ground; a wooden mallet helps in firm soil without bending them, and the anchoring tricks in camping in wind help in sand and loose ground.
Kohte and Jurte: the German canvas panel tents
A Kohte is pitched differently from a one-pole tipi. Its black canvas panels — usually four for a standard Kohte — are buttoned together into a cone with an open top. A small wooden cross (the Kohte cross) spreads the smoke hole, and the whole tent is hung from a tripod of long poles set up outside, from a line between two trees, or from a single pole inside. Groups often cut the poles on site where the landowner allows it, or carry them on a cart; check this before the trip.
Pitching a Kohte from panels
 1Button the panels together
Lay the panels out and button them along their edges, leaving the door seam open. Check every loop: a missed button lets rain in and puts strain on its neighbours.
 2Spread the smoke hole with the cross
Push the two sticks of the Kohte cross through the loops around the top opening so it is held open and square. A closed smoke hole would trap smoke and moisture.
 3Hang it from a tripod
Lash three poles into a tripod (see lashings) and hoist the cone by a cord from the top. Alternatives are a line between two trees or a centre pole.
 4Peg out the base evenly
Peg the lower edge all round, as with any tipi: opposite pairs first, then fill in. Close the door, check the walls hang smooth and keep the smoke hole open.
A Jurte combines roof panels with wall panels, giving vertical sides and far more usable floor space. It is pitched with a ring of guylines on the eaves and a roof held by a tripod, centre pole or cross, depending on size and group custom. Several sets of panels can be combined into large structures for camp kitchens and meetings. Because the system is modular, it suits base camps and longer group camps rather than fast trips.
The black colour is traditional and shows soot less. It also warms up quickly in the sun, which is pleasant in spring and autumn but hot in summer — open the door and lift the lower edge for a through-draught.
How tipis handle wind and rain
A well-pitched cone has no broadside: wind from any direction meets the same sloping wall and slides over it. That is why lavvus survive open, windy terrain. The weak points are slack walls, a sinking pole and a door that catches the wind.

- Door to the lee: orient the door away from the expected wind before you peg, because you cannot turn a pitched tipi. The full logic for orienting shelters is in camping in wind.
- All guylines out: they take load off the base pegs and stop the walls flapping. In rising wind, add a second peg behind any that starts to move.
- Vent on the lee side: turn adjustable vents or smoke flaps away from the wind so it does not blow in.
- Know your limits: check the forecast and the gusts with the wind and Beaufort camp calculator. In storms no fabric beats a sheltered site, and a tipi under tall trees is exposed to falling branches.
Rain
Steep cone walls shed rain fast. Water can, however, run down the centre pole from the apex, and an open smoke hole lets rain fall into the middle. Many tipis have a rain cap or a closable top vent for wet weather; in heated designs the stove pipe keeps the top open, so the drip zone around the pole needs a plan. Keep the base edge snug to the ground or with a small overlap so rain does not blow under it, and pitch on free-draining ground. More wet-weather routines are in camping in the rain, and good rain gear lets you peg out without getting soaked.
Condensation in a tipi tent
Most one-pole tipis are single wall: the fabric you see from inside is the same fabric the rain hits. On clear, cold, still nights the warm, moist air from people and wet gear meets that cold wall and condenses. Canvas absorbs and breathes much of it; synthetic walls drip. The cone shape helps, because warm air rises to the apex — if it can get out there.

| Symptom | Likely cause | What to do |
|---|---|---|
| Wet inner walls in the morning | Still, clear night; vent closed | Open top vent, leave a gap at the base |
| Drips onto sleeping bags | Bags touch the sloping wall | Sleep further in, use an inner tent or liner |
| Musty, damp air | Wet clothes and boots inside | Keep wet kit in a porch or bag, dry it outside |
| Frost on the walls | Below-freezing night | Shake off before packing, dry the tent at home |
An inner tent or a liner along the lower wall is the most effective upgrade for synthetic tipis. For a deeper look at why condensation happens and how vents work, see tent ventilation and condensation in the rain.
Fire in a tipi or Kohte: when it is acceptable and when it never is
Tipis, lavvus and Kohten are famous for the fire in the middle, and that reputation leads to dangerous copying. Be clear about which of three situations you are in.
- Synthetic tipi without a stove jack: never any fire, stove, grill, embers or hot stones inside. The fabric melts in seconds, and anything that burns produces carbon monoxide, which you cannot smell. This is the rule in campfire safety, and it applies without exception.
- Tipi or lavvu with a stove jack: a wood stove may be used only as the tent maker intends, with the pipe through the jack, a spark arrestor, high and low vents open, a tested CO alarm and the clearances in the manuals. Everything in hot tents and tent stoves applies here.
- Canvas Kohte, Jurte or traditional lavvu built for an open fire: a small open fire under the smoke hole is a long tradition in youth groups and in the north. It is acceptable only in canvas tents made for it, where fires are allowed, with experienced people, and with the precautions below.
Can we have a fire in this tent?
Is the tent made of nylon, polyester or another synthetic fabric without a stove jack?
Yes → No fire, stove or embers inside at all. Cook and warm up outside, at least 5 m away.No → Go on to the next question.Does it have a stove jack and a stove made for it?
Yes → Stove only, following the hot tent rules: vents open, CO alarm, never asleep with it burning.No → Go on to the next question.Is it a canvas Kohte, Jurte or traditional lavvu designed for an open fire, and are fires allowed here with no fire ban?
Yes → A small fire under the open smoke hole is possible with an experienced person in charge and the precautions below.No → No fire inside. Keep warm with your sleep system and dry clothes.
A small fire in a canvas Kohte, safely
 1Check rules, ban and wind first
An open fire in a tent counts as an open fire: forest fire rules, bans and the landowner's permission apply. In strong wind (Beaufort 5 and above) sparks fly from the smoke hole — skip the fire.
 2Small ring on bare soil, beds at the wall
Clear a patch to mineral soil in the centre and ring it with stones. Sleeping places stay at the wall, as a rule of thumb at least about 1 m from the fire ring, with nothing synthetic nearby.
 3Small fire, air in low, smoke out the top
Keep the fire plate-sized, with dry, thin wood that burns cleanly. Keep the smoke hole open and a gap at the door or base so fresh air enters low. Smoke at head height means stop.
 4Fire watch, or out before sleep
Nobody sleeps beside an unattended fire. Either someone stays awake, or the fire is put out with water and the ashes are cold before the group sleeps. A CO alarm is a sensible back-up.
Children and dogs need extra rules near a fire in a tent: one adult is in charge of the fire, nobody else feeds it, and children sleep furthest from it — see bushcraft with kids. Have a first aid kit with burn dressings, and cool burns with cool water for about 20 minutes as in our first aid guide.
Site choice, group camps and base camps
A tipi needs more ground than its floor suggests: the base circle plus a ring of guylines. Look for a level, round patch that takes pegs, with no roots or stones where people will sleep. The general rules from choosing a camp site apply in full: look up for dead branches (see widowmakers), avoid hollows where cold air and water collect, and keep camp at least 60 m from lakes and streams.
Group camps
Cone tents shine in groups. A large tipi or Jurte makes a central meeting and cooking space, smaller tents or Kohten form the sleeping area around it. Plan the layout as in base camp zones: sleeping tents on the windward side of any outdoor fire, at least 5 m from it, kitchen and woodpile separate, toilet area well away from tents and water. Clear paths between tents keep guylines from becoming trip wires at night; mark them or keep them short.
Base camps and long stays
For a stay of several days a tipi becomes a little house: a groundsheet or floor for the sleeping half, a drying line high up (never over a stove or fire), boxes for food and a fixed place for boots. Re-tension after the first night and after every rain; canvas and nylon both change length with moisture. More on camp routines is in camp setup.
Where can you pitch one?
A tipi is a tent like any other in the eyes of the law. Rules on where you may camp differ by country, region and landowner, and large group tents usually need the landowner's permission or a campsite. Read wild camping rules for the background; this is not legal advice. Fires — inside or outside the tent — need separate permission, see fire and wild camping.
Caring for a tipi: drying, storing and repairing canvas
Canvas lasts for many years if it is dried properly; it can be ruined in a few weeks if it is packed away damp. Synthetic tipis are more forgiving but share the same basic routine as any tent in tent care.
Canvas care after a trip
 1Dry it fully, even after dew
Even a dry night leaves dew in canvas. Pitch or hang the tent until every seam and the base edge are dry, within a day or two of coming home.
 2Brush off dirt once dry
Let mud dry, then brush it off with a soft brush. Avoid detergents and scrubbing, which strip the proofing and weaken the fibres.
 3Store dry, loose and airy
Store canvas loosely in a breathable bag in a dry place. Packed damp, it develops mildew spots that stain and rot the fabric.
Repairs and re-proofing
Small burn holes, torn peg loops and missing buttons are easy to fix if you deal with them before the next trip: patch canvas with canvas, re-sew loops with strong thread, and replace buttons on a Kohte panel before they are lost. Re-proof canvas with a product made for cotton tents when water no longer beads. A sail needle, waxed thread and a few patches belong in the group's repair kit. Check the pole for cracks and the foot plate for wear, and count the pegs when you strike camp.
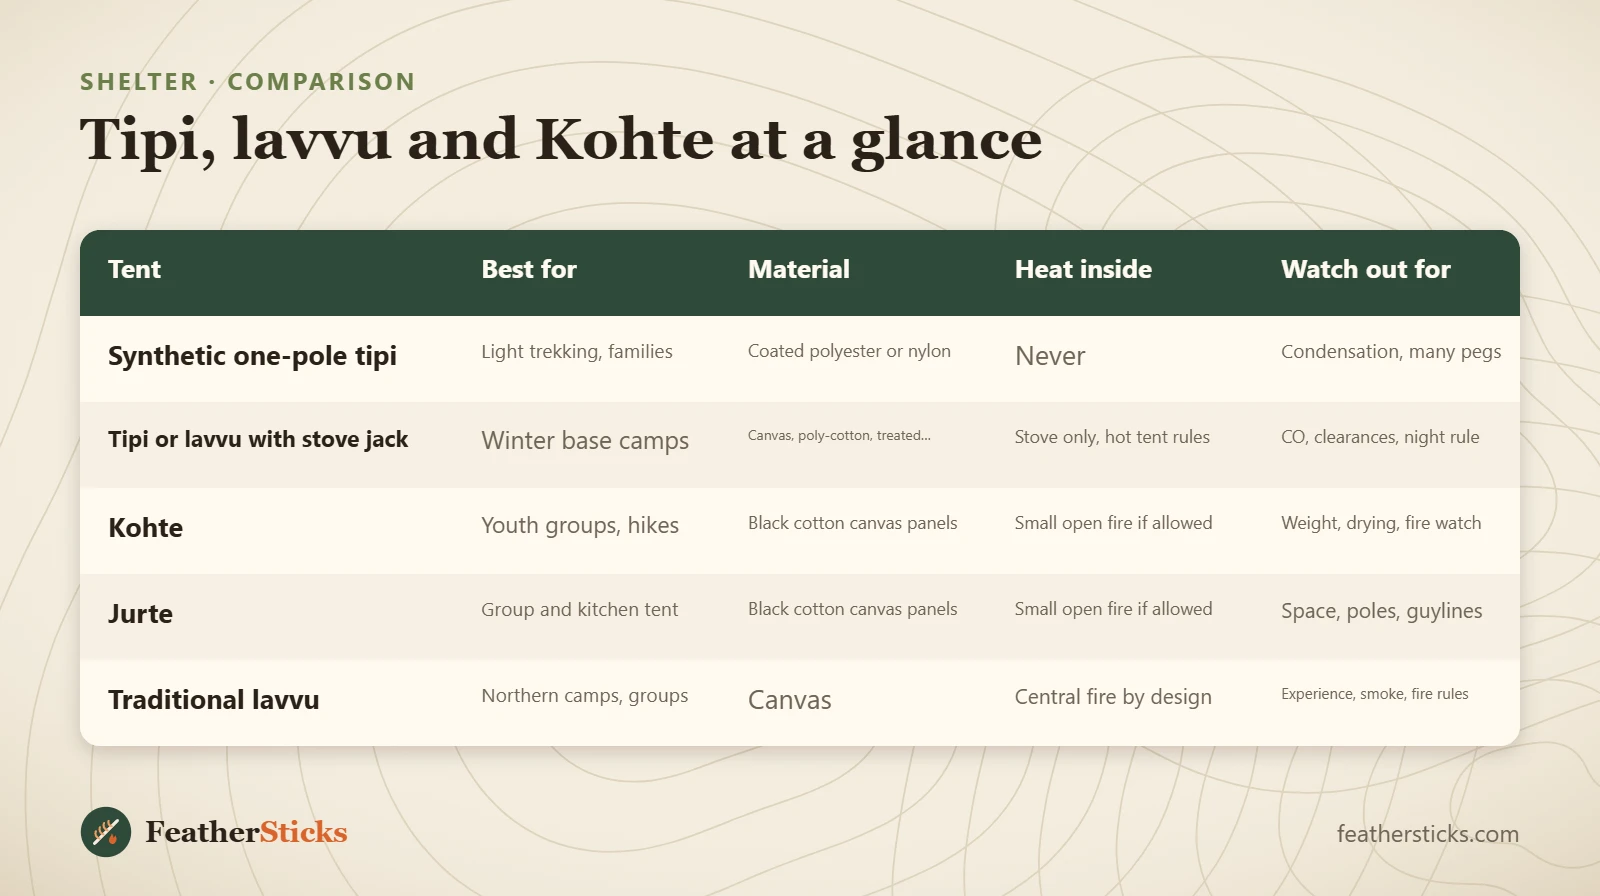
| Tent | Best for | Material | Heat inside | Watch out for |
|---|---|---|---|---|
| Synthetic one-pole tipi | Light trekking, families | Coated polyester or nylon | Never | Condensation, many pegs |
| Tipi or lavvu with stove jack | Winter base camps | Canvas, poly-cotton, treated synthetics | Stove only, hot tent rules | CO, clearances, night rule |
| Kohte | Youth groups, hikes | Black cotton canvas panels | Small open fire if allowed | Weight, drying, fire watch |
| Jurte | Group and kitchen tent | Black cotton canvas panels | Small open fire if allowed | Space, poles, guylines |
| Traditional lavvu | Northern camps, groups | Canvas | Central fire by design | Experience, smoke, fire rules |
Common mistakes
- Raising the pole before pegging the base, which gives a crooked, creased cone.
- Pegging with the door open, so the zip is strained and will not close.
- Leaving the pole on soft ground, where it sinks and slackens the tent overnight.
- Lighting any fire, stove or embers in a synthetic tipi without a stove jack.
- Closing every vent or the smoke hole to keep heat in.
- Sleeping beside an unattended fire or smouldering embers.
- Packing canvas away damp and finding it mildewed weeks later.
What you need
- Tipi, lavvu or Kohte panels with all buttons and loops
- Centre pole or tripod poles, foot plate or flat stone
- Full set of pegs plus spares, mallet
- Guylines with tensioners
- Groundsheet or inner tent for the sleeping area
- Sail needle, waxed thread, canvas patches
- For heated tents: CO alarm, water, fire blanket, first aid kit with burn dressings
FAQ
What is the difference between a tipi and a lavvu?
How do you pitch a tipi tent?
Is a tipi tent good in wind?
Can you have a fire in a tipi tent?
Is a canvas or synthetic tipi better?
Tipi or tunnel tent: which should I buy?
How do I stop condensation in a tipi?
Check yourself
Completed6 quick questions from this guide. Nothing is sent anywhere.
Related step-by-step guides
-
 1
-
 1
-
 1