Rain Gear: Jackets, Ponchos & Gaiters for Hiking and Bushcraft
The best rain gear for hiking is a system, not a single jacket: a waterproof shell with a good hood and pit zips, rain trousers or chaps for the legs, gaiters for wet grass and brush, and – depending on terrain – a poncho that also covers your pack and doubles as a shelter. Just as important is how you use it: vent before you sweat, layer sensibly underneath and keep the outer fabric beading water.
This guide explains waterproof vs water-resistant, how membranes and coatings work, why you still get wet inside, the honest pros and cons of rain jacket vs poncho, which gaiters suit which job, and how to wash and reproof your gear. It builds on our guide to bushcraft clothing and layering and belongs to our bushcraft gear guides. For the camp side of bad weather, see camping in the rain.
Step by step
-
1

Choose jacket, poncho or both
A jacket handles wind and brush; a poncho ventilates, covers the pack and becomes a shelter. Many bushcrafters carry a jacket and use a tarp for camp.
-
2

Check hood, pit zips and length
The hood should turn with your head and have a stiff peak. Pit zips let steam out, and the hem should cover your seat.
-
3

Protect legs and feet
Rain trousers or chaps keep your thighs warm; gaiters stop water, mud and ticks from getting into the boot top.
-
4

Vent before you sweat
Open pit zips and the front zip early, take off the mid layer and slow down slightly. Sweat soaks you as fast as rain.
-
5

Dry, wash and reproof
Hang gear to dry after every trip, wash it with a technical cleaner and renew the water-repellent finish as the label says.
Waterproof vs water-resistant: what the labels mean
Water-resistant (or "water-repellent") clothing sheds a shower for a while: drops roll off a tightly woven fabric or a chemical finish, but under steady rain, pressure from pack straps or kneeling on wet ground, water eventually soaks through. Soft shells, wind smocks, poly-cotton and many "outdoor" jackets fall into this group. Waterproof clothing has a continuous barrier – a membrane or a coating – plus taped or sealed seams, so water cannot pass even after hours of rain.
Both have their place. A water-resistant smock breathes far better and is ideal for drizzle, wind and work by the fire. A waterproof shell is the one you need when it rains all day, when it is cold and windy, or when getting wet would be dangerous. In cool, wet weather, wet clothing drains body heat fast – water conducts heat around 25 times faster than air – which is why a real waterproof jacket goes on every trip in our Kit Builder.
Hydrostatic head: how waterproof is waterproof?
Waterproofness is usually given as hydrostatic head in millimetres: the height of a water column a fabric resists before water is pressed through. The number is useful as a concept, but not as a precise ranking, because labs and test methods differ and seams, zips and wear matter more in the field.
| Item | Typical stated range | Why |
|---|---|---|
| Water-resistant smock, soft shell | No rating or low values | Sheds showers; soaks through under steady rain or pressure |
| Tarp or flysheet | ≈ 1,500–3,000 mm | Pitched at an angle, nothing presses on it – see how waterproof a tarp needs to be |
| Rain jacket and trousers | Commonly about 5,000–20,000 mm or more | Shoulder straps, sitting and kneeling press water into the fabric |
| Groundsheet | Higher than the tarp above it | Body weight presses directly onto wet ground |
Typical label values for orientation only, not test results. A worn coating or open seam leaks whatever the number says.
In practice, check three things before the number: taped seams (look inside for tape strips along every seam), covered or water-resistant zips and a hood that seals around the face. A jacket with a modest rating and good construction keeps you drier than a high number with a poor hood.
How waterproof breathable jackets work: membranes and coatings
A waterproof breathable jacket must do two contradictory jobs: keep liquid rain out and let water vapour from your sweat escape. There are two basic ways of doing this, and many variations of each.
- Membranes: a very thin film laminated to the back of the outer fabric. Microporous membranes have pores far too small for a water drop but large enough for vapour molecules; other membranes are solid and move vapour through the material itself by diffusion. Membranes are usually the most durable and breathable option.
- Coatings: a waterproof layer brushed or sprayed onto the inside of the fabric. Coated jackets are often cheaper and lighter, but usually breathe less and can wear off at friction points such as shoulders and hips.
The barrier is protected inside by a liner: a third fabric layer (often called "3-layer"), a printed or thin protective layer ("2.5-layer") or a loose mesh hanging inside ("2-layer"). Three-layer shells are the most robust for packs and brush; light 2.5-layer jackets pack small but wear faster.

The water-repellent finish (DWR)
The outer fabric carries a durable water-repellent finish (DWR) that makes rain bead up and roll off. It is not what keeps you dry – the membrane does that – but it is what keeps the jacket breathable. When the DWR wears off, the outer fabric soaks up water ("wets out"), turns darker and heavier, and a film of water now sits over the membrane. Vapour can hardly get through, condensation builds inside, and the jacket feels cold and clammy although it is not leaking. That is why care and reproofing matter so much (see below).

Breathability ratings as a concept
Breathability is stated in two common ways. MVTR (moisture vapour transmission rate) gives how many grams of vapour pass through a square metre in 24 hours – higher is better. RET (resistance to evaporative heat transfer) works the other way round – lower is better; as a commonly quoted rough guide, values under about 6 are described as very breathable and values above about 20 as poorly breathable. Different test methods give very different numbers, so compare figures only within one maker's range, never across brands.
The honest summary: no fabric breathes fast enough for hard work. Climbing a hill with a pack, you can produce far more sweat than any membrane can move. Breathability helps at an easy pace and at rest; for everything else you need ventilation.
Why you still get wet inside a rain jacket
Most "leaking" jackets are not leaking. The water on the inside comes from three sources, and only one of them is rain:
- Sweat: you produce more vapour than the fabric can pass, and it soaks your base layer.
- Condensation: warm, moist air meets the cold inner surface of the shell and turns into droplets – like breath on a cold window. The colder and wetter it is outside, the more it condenses, and a wetted-out face fabric makes it worse.
- Real leaks: water running in at the hood, cuffs and hem, wicking up sleeves, through worn seam tape, a failed coating or an open pocket.

Venting: the skill that keeps you dry
Venting means letting steam out before it condenses. Open the pit zips and the front zip partway, loosen the cuffs, push the hood back when the rain eases, and take the mid layer off before a climb rather than at the top. Slowing down a little so you do not overheat is the single most effective trick. Many experienced walkers keep a hat under the hood and open the jacket wide in mild rain – a damp base layer that stays warm is better than a soaked one.
| What you notice | Likely cause | What to do |
|---|---|---|
| Back and chest damp, sleeves dry | Sweat and condensation | Open pit zips, mid layer off, slower pace |
| Outer fabric dark and heavy | DWR worn, face fabric wetted out | Wash and reproof at home; vent more today |
| Wet collar and neck | Hood not sealed, rain running in | Adjust the hood volume and face cord, close the collar |
| Wet forearms | Water running into the cuffs | Cuffs over gloves, arms down when possible |
| Wet shoulders only | Pack straps press water through worn fabric | Check the coating; use a pack cover or poncho |
| Damp patches along seams | Seam tape peeling | Re-seal at home – see field repair kit |
Best rain gear for hiking: jacket features that matter
In a storm, details decide whether you are comfortable. Try a jacket on over a fleece, with your pack if you can, and move.
- Hood: the most important feature. It should turn with your head (adjust the volume at the back), close around the face with a cord, and have a stiff peak that keeps rain off your face and glasses. A hood that blocks your side vision is dangerous on rough ground.
- Pit zips: long underarm zips for venting. Worth their small weight for anyone who walks uphill.
- Length: a hem that covers your seat keeps water off the top of your trousers when you sit on a log or kneel. Very short "alpine" cuts suit climbing harnesses, not bushcraft.
- Sleeves and cuffs: long enough not to ride up when you reach forward, with adjustable cuffs that fit over gloves.
- Front zip and pockets: a storm flap or water-resistant zip, and chest pockets above a hip belt so they stay reachable with a pack on.
- Fabric weight: heavier face fabrics resist thorns and pack abrasion better. The Kit Builder counts a typical rain jacket at 350 g.
Fitting check in the shop or at home
- Hood turns with your head and you can still see to the side
- Peak keeps rain off your face when you look down
- Arms raised: hem stays over your waistband, cuffs over your wrists
- Room for a fleece underneath without restricting movement
- Pit zips reachable and usable with one hand
- Chest pockets clear of the pack hip belt
- Seams taped inside, zips covered or water-resistant
Rain jacket vs poncho: which is better?
The rain jacket vs poncho question has no single answer – it depends on terrain, wind and what else you carry. A jacket fits close, stays put in wind and moves through brush. A poncho is a large waterproof sheet with a hood: it ventilates from below, covers you and your pack, and can become a shelter or groundsheet.
Rain jacket vs poncho
Rain jacket
- Stays in place in strong wind
- Moves through dense undergrowth without snagging
- Works with rain trousers as a full system
- Pack needs its own cover or liner
- Breathes less – venting is up to you
Poncho
- Excellent ventilation from below
- Covers the pack, no extra cover needed
- Doubles as a small tarp or groundsheet
- Flaps and catches the wind on open ground
- Snags on branches, wets the lower legs
A rule of thumb: on forest tracks in warm, steady rain a poncho is very comfortable; on exposed ridges, in cold wind or in thick scrub, a jacket is safer. Many bushcrafters carry a jacket for moving and a tarp for camp. Others carry a poncho as their backup shelter – the Kit Builder lists an emergency poncho or small backup tarp at about 300 g for trips where you plan a natural shelter.
Jacket, poncho or both?
Will you be on open, windy ground (moors, ridges, coast)?
Yes → Take a rain jacket – a poncho turns into a sail. Add rain trousers in cool weather.No → Go on to the next question.Is the route through dense brush or thick young forest?
Yes → A jacket and gaiters move through it better.No → Go on to the next question.Do you want your rain layer to double as a shelter?
Yes → Carry a poncho – or a jacket plus a light tarp if weight allows.No → A jacket with pit zips and a pack liner is the simplest choice.
Umbrellas: underrated on tracks
On wide forest roads in calm rain, a trekking umbrella is surprisingly good: it keeps your head and upper body dry while you leave the jacket open for maximum ventilation, and it is pleasant at a sit spot or while reading the map. It is useless in strong wind and dense undergrowth, takes a hand away from poles, and you should never hold one up in a thunderstorm – see what to do in a thunderstorm. Treat it as an extra, not a replacement for a shell.
Using a poncho as a shelter or groundsheet
Shelter-style ponchos have reinforced grommets or tie-outs at the corners and sides and a hood that can be closed. Typical sizes are often around 1.4 × 2.2 m – small for a tarp, so pitch low and choose a sheltered spot. The basic pitches are the same as for any tarp; our tarp shelter guide explains ridgelines and knots, and bivouacking shows how a minimal shelter and a bivvy bag work together.
From rain cover to shelter
 1Lay it out, tie the hood shut
Spread the poncho flat and close the hood tightly with its drawcord, or twist it and tie it off with cord. An open hood on a roof is a funnel straight onto your sleeping bag.
 2Ridgeline and low A-frame
Run a taut ridgeline between two trees at about hip to chest height, drape the poncho over it and peg the side grommets low. A low pitch gives more cover from a small sheet.
 3Lean-to with the low side to the wind
In wind-driven rain, tie one long edge high and peg the other edge to the ground on the windward side. The sloping back takes the wind and rain; you lie under the high side.
 4Or use it as a groundsheet
Under a tarp, the poncho can protect your pad and bag from wet ground. Keep it well inside the drip line – an edge sticking out catches rain and channels it under you.
Leave the ends open so condensation can escape, and pack a wet poncho outside the main compartment. The tarp pitch planner helps with cord lengths for small sheets too.
Rain trousers and chaps: keeping your legs warm
Wet thighs cool you much more than most people expect, especially in wind. In summer showers you can often accept damp legs if your trousers dry fast. In autumn, winter and on long rainy days, rain trousers are worth their weight.
- Full rain trousers: the most complete protection. Look for long side zips (ideally to the hip) so you can pull them on over boots, an elastic or adjustable waist, and reinforced inner ankles where crampons or boot hooks rub.
- Rain chaps: two separate leg tubes tied to a belt. They ventilate far better than trousers and work well under a poncho or long jacket, but leave the seat and crotch exposed.
Put rain trousers on early – it is much easier on dry ground than sitting in mud. Wear them over the gaiters in rain, so water runs down the outside rather than into the gaiter top; in deep snow it is often the other way round.
| Option | Protection | Ventilation | Best for |
|---|---|---|---|
| Full rain trousers | Very good | Low – use side zips to vent | Cold rain, wind, all-day rain |
| Rain chaps | Good on legs, none on seat | Good | With a poncho or long jacket, warm rain |
| Water-resistant trousers only | Showers only | Very good | Summer, short wet spells |
Hiking gaiters: low, high, brush, snow and ticks
Hiking gaiters close the gap between trousers and boots. They keep water running down your legs, wet grass, mud, needles, stones and snow out of the boot top, protect trousers from thorns and are a simple barrier against ticks. They extend the range of any boot – our guide to waterproof versus breathable boots explains why water entering over the top is the main reason for wet feet.
| Type | Height | Good for | Limits |
|---|---|---|---|
| Low / ankle gaiters | Just above the ankle | Trail shoes, grit, needles, dew | Do not stop wet grass at shin height |
| High gaiters | Just below the knee | Wet grass, mud, brush, rain running down | Warmer, need a good fit over boots |
| Snow / winter gaiters | Knee-high, robust | Deep snow, crust, cold | Heavier; check moving through snow |
| Brush gaiters | Knee-high, abrasion-resistant front | Thorns, heather, thick undergrowth | Less breathable |
Putting on gaiters
 1Wrap it round the lower leg
Most gaiters open at the front or side. Wrap the gaiter round your lower leg with the closure at the front, over the trouser leg (or tuck the trousers into it in brush and snow).
 2Hook the laces, strap the instep
Clip the front hook into the lowest lace or the lace loop, then pass the strap under the arch of the boot, just in front of the heel. A strap under the ball of the foot wears through fast.
 3Close the front, cinch the top
Close the hook-and-loop or zip from the bottom up and tighten the top cord just below the knee – snug enough not to slip, loose enough not to press on the calf.
Gaiters against ticks
Ticks wait on low vegetation and climb upwards from your boots. Light-coloured gaiters over the trousers close the gap and make ticks easy to spot and brush off. They do not replace a body check in the evening – see protection against ticks and mosquitoes for repellents, treated clothing and correct tick removal.
Waxed cotton and canvas: rain gear for the bushcraft fire
Before synthetic shells, outdoor people stayed dry in waxed cotton, oilskin and tightly woven canvas. They are still popular in bushcraft for one reason: the fire. A spark landing on a membrane jacket melts a hole – and molten synthetic fabric on skin causes serious burns. Waxed cotton and canvas char at worst and do not drip.

Waxed cotton and canvas
Strengths
- Tolerates sparks far better than synthetics
- Very robust against thorns and wear
- Quiet, repairable, re-waxable for decades
- Windproof and good in drizzle
Weaknesses
- Heavy, and heavier still when wet
- Breathes poorly once waxed
- Wax can soak through in long, hard rain
- Stiff in cold weather, needs regular re-waxing
A practical approach: a waxed cotton, wool or poly-cotton smock in camp and at the fire, the light synthetic shell for long wet walks.
What to wear under rain gear
Rain gear only works as part of the layering system. Underneath the shell, every layer should keep some warmth when damp – wool or synthetics, never cotton in cool weather.
Under the shell (top = outermost)
- Stops rain and wind; vented through pit zips and front zip
- Light fleece or thin wool – often too warm while walking in rain, put it on at breaks
- Merino or synthetic – stays warm when damp from sweat
Wear less under a shell than you think: the jacket itself adds a lot of warmth by stopping wind. A common pattern is base layer plus shell while walking, then an insulated jacket on top of or under the shell at every stop. In cold, wet and windy weather, check the feels-like temperature with the wind chill calculator and watch each other for early signs of hypothermia: shivering, clumsiness, mumbling. Wet and windy at a few degrees above freezing is the classic hypothermia weather.
In warm summer rain, the opposite applies – a shell can make you hotter and wetter than the rain itself. A light, quick-drying shirt, an umbrella or an open poncho may be the better choice; see hot weather for heat illness signs.
Washing and reproofing rain gear
Dirt, sweat, sun cream and smoke clog the outer fabric and break down the DWR. Regular washing does not harm a waterproof jacket – it usually restores performance. Always follow the care label: temperatures, detergents and whether heat is allowed vary between fabrics.
Wash and reproof a rain jacket
 1Read the label, prepare
Check the care label, close all zips and hook-and-loop tabs, loosen the cords and empty the pockets. Use a technical cleaner for outdoor clothing, not normal detergent or fabric softener, which leave residues.
 2Wash and rinse thoroughly
Wash at the temperature on the label, then add an extra rinse so no detergent stays in the fabric. Detergent residue makes the fabric attract water.
 3Renew the water-repellent finish
If water no longer beads after washing, apply a spray-on or wash-in reproofer exactly as the product says – many are applied to the clean, still damp garment. Spray-on treats the outside only and suits membrane jackets.
 4Activate and test
Some finishes need gentle heat to work: tumble-dry or iron on low only if the label allows it. Then sprinkle water on the shoulders – it should bead and roll off again.
Waxed cotton is different: never machine-wash it. Brush off dirt when dry, sponge with cold water and re-wax the fabric when it looks pale and dry, usually by warming the wax gently and rubbing it in, then letting it cure. Store all rain gear clean, dry and loosely hung, not compressed in a stuff sack, and keep it out of hot car boots – heat and damp storage damage coatings and seam tape.
| Gear | Clean | Re-proof | Avoid |
|---|---|---|---|
| Membrane jacket and trousers | Technical cleaner, as the label says | Spray-on or wash-in DWR, heat only if allowed | Fabric softener, dry cleaning unless the label allows it |
| Coated poncho or cheap shell | Sponge or gentle hand wash | DWR spray on the outside | Hot water, wringing, long damp storage |
| Waxed cotton | Brush, cold sponge | Re-wax when pale | Washing machine, hot water, detergents |
| Gaiters | Rinse off mud, air dry | DWR spray if fabric soaks | Drying beside the fire |
Repairs and rain gear on a budget
Small damage grows quickly in rain gear: a thorn hole lets water in and frays, a peeling seam tape becomes a running leak. In the field, a round-cornered patch of repair tape on the outside (and ideally inside) seals a small tear for the rest of the trip; a broken zip slider can often be squeezed back into shape with pliers. Our field repair kit guide shows the materials and techniques. At home, peeling seams can be re-sealed with seam sealer, and larger tears are worth a professional repair before you replace a jacket.
Good rain gear without spending much
Rain protection is one of the places where money matters most – wet and cold is the most dangerous combination – but you can still save sensibly. Our guide to bushcraft gear on a budget puts a real rain jacket near the top of the priority list. Useful savings:
- A simple, robust shell with taped seams, a good hood and pit zips beats a light, expensive jacket with many features you do not need.
- Military surplus ponchos are tough and double as shelter, though usually heavy. Check the coating and grommets before relying on one.
- Second-hand waxed cotton can be re-waxed and used for decades around camp.
- Test old gear under a garden hose or shower before a trip – coatings fail with age, sometimes all at once.
- A pack liner (a strong bin bag works) is cheaper and more reliable than a pack cover alone – see backpacks and waterproof packing with dry bags.
Rain gear in camp: keeping the rest dry
At camp, rain gear becomes part of the routine of keeping your dry set dry. Put the shell back on for every trip out from under the tarp, hang wet jackets at the edge of the shelter where they drip outside the sleeping area, and never take wet rain gear into your sleeping bag. Watch the sky and put rain gear on before the first drops – reading weather signs helps with the timing.
The complete wet-weather camp – site choice, pitching, drips, condensation and cooking – is covered in camping in the rain, including why it drips inside. For lighting a fire in wet weather, see fire in the rain. If you are just starting out, our bushcraft for beginners guide shows which gear matters first, and the bushcraft kit list puts your rain gear in context.
Rain gear packing list
- Waterproof jacket with hood and pit zips
- Rain trousers or chaps (autumn to spring, all-day rain)
- Gaiters for wet grass, brush, snow or tick areas
- Poncho or small tarp if you need a backup shelter
- Pack liner and dry bags for sleeping bag and dry set
- Spare hat and gloves – they get wet first
- Repair tape for small tears
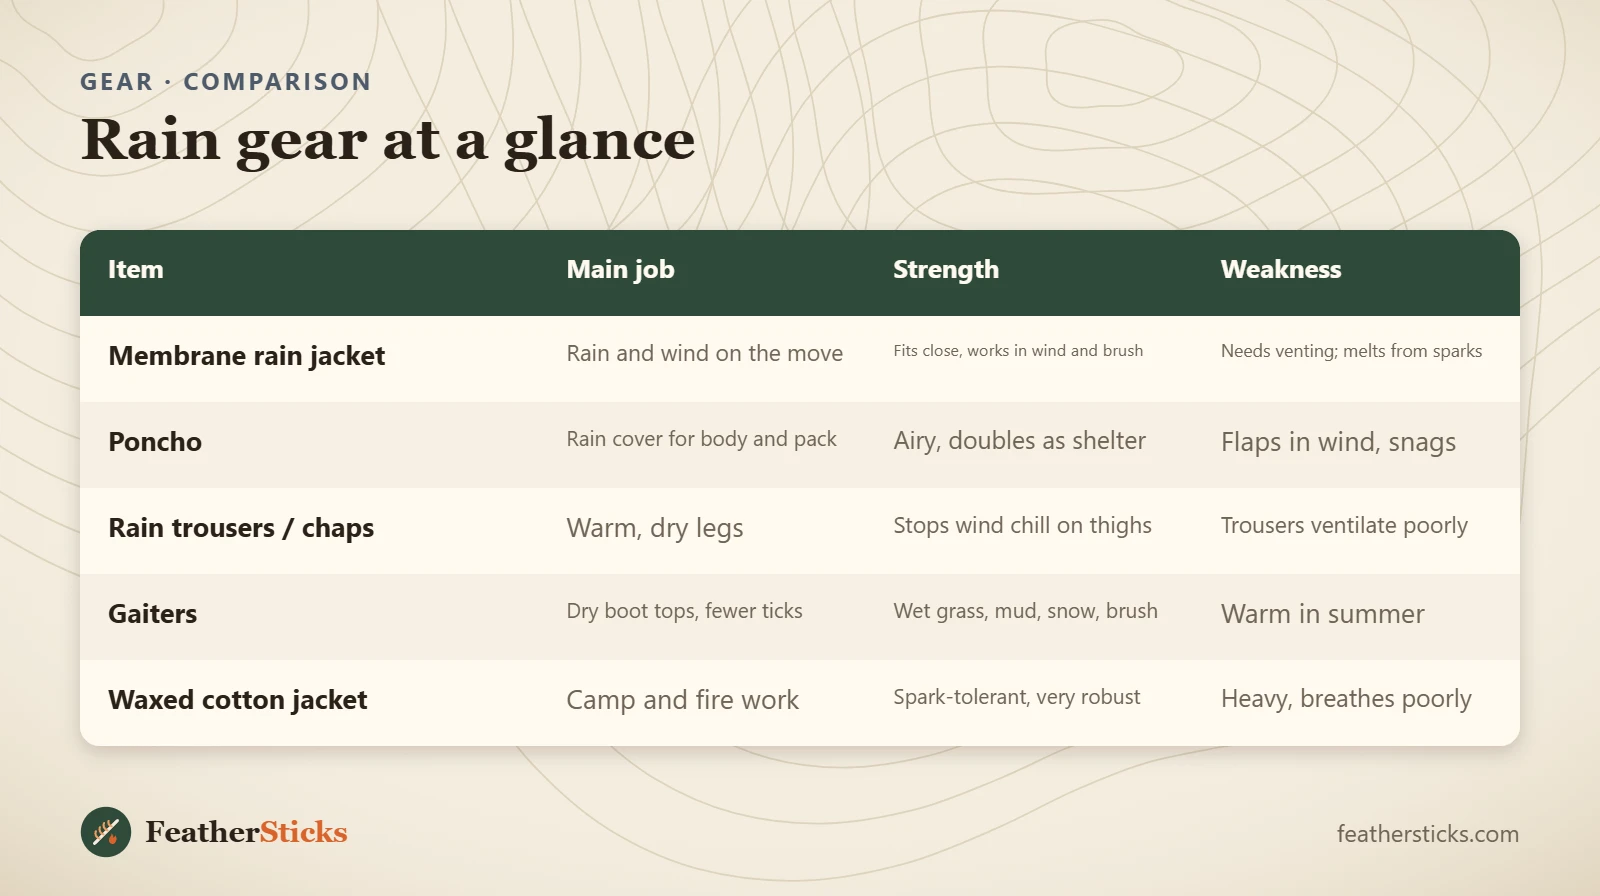
| Item | Main job | Strength | Weakness |
|---|---|---|---|
| Membrane rain jacket | Rain and wind on the move | Fits close, works in wind and brush | Needs venting; melts from sparks |
| Poncho | Rain cover for body and pack | Airy, doubles as shelter | Flaps in wind, snags |
| Rain trousers / chaps | Warm, dry legs | Stops wind chill on thighs | Trousers ventilate poorly |
| Gaiters | Dry boot tops, fewer ticks | Wet grass, mud, snow, brush | Warm in summer |
| Waxed cotton jacket | Camp and fire work | Spark-tolerant, very robust | Heavy, breathes poorly |
Common mistakes
- Closing everything up and marching hard until soaked with sweat inside.
- Waiting until you are wet before putting on rain gear.
- Never washing the jacket and blaming a wetted-out face fabric on a leak.
- Sitting close to the fire in a synthetic shell or poncho.
- Wearing gaiters over rain trousers in rain, so water runs into the gaiter.
- Pitching a poncho shelter with the hood still open.
- Relying on an old jacket or surplus poncho without testing it first.
What you need
- Waterproof breathable jacket with taped seams, peaked hood and pit zips
- Rain trousers with side zips, or rain chaps
- Low or high gaiters
- Shelter-capable poncho (optional)
- Waxed cotton or wool smock for the fire (optional)
- Technical cleaner and DWR reproofer
- Repair tape and seam sealer
FAQ
What is the best rain gear for hiking?
Is a rain jacket or a poncho better?
Why do I get wet inside my waterproof jacket?
What is the difference between waterproof and water-resistant?
What hydrostatic head does a rain jacket need?
Do I need gaiters for hiking?
How do I reproof a rain jacket?
Is waxed cotton good rain gear for bushcraft?
Check yourself
Completed6 quick questions from this guide. Nothing is sent anywhere.
Related step-by-step guides
-
 1
-
 1
-
 1