Processing Firewood: Collecting, Sawing, Splitting and Stacking
Processing firewood means turning dead wood into fuel your fire can actually use: collecting dry dead wood where it is allowed, testing it, sawing it to length on a support, splitting it with an axe or knife and sorting it by size – from tinder to wrist-thick fuel – before you light anything. Done in that order, the fire almost lights itself; done in a hurry, you crouch in the smoke feeding wet sticks.
This guide covers where you may collect, how to find dry wood, firewood sizes, sawing firewood safely, splitting wood with an axe, splitting with a knife, stacking and keeping wood dry, how much wood an evening takes, and tool safety in pairs and with kids. It ties together our guides to axes, saws and batoning in the tools section and builds on the bushcraft basics.
Step by step
-
1

Collect only dead and down wood
Gather dead, fallen wood where collecting is allowed. Never cut living trees; rules differ by country and landowner.
-
2

Test that it is dry
Dry wood snaps with a crack, feels light and knocks with a clear sound. Wood that bends or feels heavy and cold is wet.
-
3

Sort it by size
Make separate piles: tinder, fine kindling, pencil-to-thumb kindling, thumb-to-wrist small fuel and wrist-thick fuel.
-
4

Saw to length on a support
Rest the wood on a sawbuck or a second log and cut just beyond the support into 25–35 cm rounds. Never saw over your knee.
-
5

Split on a chopping block
Stand the round on a block, keep two axe lengths clear and aim at the far half. Kneel with a hatchet; baton small pieces with a knife.
-
6

Stack it and keep it dry
Stack on rails off the ground, cross-stack the ends and cover only the top. Keep tinder and kindling in a bag.
Where can you collect firewood?
Every piece of wood belongs to someone – a landowner, a forestry body, a park authority – and that includes branches lying on the ground. The safe default for bushcraft is simple: take only dead and down wood, only where collecting and fire are allowed, and never cut living trees or branches without the landowner's permission. Living wood also burns badly: it is full of water and smokes rather than flames.
Rules differ widely by country, region, ownership and season. Some places allow small amounts of fallen wood for a campfire at a designated fireplace; others ban collecting entirely, for example many nature reserves and national parks, or require a permit from the forestry office. Scandinavian and Scottish access rights come with duties too. This is orientation, not legal advice: check locally before you go, together with the rules for fires themselves in campfire safety and is it legal to start a fire?.
Collect or leave it?
Usually fine where collecting is allowed
- Dead branches lying on the ground, off the main path
- Small dead twigs you can snap off low on spruce and pine by hand
- Leftover wood at a designated fireplace
- Wood you brought or bought, from the same region
Leave it
- Any living tree, branch or bark – including birch bark peeled from live trees
- Standing dead trees, especially with holes or fungi: habitat and a falling risk
- Thick logs rotting on the ground: home to insects, fungi and seedlings
- Wood in reserves, national parks or stacked forestry piles
Dead wood is not waste: it feeds beetles, fungi, birds and the next generation of trees. Take thin and medium wood that is easy to break or saw, leave the big trunks, spread your collecting over a wide area and burn only what you need. A small, hot fire built from well-processed wood uses far less than a big, smoky one.
Look up as well as down. Dead branches hanging in a crown or a leaning dead tree can fall without warning – the classic widowmaker. Never pull, shake or saw at them, and keep your work and wood stack well away from them, as explained in how to spot dangerous trees.
Finding dry dead wood: standing or on the ground?
Dry dead wood is the single biggest factor in a good fire. The rule of thumb: wood off the ground is drier than wood on the ground. Dead lower branches on conifers, dead twigs caught in bushes and branches that fell recently onto other wood rather than into moss stay airy and dry out quickly after rain. Wood lying in moss, leaf litter or wet soil soaks up water from below, starts to rot and often stays damp all the way through. The glossary calls the good stuff standing dead wood – dead, but still held up off the ground.

How to test dryness
You do not need a moisture meter. Four quick checks tell you almost everything, and together they take seconds per piece.
How dry is it? Four quick tests
 1Snap test
Break a thin stick. Dry wood snaps cleanly with an audible crack. If it bends, tears with long fibres or feels rubbery, it is wet or still green.
 2Weight test
Lift two pieces of similar size. Dry wood feels surprisingly light; wet wood is heavy and feels cold against your skin, because evaporating water cools it.
 3Knock test
Knock two pieces together. Dry wood gives a clear, hollow knock; wet or rotten wood gives a dull thud.
 4Look at it
Radial cracks (checks) in the end grain, loose or missing bark and a grey surface show wood that has been dead and drying a long time. Soft, crumbly wood is rotten – it smoulders rather than burns.
Wet weather and winter
After days of rain, thin twigs are wet through, but a dead branch 4–8 cm thick usually has a dry core. Saw and split it, and the inner faces give you dry kindling – the method behind every wet-weather fire. Resinous pine stumps may hold fatwood, which lights even when damp, and birch bark burns wet – collect it only from dead or fallen birches; working with birch bark explains more. In frost, frozen wood splits more easily, but it takes longer to catch, so split it finer than usual.
Which species burn best is covered in tree identification for firewood. In short: dense hardwoods such as beech, oak and ash give long-lasting coals, softwoods such as spruce and pine catch fast and burn hot but quickly, and very rotten wood of any kind is not worth carrying.
Firewood sizes: from tinder to fuel
A fire climbs a ladder: the flame of the tinder lights thin sticks, which light thicker sticks, which finally light the fuel. Every missing rung is a reason for the fire to die. That is why sorting firewood sizes into separate piles before you light is the most useful habit in firecraft. Use your own body as a gauge: matchstick, pencil, thumb and wrist.
| Size | Thickness | Typical sources | How much for one fire |
|---|---|---|---|
| Tinder | Fibres, shavings, bark | Dry grass, birch bark, feather-stick curls, tinder from home | A fist-size bundle |
| Fine kindling | Matchstick to pencil (2–6 mm) | Dead spruce twigs, split slivers | A thick bundle, forearm diameter |
| Kindling | Pencil to thumb (6–20 mm) | Dead branches, split sticks | Two bundles |
| Small fuel | Thumb to wrist (2–5 cm) | Dead branches, split logs | An armful |
| Fuel | Wrist and thicker (5 cm+) | Split logs, sawn rounds | An armful or more per hour |
These are the same sizes we use in fire lays. The firewood calculator groups them into four: tinder, kindling (match to pencil), small fuel (thumb to wrist) and main fuel (wrist and up).
Most fires fail at the kindling stage, not at the tinder. The fix is almost always more fine kindling and more pencil-to-thumb sticks: gather twice as much as you think you need. Split wood lights better than round sticks of the same size, because the split faces are drier and the sharp edges catch flame.
Lengths
For most fire pits, rounds of 25–35 cm are a good length: short enough to split easily and to fit in a small fire, long enough to bridge the coals. Kindling can be the length of your forearm. Long poles for a star fire or a long fire are pushed in from the sides instead of being cut, which saves sawing – see fire lays and the fire lay picker.
Sawing firewood safely
For cross-cutting, a saw is quieter, safer and far less tiring than an axe. A folding saw with a 24–27 cm blade handles most dead wood up to about 10 cm; a bow saw is faster for thicker logs at a base camp. Blade choice, teeth and pinching are covered in detail in folding saw vs bow saw, resin cleaning and blade changes in saw care; here is how to set up the cut so it is safe.
Sawing safely: support and stroke
 1Build a sawbuck
Drive or stand two pairs of stakes crossed in an X and lash each crossing – a square or shear lashing holds well. The log rests in the crotch at a comfortable working height.
 2Or use a second log
No time for a sawbuck? Lay the log across a second, thicker log and cut just beyond it, so the end hangs free and the kerf opens as you saw.
 3Long, light strokes
Start with a few light pull strokes, then use the full blade length with little pressure. Your guard hand holds the wood at least a hand width beside the cut.
 4Never over your knee
Do not rest the wood on your knee or thigh while sawing. When the blade jumps or breaks through, it goes straight into your leg.
Safe sawing checklist
- The log lies firmly on a sawbuck or a second log and cannot roll
- You cut just beyond the support, so the offcut hangs free
- Your guard hand is well beside the cut, never in front of or under the blade, never used as a thumb guide
- You kneel or stand to the side, so a slipping blade passes your legs
- You support the offcut on the last strokes so it does not drop on your foot
- The folding saw is closed and locked whenever you put it down
If the saw suddenly binds, the log is pinching the blade. Stop, lift the free end or move the support, and never yank or twist the blade out; saw technique shows how to read the load and when to cut from below. Wear gloves that grip well – a slipping saw blade is the most common way to cut the guard hand.
Splitting wood with an axe
Splitting exposes the dry inner wood and turns rounds into usable fuel and kindling. The core rules for splitting wood with an axe never change: work on a chopping block, keep a clear safety circle, set up every strike so that a miss ends in wood, and let the axe head do the work. Choosing the axe, sharpening it and the full swing technique are in our guide to using an axe safely.
Splitting: axe, hatchet and knife
 1Read the round
Saw the round to 25–35 cm and stand it on the block, flat end down. Aim along a drying check through the centre; split through a knot or well away from it, never at its edge.
 2Hatchet: kneel
With a short hatchet, kneel behind the block with the front foot pulled back. The short arc then ends in the block or the ground, not in your knee.
 3Small pieces: baton
For kindling, set a fixed-blade knife or the hatchet on the end grain and strike it with a wooden baton. Your hands stay far from the edge – see batoning.
 4Axe down, then pick up
Rest the axe with its bit in the block before you touch any split piece. Never reach into the strike zone with the axe in your other hand.
Stance at the block (forest axe)
- Block
- At least 30 cm across, about knee height, flat top
- Feet
- Shoulder-width or wider, square to the block
- Distance
- Arms and axe stretched out until the head just reaches the round
- Swing
- Vertical arc, lead hand slides down to the knob – never sideways
- At impact
- Knees bent, handle level, bit on the far half of the round
- Safety circle
- Nobody within two axe lengths; look up for branches
The swing arc and the safety circle
Most axe injuries follow one pattern: the bit glances off at an angle and continues into the shin, knee or foot. A block raises the work so that a miss ends in the block, and a level handle at impact keeps the arc in front of your feet. Before each session clear the space around you – overhead branches, guylines of the tarp, gear on the ground – and keep everyone else at least two axe lengths away, in every direction, until the axe rests in the block.

| Symptom | Likely cause | Fix |
|---|---|---|
| Axe bounces off | Blunt edge, round on soft ground, angled strike | Sharpen, use a block, strike with the handle level |
| Axe sticks in the round | Round too big, green or knotty | Do not wrench sideways; take slabs off the edge or lift axe and round together onto the block |
| Round will not split | Too long, knot in the split line, twisted grain | Saw shorter, split from the other end, or burn the piece whole |
| Pieces fly off the block | Blows harder than needed | Lighter strikes or tap-and-lever; keep everyone outside the circle |
| Hands sting, handle rattles | Loose head or cracked handle | Stop at once and repair – see tool care |
Splitting with a knife and making feather sticks
On lightweight trips many people carry only a saw and a knife. That works well: saw dead wood to 25–30 cm, then split wrist-thick pieces with a sturdy full-tang knife and a wooden baton. The rule of thumb from batoning wood with a knife: the wood should be clearly thinner than the blade is long, straight and free of knots. Never baton with a folding knife, and never strike the handle. Which knife takes this abuse is explained in choosing a bushcraft knife.
From wrist-thick piece to fire-ready kindling
- Saw to length25–30 cm, knot-free, dry core
- Halves and quartersBaton through the centre along a check
- Thumb-thick sticksKindling for the second ring of the fire
- Pencil sticksFine kindling, split from the driest pieces
- Feather sticksCurls carved from a 90° corner
Keep a few straight, thumb-thick quarters with a clean 90° corner: they are the ideal blanks for feather sticks, which give you tinder and fine kindling in one piece when everything else is wet. Carve them last, right before lighting, so the curls stay dry. Split faces are the driest surfaces you have, so build your first rings of kindling from split wood rather than round twigs.
A knife edge dulls faster on firewood than in carving work. Check it after a splitting session and give it a few strokes on a fine stone or strop, as described in sharpening in the field.
Stacking firewood and keeping it dry
Processed wood is only useful if it stays dry until it goes on the fire. A tidy pile also keeps the work area clear, so nobody trips over loose sticks near a block or a fire. Stack wood at a base camp the same way woodpiles have always been built: off the ground, with air around it, covered on top.
Keeping firewood dry
 1Rails off the ground
Lay two dead poles as rails on stones or logs. Wood stacked straight on soil or grass draws moisture from below within a night.
 2Cross-stack the ends
Build the ends as small towers of pieces laid crosswise in alternating layers; they hold the long middle rows upright. Lay the top row bark side up – bark sheds rain like a roof.
 3Tonight's wood under cover
Keep tinder and fine kindling in a bag or dry sack, and the evening's wood under the edge of your tarp. A wet night does not touch them.

A good camp woodpile
- Sorted: separate piles or rows for kindling, small fuel and fuel
- On rails, a hand width or more off the ground, in a spot that does not collect water
- Covered on top, sides open to the wind
- Out of the walkways and outside the safety circle of the chopping block
- Upwind of the fire and far enough away that sparks cannot reach it
- A day's supply only – leave the rest of the forest standing
Wood stacked next to a burning fire dries quickly, but it can also catch. Keep only the next few pieces close to the fire, and the main pile further back, upwind. Fire site rules – at least 5 m from tents and hammocks and at least 3 m from synthetic tarps – are explained in campfire safety. When you leave, scatter unused wood or leave it neatly at the fireplace for the next group, as the local rules say.
How much firewood do you need for an evening?
Far more than most people expect – and that is why a good rule is: collect everything before you strike the first spark, then collect the same amount again. Our firewood calculator estimates the amount from purpose, burn time, wood type, moisture and temperature. Its base rates for dry mixed wood are rules of thumb, not measurements of your fire:
Typical burn rate, dry mixed wood (calculator base rates)
An example straight from the calculator: a 4-hour evening fire with dry mixed wood at 5 °C, lit twice (evening and morning), needs about 14 kg of wood – roughly 2 kg of kindling, 3.5 kg of small fuel and 8 kg of main fuel, plus tinder. With an armload of about 5 kg that is three armloads, a stacked cube of about 34 cm on each side (the calculator assumes stacked wood weighs about 350 kg per cubic metre), and around 50 minutes of gathering in a normal forest. Softwood, damp wood and cold weather all push the figure up: wet wood counts 1.7 times, and below 5 °C the calculator adds 2.5 % per degree.
| Factor | Effect | What to do |
|---|---|---|
| Softwood instead of mixed | Burns faster (about 1.25×) | Gather more, mix in hardwood for coals |
| Damp or wet wood | 1.3× to 1.7× as much | Split finer, dry the next pieces beside the fire |
| Cold night | More wood per hour for warmth through the night | Wear warm layers instead of building a bigger fire |
| Cooking only | Small fire, about 1.5 kg/h | Cook on coals – see campfire cooking |
| Big, bright fire | Eats wood fast, throws sparks | Keep it small; feed often with well-sorted wood |
Tool safety, first aid, working in pairs and with kids
Processing firewood combines sharp tools, heavy wood and tired people at the end of a day – the most common time for injuries. A few habits prevent most of them.
Tool safety habits
- Work rested and in daylight; stop when your arms get tired or your aim slips
- Sturdy boots, long trousers, gloves that grip; no loose sleeves or scarves
- Saw closed, axe masked, knife sheathed whenever you walk, pause or hand them over
- Tools in a fixed place, never lying unmasked in leaf litter where someone can kneel on them
- Only one tool user per work area; agree on signals before you start
- A first aid kit with a pressure bandage within reach, not at the bottom of a pack
First aid for cuts
Most injuries are cuts to the holding hand or the legs. For heavier bleeding, put on gloves if you can, press firmly on the wound with a sterile dressing and keep pressing, then apply a pressure bandage; if blood soaks through, add more dressing on top without removing the first layer. Spurting or uncontrolled bleeding is an emergency: call 112 in Europe (or your local emergency number) and keep pressing. Details are in treating knife and saw cuts. Small cuts still need cleaning and covering, because a dirty wound in the woods is easily infected. Keep injured or chilled people warm – a long evening waiting for help can lead to hypothermia.
Working in pairs
Two people process wood much faster – but only when they split the jobs instead of crowding one block. One saws, the other splits, at separate stations well apart; or one works while the other collects, sorts and stacks. The helper never stands in front of or beside someone swinging an axe, never holds a round for them and only steps into the circle when the axe rests in the block and they have made eye contact. Never hold a log for someone else to saw close to your hand.
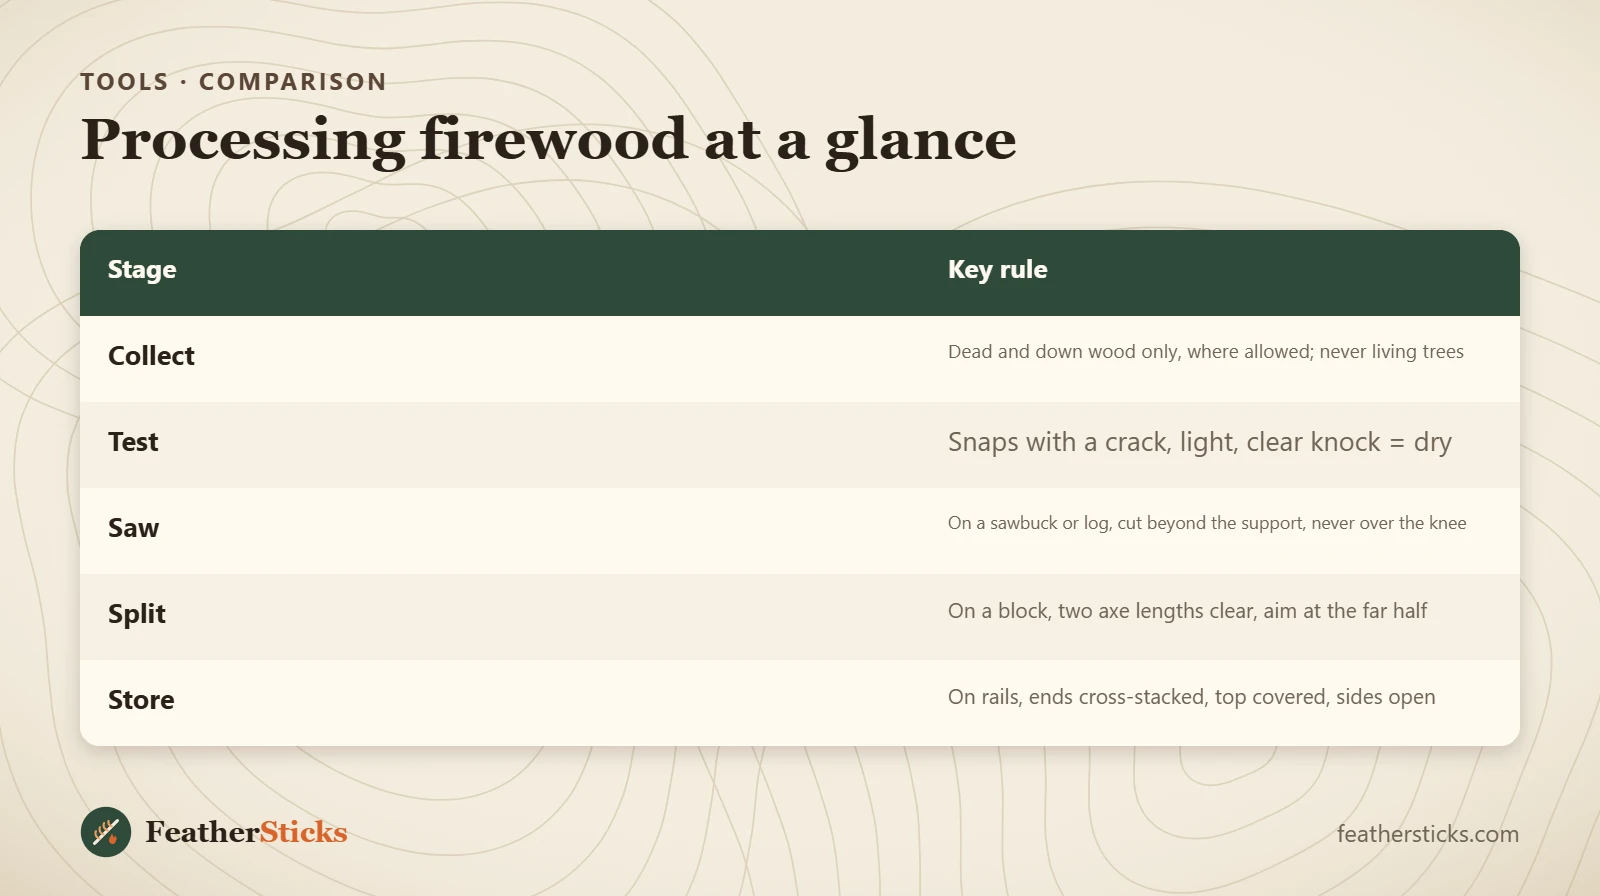
| Stage | Key rule |
|---|---|
| Collect | Dead and down wood only, where allowed; never living trees |
| Test | Snaps with a crack, light, clear knock = dry |
| Saw | On a sawbuck or log, cut beyond the support, never over the knee |
| Split | On a block, two axe lengths clear, aim at the far half |
| Store | On rails, ends cross-stacked, top covered, sides open |
Common mistakes
- Cutting living trees or branches – illegal without permission and they barely burn.
- Collecting wood lying in moss and wet leaves instead of dead wood held off the ground.
- Lighting the fire before all sizes of wood are collected, sorted and within reach.
- Sawing with the log resting on your knee or thigh.
- Splitting on the ground or on stones instead of a chopping block.
- Helpers standing inside the safety circle or holding the round.
- Wrapping the woodpile completely in a tarp, so it sweats and stays damp.
What you need
- Folding saw (24–27 cm) or bow saw for base camps
- Hatchet or small forest axe with mask
- Full-tang fixed-blade knife for batoning and feather sticks
- Work gloves that grip well
- Cord for lashing a sawbuck
- Dry bag for tinder and kindling
- First aid kit with pressure bandage
FAQ
Can I collect firewood in the forest?
How do you know if firewood is dry?
Is dead standing wood better than wood on the ground?
What size should firewood be?
How much firewood do I need for one evening?
Is it better to saw or split firewood?
How do you split wood without an axe?
How do you keep firewood dry overnight?
Check yourself
Completed6 quick questions from this guide. Nothing is sent anywhere.
Related step-by-step guides
-
 1
-
 1
-
 1