Power Bank for Camping: Sizes, Phone Battery in the Cold and Solar Chargers
A power bank for camping should be sized from what you actually use, not from the biggest number on the shelf. As a rule of thumb, a 5,000 mAh bank covers one night, 10,000 mAh a weekend of two to three days and about 20,000 mAh four to five days – for a phone used carefully as map and emergency phone plus a USB headlamp. Cold, heavy screen use and photos push you one size up. Just as important as capacity are habits: flight mode, offline maps, a warm inner pocket and a reserve you never touch.
This guide explains what you need power for, how to convert mAh into watt-hours and why about a third is lost on the way, how to make a phone last, what cold does to lithium batteries, AA and AAA cells, an honest look at solar panels, keeping electronics dry, safe handling and charging in a group. It is part of our bushcraft gear guides; the matching headlamp advice is in headlamps and camp lighting.
Step by step
-
1

List what needs power
Phone as map and emergency phone, headlamp, GPS and anything else. Note the battery size of each and how much you use it per day.
-
2

Convert mAh to Wh, minus losses
mAh × 3.7 V ÷ 1,000 gives watt-hours. About a third is lost in conversion, so plan with 60–70 % of the printed capacity.
-
3

Pick the power bank size
Rule of thumb: 5,000 mAh for one night, 10,000 for two to three days, 20,000 for four to five. In the cold or with heavy use, go one size up.
-
4

Make the phone last
Download offline maps at home, use flight mode on the trail, keep the screen dim and off while walking, and close apps you do not need.
-
5

Keep batteries warm
Carry phone and power bank in an inner pocket by day and in the sleeping bag at night. Charge lithium batteries only above 0 °C.
-
6

Pack dry, keep a reserve
Electronics go into a zip bag or dry bag. Keep 20–30 % of the phone battery for an emergency call and stop navigating with it at that point.
What do you need power for outdoors?
Before you buy or pack a power bank, list the devices that really need electricity on your trip and what each one is for. On most bushcraft and hiking trips there are only three, and one of them matters far more than the others.
- Phone: map and GPS, emergency phone, camera, weather forecast and contact with home. Because it is also your way to call 112, it is the one device that must never run empty. How to set it up as a navigation tool is explained in compass, GPS and map apps.
- Headlamp: in autumn and winter you may use it four to five hours every evening. Many modern headlamps have a built-in USB battery; others use AA or AAA cells. Details in headlamp batteries in the cold.
- Handheld GPS: usually runs on AA cells, which you can swap rather than recharge – a real advantage on long or cold trips. See GPS device or phone.
- Extras: a satellite messenger or personal locator beacon, a sports watch, a camera, a UV water purifier (see water purification), an e-reader. Each one adds to the power budget – decide which ones earn their place.

| Device | Main job | Typical battery | Typical energy |
|---|---|---|---|
| Smartphone | Map, GPS, emergency calls, photos | 3,000–5,000 mAh at 3.85 V | About 12–19 Wh |
| USB headlamp | Light in camp and on the trail | 1,000–3,000 mAh at 3.7 V | About 4–11 Wh |
| Handheld GPS | Navigation, track recording | 2 × AA | About 5 Wh (NiMH) to 8 Wh (lithium) |
| Sports watch | Time, altimeter, track | Built-in | About 1–2 Wh |
| Power bank 10,000 mAh | Recharges the others | 10,000 mAh at 3.7 V | 37 Wh printed, about 22–26 Wh usable |
Typical ranges, not specifications. The battery capacity of your own devices is in the manual or the technical data; most power banks print mAh and Wh on the housing.
The phone's job list also tells you how to prioritise. Navigation and the emergency call come first, photos and music last. A charged phone is no replacement for map and compass, though: they work without any battery at all, which is why every guide in our navigation series treats them as the backbone and electronics as the helper.
How big a power bank for hiking? mAh, Wh and conversion losses
Power banks are sold by milliampere-hours (mAh), but mAh only describes charge at a certain voltage. The energy that matters is in watt-hours (Wh): Wh = mAh × volts ÷ 1,000. The printed mAh of a power bank refers to its internal lithium cells at about 3.6–3.7 V, while it delivers power at 5 V or more through the USB port. That is why you cannot simply divide 10,000 mAh by a 4,000 mAh phone and expect two and a half charges.
On the way from the cells to your phone battery, energy is lost: the voltage is converted up in the bank, converted down again in the phone, and some turns into heat in cables and electronics. As a rule of thumb you can use roughly 60–70 % of the printed capacity – the same figure we use in power management for navigation. In the cold it is less – the power bank calculator does the whole conversion for you.
The method in four lines
- Energy of a battery
- Wh = mAh × V ÷ 1,000 (power bank cells: 3.7 V)
- Usable from a bank
- Printed Wh × 0.65 (range 0.6–0.7)
- Daily need
- Sum of the Wh each device uses per day
- Bank size
- Daily need × days to cover × margin ÷ 0.65
Worked example (typical values)
- Daily need A phone with a 15 Wh battery that uses about 40 % a day when handled carefully needs 6 Wh. A USB headlamp with a 4 Wh battery that needs half a charge each autumn evening adds 2 Wh. Together: about 8 Wh per day.
- Days to cover Three-day trip, devices fully charged at the start: day one runs on the devices themselves, so the bank covers two days = 16 Wh.
- Margin Add 25 % in mild weather for detours and photos: 16 × 1.25 = 20 Wh that must actually arrive in your devices.
- Losses 20 Wh ÷ 0.65 = about 31 Wh printed capacity. Converted: 31 Wh × 1,000 ÷ 3.7 V ≈ 8,300 mAh. A 10,000 mAh bank (37 Wh) fits with a little room to spare.
- Same trip in frost With a 50 % cold margin instead: 16 × 1.5 = 24 Wh, ÷ 0.65 ≈ 37 Wh – exactly the full 10,000 mAh bank, with nothing spare. In winter, take the next size up or a second small bank.

The example is deliberately simple. Your own figures depend on your phone, your app, the signal situation and how often you look at the screen. The best data is your own: on the next day walk, note the phone's battery level in the morning and the evening. After two or three trips you know your daily need far better than any table – the trip planning guide has a simple pre-trip checklist where the figure fits in.
Power bank sizes for 1–5 days: rules of thumb
Using the method above with typical careful use – a phone as map and emergency phone in flight mode, a USB headlamp, about 8 Wh per day – gives these rules of thumb. They assume you start with fully charged devices. For your own devices, trip length and temperatures, use the power bank calculator.
| Trip | Careful use, mild weather | Heavy use or frost | Typical weight of the bank |
|---|---|---|---|
| Day walk | Usually none; 5,000 mAh as backup | 5,000 mAh | About 100–150 g |
| One night | 5,000 mAh (≈ 18 Wh) | 10,000 mAh | 100–150 g / 180–250 g |
| Weekend, 2–3 days | 10,000 mAh (≈ 37 Wh) | 15,000–20,000 mAh | 180–250 g / 250–450 g |
| 4–5 days | 20,000 mAh (≈ 74 Wh) | 20,000 mAh plus a 10,000 mAh bank | About 300–450 g |
| Longer than 5 days | Resupply, recharge in villages or solar on open ground | Same | – |
Typical values for planning, not product data. Heavy use means many photos, all-day navigation with the screen on, a weak signal or temperatures below freezing.
Two small banks instead of one large one are worth considering on longer trips: if one fails or gets wet, you still have the other, and in a group you can lend one out. A large bank charges slowly from a wall socket – some take a whole night – so charge it the day before you leave, not the morning of departure.
Weight counts too. A 20,000 mAh bank typically weighs two to three times as much as a 5,000 mAh one; the pack weight calculator shows how it adds up, and the Kit Builder includes a power bank for multi-day trips. If you carry a handheld GPS or headlamp that takes AA cells, a few spare lithium cells can replace part of the bank – they are covered below.
How to save phone battery on a hike
The cheapest watt-hour is the one you do not use. A few settings and habits often stretch a phone from one day to two or three. The biggest consumers are the screen, the radio searching for a signal and apps that run in the background.
Four habits that make the phone last
 1Flight mode
On most phones satellite positioning keeps working in flight mode while the radio stops searching for a network. In forests and valleys with weak coverage, that search is a major drain. Test once at home that your phone and map app still show your position in flight mode.
 2Offline maps, downloaded at home
Download the map area, plus a margin around it, on home Wi-Fi and check it in flight mode. Maps that load over the mobile network on the trail cost battery and fail where there is no signal. Setup tips: offline maps.
 3Screen dim, short timeout
Lower the brightness and set the screen to switch off after about 30 seconds. Look at the map at junctions and checkpoints, not continuously, and put the phone away between checks.
 4Respect the reserve
When the battery falls to 20–30 %, stop using the phone for navigation, photos and messages. From then on it is an emergency phone – switch to map and compass.
GPS and app settings
- Track recording: recording a track all day keeps the GPS working constantly. Record only when you need it, or choose a longer recording interval if your app allows it.
- Location for other apps: allow location only for the map app, and only while it is in use.
- Wi-Fi, Bluetooth, background refresh: switch them off unless you need them – a watch or satellite messenger may need Bluetooth.
- Battery saver mode: most phones have one; switch it on from the start of the day, not at 15 %.
- Photos and video: video and many photos with the screen on cost a lot. Take them, but count them as consumption.
The emergency reserve: how much battery to keep for calls
The rule of thumb across our guides is simple: keep 20–30 % of the phone battery purely for emergency calls, and treat that part as untouchable, like the last litre of water. In the cold, the higher end makes sense, because a cold battery can drop from half full to empty within minutes. The reasoning behind it is in making an emergency call.
- Set a turning point: when the phone reaches the reserve, it is no longer your map. Navigate by map and compass, and plan your route back so you do not need the phone.
- Agree check-in times: tell someone at home when you will report and what they should do if you do not. On a solo trip this matters even more; see safety when you go alone.
- In an emergency: call 112 (EU) or the local number, give your location, then keep the phone warm and in flight mode or off between agreed contact times so the battery lasts until help arrives.
- Weak signal: 112 can often be reached through another network when yours has no coverage, but do not rely on it – higher ground often helps. A text message sometimes gets through where a call does not.
Phone battery low – what now?
Are you still above the 20–30 % reserve?
Yes → Carry on, but switch to flight mode, dim the screen and look at the map less often.No → Stop using the phone for navigation. Map and compass from now on; the rest is for emergencies.Is it cold, and did the battery drop suddenly?
Yes → Probably cold, not empty. Warm the phone 10–20 minutes in an inner pocket before you judge the level.No → Go on to the next question.Do you have a charged power bank?
Yes → Charge at the next break, with phone and bank warm. Charge to about 80–100 %, not just to the reserve.No → Switch the phone off between agreed check-in times and plan the shortest safe way out.
Phone battery in cold weather: why it dies and how to keep it going
Lithium-ion batteries – in phones, power banks and most headlamps – deliver less in the cold. The chemical reactions inside slow down, the internal resistance rises, and under load the voltage drops. The phone interprets the low voltage as an empty battery and shows a sudden fall or shuts down, sometimes with a fair amount of charge left. Most of that capacity comes back when the battery warms up; it is not lost for good.
Charging is the more sensitive part: many manufacturers advise against charging lithium-ion batteries below 0 °C, because it can damage the cells. Some phones and power banks refuse to charge when they are too cold.
Keeping batteries warm on a cold trip
 1Know the symptom
In frost a phone may show a sudden drop or switch off although it seemed well charged. Do not throw away the charge – warm the phone and check again.
 2Inner pocket by day
Carry the phone and the power bank in an inner pocket close to the body, not in a hip-belt pocket or on a shoulder strap. Take the phone out briefly to look, then put it back.
 3Sleeping bag at night
At night, phone and power bank go into the sleeping bag or a small bag at your feet inside it. They stay warm, and you can charge there overnight.
 4Charge only above 0 °C
Warm a cold phone or bank on the body for 10–20 minutes before you charge it. Charging in the warmth of the sleeping bag or inside your jacket is the simplest solution.
- Never heat batteries next to the fire, on a stove or in direct sunlight on a dark surface – heat damages lithium cells far more than cold.
- Condensation: when you take a very cold phone into a warm tent, hut or car, moisture can condense on and inside it. Let it warm up slowly in a closed bag or pocket first.
- A short cable lets you charge with phone and bank in the same inner pocket.
- Touch screens and gloves: thin touch-screen gloves under mittens let you check the map without exposing bare hands to wind chill – see the wind chill calculator for how fast that matters.
- Lithium AA cells are much better in frost than alkaline or NiMH, which is one reason a GPS or headlamp on AA cells is popular for winter trips.
On a winter camping trip with 15 hours of darkness, power planning belongs next to the sleep system: plan for the larger power bank from the size table and keep everything warm. Cold also affects you – if your fingers are too cold to use the phone, look after yourself first; the warning signs are in hypothermia.
AA and AAA batteries: lithium, NiMH or alkaline?
Many headlamps, GPS devices and satellite messengers run on AA or AAA cells. Their great advantage: you can swap them in seconds and carry spares, with no power bank and no waiting. The type makes a big difference – the same comparison we use in the headlamp guide.
| Type | In the cold | Energy per AA (typical) | Rechargeable | Best for |
|---|---|---|---|---|
| Lithium primary (1.5 V) | Very good | About 4 Wh, lightest | No | Frost, emergencies, spares that keep for years |
| NiMH, low self-discharge (1.2 V) | Fair – keep warm | About 2–2.5 Wh | Yes | Regular use above freezing, economical |
| Alkaline (1.5 V) | Poor | Much less under high load and in cold | No | Low-drain devices at home; can leak in storage |
Typical values. Check which cells your device accepts: some devices do not work well with 1.2 V NiMH, and lithium-ion cells in AA size with 3.7 V must never go into a device built for 1.5 V.
For spares, keep cells in their packaging or a small zip bag, never loose with keys and coins, and mark used cells with a pen so you do not mix them up. Used batteries go home with you and into a battery collection point – never into the fire, the latrine or the forest.
Solar chargers for camping: an honest assessment
A solar charger for camping sounds like unlimited free power, and on the right trip it is useful. But its output depends on factors you cannot control:
- Weather: under cloud a panel produces only a fraction of its sunny-day output.
- Sun angle and latitude: the lower the sun, the less energy arrives. In central and northern Europe, the short winter days with a low sun give very little; in summer, long days on open ground give much more.
- Shade: under a forest canopy most panels deliver almost nothing, and even partial shade on one cell can cut the output of the whole panel sharply.
- Orientation: a panel strapped to a pack while you walk through woods is rarely facing the sun.
So solar is useful mainly on long, sunny trips in open terrain: above the treeline, on Nordic fells in summer, on lakes and rivers by canoe, or in a base camp in a clearing. On a weekend in the woods, a slightly larger power bank is lighter, cheaper and more reliable.

Getting the most from a solar panel
 1Open ground, facing the sun
Set the panel up in the open, angled roughly towards the sun, during a long break or in camp. A panel lying flat or behind a tree delivers far less.
 2Re-angle every 1–2 hours
The sun moves across the sky. Turn the panel after it every hour or two, as a rule of thumb, and clear leaves or dew off the surface.
 3Charge the power bank, keep it in the shade
Let the panel charge a power bank, which then charges the phone: phones often stop and restart charging when a cloud passes. Keep the bank in the shade – heat harms it.
Keeping electronics dry in rain and at the water
Water is the second big enemy of electronics after cold. Many phones are splash-resistant, but water rating is not a promise for every situation: seals age, a port full of water cannot charge, and power banks and cables are rarely waterproof at all. Pack them like your sleeping bag – the methods are in packing for rain camping.
Packing electronics for wet weather
 1Phone in a zip bag
A clear zip bag keeps rain off, and on most phones the touch screen still works through thin plastic. Check this at home, and keep a spare bag.
 2Everything else in the dry bag
Power bank, cables, spare cells and charger go together into a small roll-top dry bag inside the pack. One bag, one place: you find it in the dark, too.
 3Dry the port before charging
Never plug a cable into a wet port. Dry the phone, shake out water and let the port dry – many phones warn about moisture and stop charging anyway.
- Water ratings: devices labelled IPX4 resist splashing water; IPX7 devices survive brief immersion under test conditions. Whatever the rating, do not open battery caps or covers in the rain – see headlamp problems in the field.
- River crossings and canoe trips: everything electronic goes into a dry bag before you step into the water; see crossing a river safely.
- If a device got wet: switch it off, dry the outside, do not charge it, and let it dry in a warm, ventilated place. Do not put it next to the fire.
Safe handling of lithium batteries and power banks
Lithium batteries store a lot of energy in a small space. Handled well they are safe; damaged, overheated or short-circuited they can overheat, release toxic fumes and catch fire. A few rules prevent almost all problems.
Battery safety on the trip
- Use only intact power banks, cables and chargers – no cracks, dents, swelling or exposed wires
- Stop using a bank that swells, smells, hisses or gets unusually hot
- Keep batteries away from heat: no dashboard in the sun, no fireside, no stove
- Carry spare cells in packaging or a zip bag, never loose with keys and coins
- Do not cover a charging bank tightly or lie on it – leave it room in the sleeping bag
- Do not charge wet devices or with a damaged cable
- Take damaged and used batteries home to a battery collection point
Heat is a risk in summer too: a power bank in a dark pack lying in full sun, or a phone left on a rock at midday, can overheat. In hot weather keep electronics in the shade and in the middle of the pack, as you would protect yourself – see heat and sun for the human side.
Charging in groups and with families
In a group, power is a shared resource like water and fuel. A little planning saves weight and prevents the classic situation where everyone's phone is low on the last day.
| Task | Rule of thumb | Why |
|---|---|---|
| Emergency phones | At least two phones stay charged above the reserve; one stays off as a backup | If the navigation phone fails, a full emergency phone is still there |
| Navigation | One person navigates with the phone, the others keep theirs in flight mode | Saves several phones' worth of screen time |
| Power banks | One 10,000 mAh bank per one or two people, spread across packs | No single point of failure if one bank gets lost or wet |
| Charging order | Emergency and navigation phone first, then headlamps, then cameras | The most important devices never wait |
| Cables | Agree on one connector type and carry one or two spare cables | Everyone can charge from every bank |
With children, the adults' phones are the emergency phones – children's devices come last. Give children their own simple headlamp with replaceable cells, so no one argues over the power bank at bedtime; more ideas in bushcraft with kids. Mark cables and banks with coloured tape so they find their way back to their owners. In a base camp, set up one charging point under the tarp, in a dry bag, where everything is charged and counted in the evening.
Before you go: power check and troubleshooting
Most power problems are found at home if you look. Ten minutes the evening before the trip are enough.
Power checklist before the trip
- Phone, headlamp, GPS and power bank charged to 100 % – large banks the day before
- Offline maps downloaded and tested in flight mode
- Power bank indicator checked; bank actually charges the phone with the cable you pack
- Short cable (plus a spare on longer trips) and the right connectors
- Spare lithium AA/AAA cells for devices that take them
- Zip bag for the phone, small dry bag for electronics
- Check-in times and route left with someone at home
| Problem | Likely cause | What to do |
|---|---|---|
| Phone switches off at a decent battery level | Cold battery | Warm it 10–20 minutes on the body, then check again |
| Power bank will not charge the phone | Cable, dirty port, bank too cold, bank empty | Try another cable, clean and dry the port, warm the bank |
| Bank switches off when charging a headlamp | Some banks turn off at very low current | Use a low-current mode if the bank has one, or charge the phone at the same time |
| Charging is very slow | Cold, thin cable, solar under cloud | Charge warm, use a good short cable, let the panel charge the bank |
| Phone drains fast with no use | Weak signal, background apps, tracking | Flight mode, close apps, record tracks only when needed |
Power is one part of a well-prepared kit, not a replacement for skills. A full list of what belongs in the pack is in the bushcraft kit list, and if you are just starting out, the bushcraft for beginners guide shows how map, compass, headlamp and phone fit together. For walks that end after dark, plan the light with the daylight calculator and the tips in night skills.
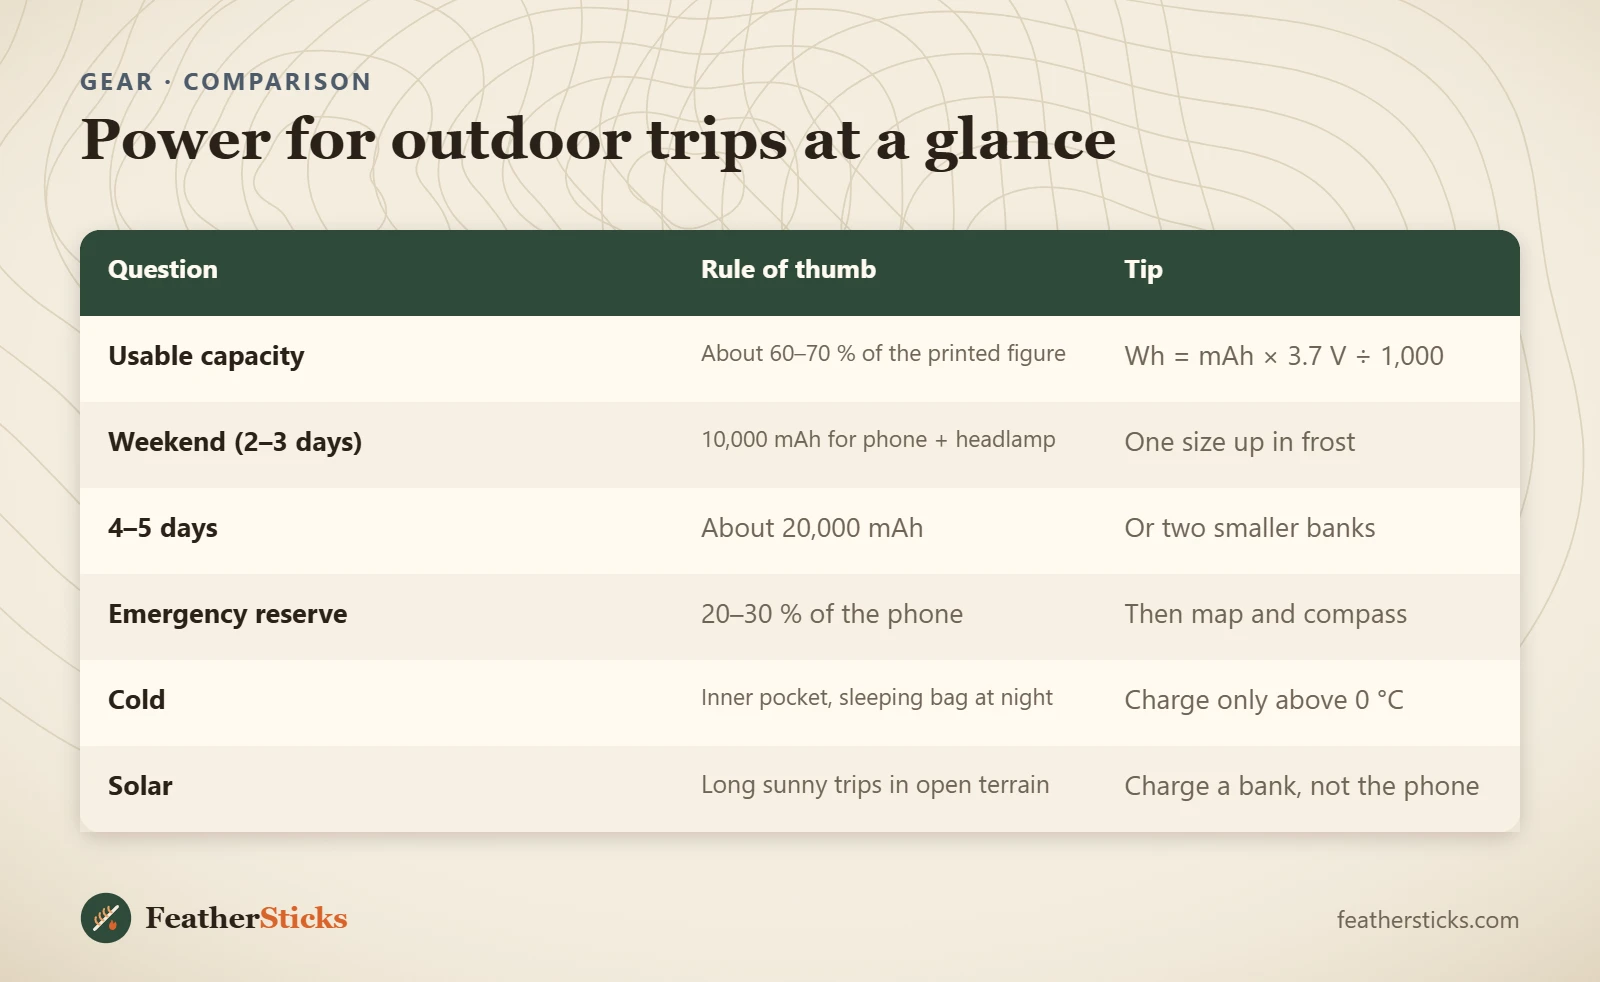
| Question | Rule of thumb | Tip |
|---|---|---|
| Usable capacity | About 60–70 % of the printed figure | Wh = mAh × 3.7 V ÷ 1,000 |
| Weekend (2–3 days) | 10,000 mAh for phone + headlamp | One size up in frost |
| 4–5 days | About 20,000 mAh | Or two smaller banks |
| Emergency reserve | 20–30 % of the phone | Then map and compass |
| Cold | Inner pocket, sleeping bag at night | Charge only above 0 °C |
| Solar | Long sunny trips in open terrain | Charge a bank, not the phone |
Common mistakes
- Buying by the mAh on the box without allowing for conversion losses.
- Using the phone as map, camera and torch until it is empty, with no reserve for an emergency call.
- Carrying phone and power bank in an outside pocket in frost.
- Charging lithium batteries below 0 °C or warming them next to the fire.
- Relying on a solar panel for a trip in the forest or in winter.
- Charging the large power bank on the morning of departure.
- Carrying spare cells loose with keys and coins.
What you need
- Power bank sized to the trip (5,000–20,000 mAh)
- Short charging cable plus a spare on longer trips
- Spare lithium AA/AAA cells for devices that take them
- Clear zip bag for the phone
- Small roll-top dry bag for electronics
- Thin touch-screen gloves for winter
- Folding solar panel (only for long, sunny trips in open terrain)
Calculators for this topic
FAQ
How big a power bank do I need for hiking?
How many phone charges do I get from a 10,000 mAh power bank?
Why does my phone battery die in the cold?
Is it safe to charge a phone in the cold?
Is a solar charger worth it for camping?
How much phone battery should I keep for emergencies?
Check yourself
Completed6 quick questions from this guide. Nothing is sent anywhere.
Related step-by-step guides
-
 1
-
 1
-
 1