Coffee at Camp: How to Make Cowboy Coffee and Other Camping Brews
How to make coffee camping without a coffee maker? Heat water until it is just off the boil, stir in coarsely ground coffee, let it steep for three to four minutes, settle the grounds and pour gently. That is cowboy coffee, the simplest campfire coffee there is, and it needs nothing but a pot and a mug. If you have a little more room in the pack, a pour-over holder, a cloth filter or a moka pot give a cleaner cup.
This guide compares the common methods, explains the water side (wild water must be treated first), gives rule-of-thumb ratios, shows cowboy coffee and pour-over step by step, and covers cold weather, altitude, caffeine and what to do with the grounds. It belongs to the outdoor cooking hub, sits next to camp stoves and cookware, and builds on the bushcraft basics.
Step by step
-
1

Treat the water first
Wild water needs a rolling boil for 1 minute (3 minutes above about 2,000 m) or another treatment. Clean tap or bottled water can go straight in.
-
2

Grind coarse, measure
Grind the beans coarse, like sea salt. Start with 10–14 g of coffee per 200 ml cup and adjust to taste next time.
-
3

Take the water off the boil
Remove the pot from the heat and wait 30–60 seconds, so the water is hot but no longer bubbling.
-
4

Add grounds, stir, steep
Stir the grounds in once, put the lid on and let the coffee steep for 3–4 minutes.
-
5

Settle the grounds
Add a splash of cold water or tap the side of the pot, then wait 1–2 minutes without stirring.
-
6

Pour gently, pack out the grounds
Pour slowly and stop before the sludge. Spoon the grounds into a bag and carry them out.
How can you make coffee without a coffee maker? Eight methods compared
You do not need a machine to get a good cup outdoors. Every method below does the same thing: it brings hot water and ground coffee together for a few minutes and then separates the liquid from the grounds. The difference lies in how it separates them, how much it weighs and how much mess it leaves.

| Method | Kit weight | Fuel use | Taste and body | Clean-up | Grounds |
|---|---|---|---|---|---|
| Cowboy / boiled, with settling | None extra: the pot you already carry | Low: one pot of water | Full body, some sediment, can turn harsh if boiled long | One pot; sludge at the bottom | Wet slurry: scoop into a bag |
| Pour-over with a filter holder | Light (collapsible holder) plus filters | Low to medium: needs a pot and a thin pour | Clean, light body | Filter and holder | Compact in the filter: pack out together |
| Cloth filter or "sock" | Very light | Low to medium | Clean, slightly fuller than paper | Cloth must be rinsed and dried | Tip into a bag, rinse the cloth far from water |
| Steeping with a mesh or coffee bag | Very light | Low | Mild to medium, easy to repeat | Almost none | Sealed in the bag: simplest to pack out |
| French-press-style cup | Light to medium (a cup with a plunger) | Low | Full body, little sediment | Plunger parts to rinse | Scoop out of the cup |
| Moka pot on a stove | Medium: metal pot | Medium: needs a stove and steady low heat | Strong and concentrated | Three parts to wipe | Compact puck: knock out into a bag |
| Turkish-style | Light: a small pot | Low | Very strong, thick, unfiltered | Small pot | Fine sludge: scoop out |
| Instant coffee | Very light | Lowest: just hot water | Thin, convenient | Just the mug | None |
Weight classes and fuel use are relative guides, not measurements. Taste depends mainly on grind, ratio, water temperature and brew time.
For many trips the right answer is simply the one that adds the least to your pack. A pot you already carry turns into a cowboy coffee pot for free, and our cookware guide shows which pots handle it well. If you are weighing every gram, a mesh steeping bag or an instant sachet weighs almost nothing. The Kit Builder adds the weight up.
Which method should you pick?
Do you want the lowest weight and no extra kit?
Yes → Cowboy coffee in the pot you already carry, or instant or a steeping bagNo → Next questionDo you want a clean, sediment-free cup and can carry a small holder?
Yes → Pour-over with a filter holder or a cloth filterNo → Next questionDo you have a stove and want strong coffee?
Yes → Moka pot, or Turkish-style in a small potNo → Cowboy coffee or a press cup
Water for camp coffee: treat it first
Coffee is mostly water, so the water decides both safety and taste. If you take water from a stream, lake or spring, it has to be made safe before it goes in the cup. Hot coffee is not automatically safe: water that only got hot, without a proper boil, may still carry germs.
Three clean routes lead to safe coffee water:
- Boil it for the coffee itself. Bring the water to a rolling boil and hold it for 1 minute, or 3 minutes above about 2,000 m, exactly as in how long to boil water. Only then does the boil count as treatment. Afterwards you take the pot off the heat and wait before the grounds go in.
- Filter or purify first. A water filter or another method from the purification guide gives you safe water that you only need to heat.
- Use clean tap or bottled water where you have it, for example on a campsite.
If the stream is cloudy, let the water settle or pour it through a cloth first. Sediment does not make the coffee safer, but it makes it taste muddy and clogs filters. Clear water also saves fuel in the end. For finding a safe source, see finding water; in winter, melting snow and ice follows the same rules.
How much coffee per cup? Ratios and grind size
Ratios are a matter of taste. As a starting point, many people use about 10–14 g of ground coffee for a 200 ml cup, which is roughly two level tablespoons. Weigh your usual scoop once at home so you know what it holds. Then change one thing at a time on your next trip: more coffee for a stronger cup, less for a milder one.

| Method | Grind | Coffee per 200 ml cup | Contact time |
|---|---|---|---|
| Cowboy / boiled | Coarse | about 10–14 g | 3–4 min, then settle 1–2 min |
| Pour-over | Medium | about 10–14 g | about 3 min of slow pouring |
| Cloth filter | Medium to medium-coarse | about 10–14 g | 3–4 min |
| Steeping bag | Medium | about 10–14 g | 3–4 min, remove the bag |
| Press cup | Coarse | about 10–14 g | 3–4 min, then press |
| Moka pot | Medium-fine, do not press down | fill the basket loosely | a few minutes on low heat |
| Turkish-style | Very fine (powder) | about 5–7 g per 100 ml | heat slowly, let it foam, settle |
| Instant | None | follow the packet | seconds |
These are rule-of-thumb ranges, not recipes. A lighter roast, high altitude or cold weather can all shift the taste.
Why a coarse grind for cowboy coffee?
Coffee that sits in the water for several minutes extracts quickly. Fine grounds give up everything at once, taste bitter and stay in suspension so the cup turns muddy. Coarse grounds extract more slowly and sink faster. Most people also find coarse coffee easier to leave behind in the pot.
Pre-ground, hand grinder or beans?
Pre-ground coffee is the lightest solution, but the grind is rarely coarse. If you use it, choose a coarse pack and expect more sediment. A small hand grinder adds weight but lets you choose the grind and keeps the beans fresh longer. For short trips, grind at home and carry the coffee in a sealed bag or small tin, away from damp and from strong smells.
How to tell what is wrong with the taste
- Bitter or harsh: grounds too fine, brew too long, water too hot or too much coffee.
- Sour or thin: grounds too coarse, brew too short, water too cool or too little coffee.
- Gritty: not settled long enough, poured too fast or too fine a grind.
How to make cowboy coffee, step by step
Cowboy coffee is coffee brewed directly in a pot and cleared by settling rather than filtering. It works on a stove, a fire or even on a hot stone, and it is the method every camper should know because it needs no extra gear. The steps below are the recipe in the main step-by-step cards; here are the details that make the difference.
Cowboy coffee in detail
- Measure the water Fill the pot with only as much water as you want to drink, plus a little for losses. Treat wild water first (see above). Put the lid on to save fuel.
- Heat to a boil, hold it if the water is wild Bring the water to a rolling boil. For wild water, keep it rolling for 1 minute (3 minutes above about 2,000 m). Use the boiling calculator to see how much fuel that takes.
- Take the pot off the heat Move the pot to a flat stone or the ground, away from the flame. Wait 30–60 seconds. This brings the water just off the boil, which many people find gives a smoother cup than coffee boiled hard.
- Add the coffee and stir once Add 10–14 g of coarse coffee per 200 ml. Stir once to wet all the grounds, then put the lid on. Do not keep stirring.
- Steep for 3–4 minutes Steep for 3–4 minutes. Longer gives a stronger and more bitter cup. A tea towel or jacket around the pot keeps the heat in on a cold day.
- Settle the grounds Add a splash of cold water or tap the side of the pot, then wait 1–2 minutes. The grounds sink to the bottom.
- Pour slowly Pour in one steady, slow movement. Stop with a finger of coffee and the sludge left in the pot.
What it should look like
After steeping, a dark crust of grounds floats on top. After settling, the surface is clearer and a layer of grounds lies on the bottom. When you pour, the coffee should be dark but not cloudy. If clouds of grounds swirl in the cup, the coffee needed more settling time or the pour was too fast.

How do you settle the grounds? Splash, tap or wait
Settling is the one skill that separates a good cowboy coffee from a gritty one. Grounds are heavier than water, so they sink. The three methods below all help them sink faster. Use one, or combine two.
Three ways to settle the grounds
 1Splash of cold water
Pour a splash of cold water over the surface, about a tablespoon or two. People report that it makes the floating grounds sink. The water is clean, so treat it first if it comes from a wild source. Typical error: pouring a whole cup and cooling the coffee.
 2Tap the side of the pot
Tap the wall of the pot with a spoon handle or a knuckle. This knocks grounds clinging to the wall back into the liquid so they can sink with the rest. Tap gently: a hot, full pot can slosh.
 3Wait without stirring
Put the lid on and wait 1–2 minutes. Stirring or moving the pot swirls the grounds up again. If you are in a hurry, pour through a cloth or tea strainer instead.
Egg shell, salt and other traditions
Old camp tradition says to stir a crushed egg shell or a raw egg into the grounds, or to add a pinch of salt. Some people swear by it. It is not needed for a good cup, it does not replace settling, and a raw egg in a camp kitchen brings its own food-hygiene problem. If you want to try the shell, use only a clean, dry shell and treat it as a curiosity, not a requirement.
| Symptom | Likely cause | Fix |
|---|---|---|
| Gritty cup | Not settled long enough, poured too fast | Wait longer, add a cold splash, pour slowly or use a strainer |
| Bitter | Too long, too fine, too much coffee | Shorten the steep, grind coarser, use fewer grounds |
| Sour or watery | Too short, water too cool, too little coffee | Steep a little longer, use water just off the boil, add coffee |
| Lukewarm | Cold wind, no lid, thin mug | Lid on, wrap the pot, preheat the mug |
| Boils over | Pot too full, flame too high | Fill to three quarters, take off the heat early |
| Burnt taste | Grounds stuck to a hot pot | Pour out grounds quickly, rinse the pot |
How to make pour-over coffee at camp
A pour-over gives a clean cup with no sediment. It needs a small holder that sits on your mug, paper filters (or a reusable mesh), and a pot with a spout you can pour from slowly. Collapsible holders weigh very little and pack flat. Use hot water that has come off the boil, just as for cowboy coffee, and treat wild water first.
Pour-over in five steps
 1Set up and rinse
Put the filter in the holder and set the holder on a stable mug. Rinse the filter with a little hot water, which warms the mug and removes the paper taste. Pour that water away.
 2Add the grounds
Add about 10–14 g of medium-ground coffee for a 200 ml cup. Shake the holder gently so the bed is level. Typical error: a grind so fine that the water takes forever.
 3Wet the grounds and wait
Pour just enough water to wet all the grounds and wait about 30 seconds. The coffee swells and releases gas, which makes the next pour more even.
 4Pour in slow circles
Pour the rest of the water slowly in small circles, keeping the level below the rim. The whole pour should take about three minutes. A thin stream from a pot spout works better than a splash.
 5Lift off and pack out
When the dripping stops, lift the holder off and put it on a flat stone. Pack the filter with the grounds into your bag; it is compact and dry enough to carry.
Cloth filter, steeping bag, press cup, moka pot, Turkish-style and instant
The remaining methods suit different trips. Pick by the gear you carry and the cup you like.
Cloth filter or coffee "sock"
A small cloth bag on a wire ring holds the grounds like a paper filter would. It is reusable and light, and gives a slightly fuller cup. After use, tip the grounds into a bag, rinse the cloth well away from water (see the cleaning section) and let it dry. A cloth that stays damp for days will smell, so air it on your pack.
Steeping with a mesh or coffee bag
Fill a mesh bag with ground coffee, drop it into a mug of hot water and lift it out after three to four minutes. Like tea, it is almost mess-free, and the whole bag goes into your rubbish bag. Ready-filled coffee bags are the lightest option and good for fast mornings.
French-press-style cup
A cup with a plunger and mesh disc brews and filters in one container. Add coarse coffee and hot water, steep for three to four minutes, then press the plunger slowly. The cup is heavier than a bag but gives full body with little sediment. Rinse the mesh well because it traps oils.
Moka pot on a stove
A moka pot makes strong coffee from steam pressure. Fill the base with water below the safety valve, fill the basket loosely with medium-fine coffee without pressing it down, and screw the pot together tightly. Heat gently on a camp stove with a stand that supports the pot fully, and take it off when it begins to gurgle. Keep your hand off the hot handle and do not use it on an open fire, where the handle and uneven heat cause trouble.
Turkish-style
Very fine coffee powder and cold water go into a small pot with a long handle. Heat slowly, and take the pot off just as the foam rises. Let it settle, then pour into small cups. It needs a very fine grind, so buy it ready-ground in that style. Do not stir after the foam forms.
Instant coffee
Instant is the lightest and fastest, with just hot water and a mug. It is a handy backup for rain and rushed mornings.
Stove or fire: heat for your coffee water
A stove gives quick and steady heat, and you can take the pot off at the right moment. On a camp stove, one pot of water for two cups takes only a few minutes. Gas is quiet and clean; a twig stove is slower and sootier but uses free fuel. Use the boiling point and fuel calculator to estimate fuel for several brews.
An open fire works too, if fires are allowed where you are. Set the pot on a grate or a flat stone next to the coals, not in the flames, and check the notes in campfire cooking and fire safety before you light anything. A pot on the fire gets sooty, so keep it in a bag. Always check local fire rules and fire danger levels first; many places ban open fires entirely.
| Heat source | Strengths | Watch out |
|---|---|---|
| Gas canister stove | Fast, steady, easy to take off the heat | Wind and cold; stay with the pot |
| Alcohol or solid-fuel stove | Light and quiet | Slower; needs a windscreen |
| Twig stove | Free fuel | Soot, constant feeding, still an open flame |
| Campfire coals | Atmosphere, no extra fuel | Fire rules, soot, uneven heat |
Altitude changes the boil
The higher you are, the lower the boiling point of water, so the water in the pot is less hot than at sea level even when it boils hard. This affects both safety (the longer boil time above about 2,000 m) and brewing. Look up your altitude in the boiling calculator rather than guessing. If the coffee tastes weak up high, steep it a little longer or add a bit more coffee. For the safety side, follow the times in the boiling guide.
Coffee in cold weather
Coffee cools fast in the cold, so a few habits matter more than the method. Preheat the mug with a little hot water and pour it out before you fill the cup. Use an insulated mug with a lid if you carry one. Keep the pot lid on while it steeps and wrap the pot in a jacket or tea towel.
Cold also affects your stove. Gas canisters lose pressure when chilled, so keep them warm in a jacket pocket until you use them. The full advice for stoves and fuel in the cold is in keeping water from freezing and stoves working, and the snow water guide covers melting snow for the brew.

Tea, chai and cocoa: alternatives to coffee
The same pot and heat work for other hot drinks. A tea bag or a few loose leaves in a mug steeps in a few minutes, usually three to five, but follow the packet. Chai is tea simmered with spices and often milk or milk powder; simmer gently and keep the pot from boiling over. Cocoa is easiest when you stir the powder into a little cold water first to avoid lumps and then add hot water.
Herbal tea is a good evening choice because it contains no caffeine. For hot drinks in a bigger menu, see camp recipes, and for a warm start to the day pair a mug with bannock.
Caffeine and hydration outdoors
For most healthy adults, coffee in moderation is fine on a trip, and health services generally count it towards fluid intake, as in the hydration guide. It is still not a replacement for plain water. Drink water alongside your coffee, especially on hot or strenuous days.
Sensitivity to caffeine varies. Too much can cause jitters, a fast pulse, stomach upset or poor sleep, and an evening cup can cost you rest on a cold night. If you are pregnant, take medication or have a heart or other health condition, follow your doctor's advice. Children should not be given coffee. If a cup upsets you, skip it or switch to herbal tea. The drink is a comfort, not a safety tool, and it never replaces warm clothing or food.
Grounds and leave no trace: pack them out
Coffee grounds are organic, but they are not a natural part of the forest. A pile of wet grounds looks like litter, smells strongly and can attract animals. The best practice is to pack the grounds out. Scatter them thinly only where local rules allow it, far from water, camp and trails, and never in a stream, lake or spring. Paper filters, tea bags and bags go out with you.
In areas with bears or other wildlife, treat grounds like food waste and store them with your food, see food storage. Washing yourself, your pot and your mug follows the usual rule of 60–70 metres from water, described in washing outdoors.
Cleaning up after coffee
 1Let the pot cool
Leave the grounds in the pot until the pot is cool enough to handle. The sludge stays at the bottom.
 2Scoop into a zip bag
Spoon the grounds into a zip bag or a small tin kept for waste. Do not tip them on the ground at the camp spot.
 3Wipe it out
Wipe the pot with a cloth or paper. This removes most of the residue and saves washing water.
 4Wash far from water
Wash the pot and mug with a little water 60–70 m from streams and lakes. Strain the dirty water and scatter it widely.
Leave no trace checklist for coffee
- Grounds in a sealed bag, not on the ground
- Filters, tea bags and sachets packed out
- Washing water 60–70 m from any water source
- Wildlife areas: grounds stored like food
- Check local rules for any scattering
A light coffee kit for camp
You rarely need more than a few items: a pot with a lid, a mug, a spoon, the coffee in a sealed container and a bag for the grounds. Add a collapsible pour-over holder or a cloth filter if you want a cleaner cup, and a small cloth to wipe the pot. See the kit list and the budget kit for how coffee gear fits into your whole kit, and plan morning fuel with the firewood calculator or the boiling tool if you cook with wood. A quiet morning brew also makes a good start to a sit spot session.
Rules of thumb at a glance
- Coffee
- about 10–14 g per 200 ml (a starting point)
- Grind
- coarse for cowboy and press, medium for pour-over
- Water
- treat wild water first; just off the boil
- Steep
- 3–4 minutes, settle 1–2 minutes
- Grounds
- pack out; never into water
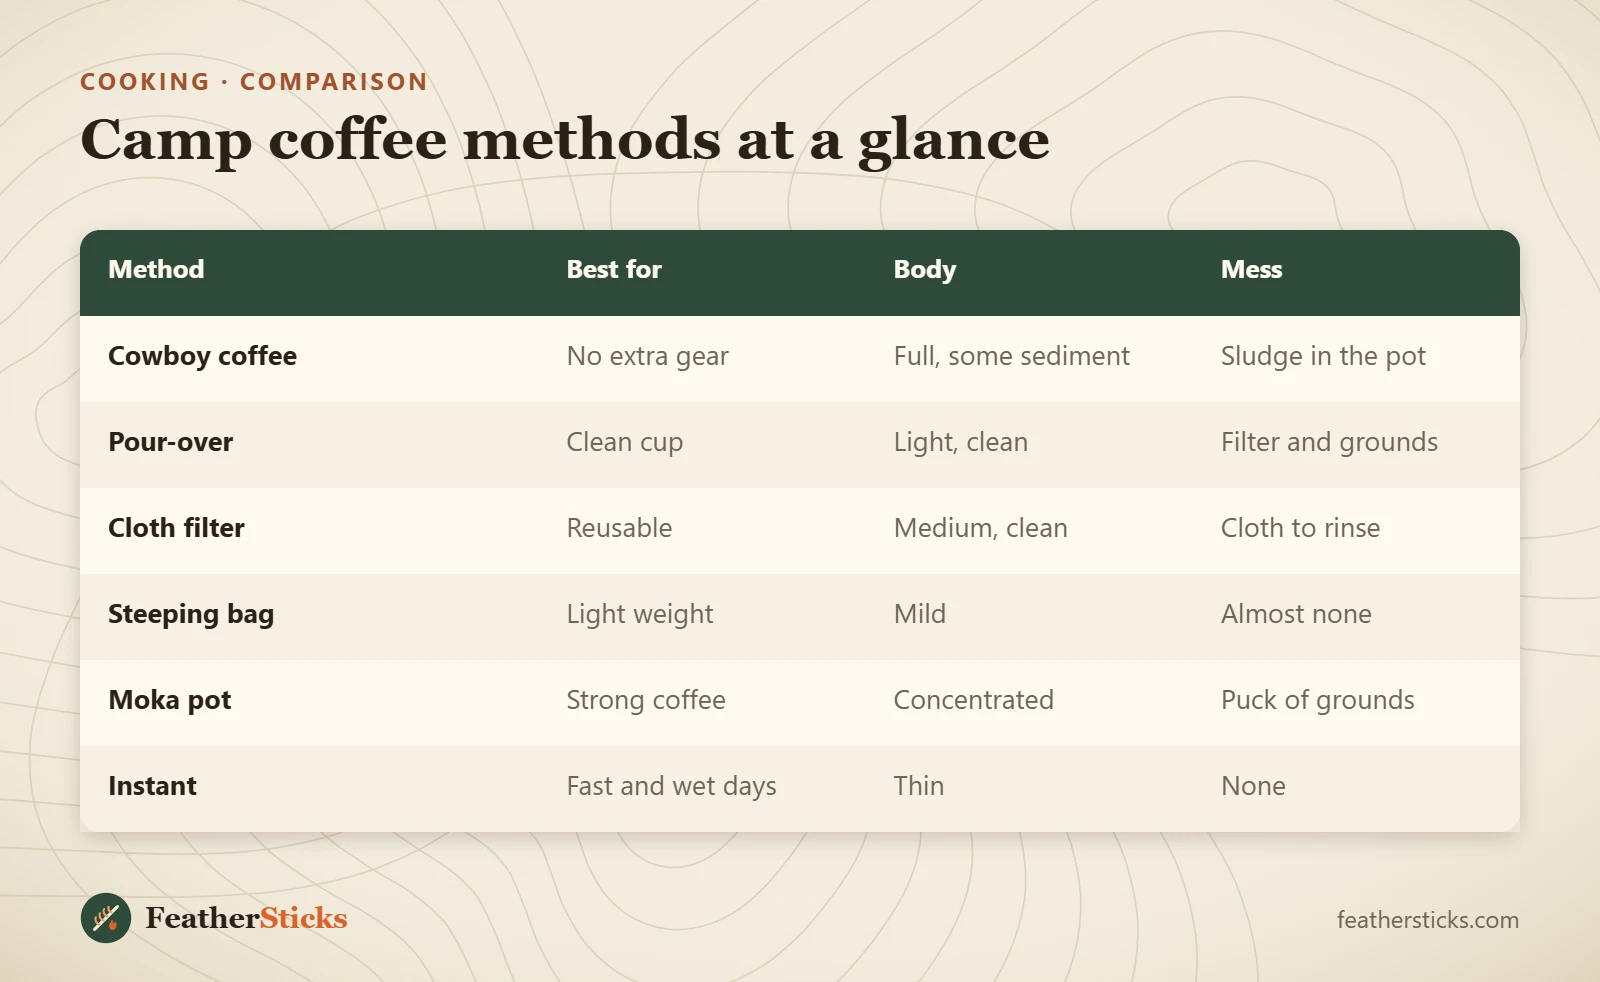
| Method | Best for | Body | Mess |
|---|---|---|---|
| Cowboy coffee | No extra gear | Full, some sediment | Sludge in the pot |
| Pour-over | Clean cup | Light, clean | Filter and grounds |
| Cloth filter | Reusable | Medium, clean | Cloth to rinse |
| Steeping bag | Light weight | Mild | Almost none |
| Moka pot | Strong coffee | Concentrated | Puck of grounds |
| Instant | Fast and wet days | Thin | None |
Common mistakes
- Pouring untreated stream water straight into the pot and calling it safe because it is hot
- Grinding too fine for cowboy coffee, which gives a bitter, gritty cup
- Stirring again after settling, which sends the grounds back up
- Overfilling the pot so it boils over onto the stove or fire
- Tipping grounds on the ground or into a stream instead of packing them out
- Brewing inside a closed tent, where carbon monoxide and fire are real risks
What you need
- Pot with a lid, ideally with a bail or handles
- Mug, preferably insulated or with a lid
- Coarse-ground coffee in a sealed container
- Spoon and a small measuring scoop
- Zip bag for the grounds
- Optional: collapsible pour-over holder, filters or a cloth filter
FAQ
How do you make coffee while camping without a coffee maker?
What is cowboy coffee?
How much coffee do you use for cowboy coffee?
How do you keep grounds out of cowboy coffee?
Is camp coffee safe to drink if the water comes from a stream?
What do you do with coffee grounds when camping?
Does coffee dehydrate you when hiking?
Does altitude change how coffee brews?
Check yourself
Completed6 quick questions from this guide. Nothing is sent anywhere.
Related step-by-step guides
-
 1
-
 1
-
 1