Baking at Camp: Bread, Cake & Pizza over a Campfire
Baking bread over a campfire works when you trap heat around the dough instead of holding it in flames. A pot with embers below and on the lid, a lidded skillet, a reflector oven in front of the fire or a small tin inside a bigger pot all become ovens. Prepare the dough at home and let it rise on the way. Most of the work is controlling the heat: gentle heat underneath, more heat on top, and a check before you cut the loaf.
This guide covers yeast bread and no-knead dough, pan bread and skillet pizza, cake in a pot, the reflector oven and the two-pot oven. Three related topics have their own guides and are only linked here: coal counts in the Dutch oven guide, stick bread in bannock and twist bread and flatbread on hot rock in stone cooking. It is part of the outdoor cooking hub and builds on the bushcraft basics.
Step by step
-
1

Mix the dough at home
Stir flour, water, salt and yeast in a bowl, then pack the dough in a lidded box. No kneading is needed for a long, slow rise.
-
2

Let it rise in a warm spot
Let the dough double in size. A warm spot of about 24–30 °C speeds it up; a cool box slows it down for transport.
-
3

Build an ember bed
Burn hardwood down to glowing embers beside the fire. Allow 20–30 minutes. Bake on embers, never in flames.
-
4

Bake with heat above and below
About two thirds of the heat on the lid, one third below. Rotate the pot and lid every 10–15 minutes.
-
5

Check doneness
Bread sounds hollow and typically reaches about 90–95 °C inside. A stick pushed into cake comes out clean.
Baking at camp: which method should you use?
Every camp oven does the same job: it surrounds the dough with dry, even heat from several sides. They differ in weight, how much fuel they need and how easy they are to control. Pick the method that fits your kit and trip. The coals rules in the table come from our Dutch oven coals chart, and simple unleavened breads are better made as pan bannock or on a hot cooking stone.
| Method | Heat source | Best for | Weight | Control |
|---|---|---|---|---|
| Dutch oven / camp oven | Embers or briquettes below and on the lid | Loaves, cake, pizza, cobbler | Heavy (cast iron) | Very good with briquettes |
| Skillet with flat lid | Embers below, a few on the lid | Pan bread, skillet pizza, flat cakes | Medium | Good, fast to react |
| Reflector oven | Radiant heat from tall flames in front | Rolls, biscuits, flat cakes, pizza | Light (folding metal) | Good once you know the distance |
| Two-pot / tin can oven | Gentle embers below, embers on the lid | Small loaves and cakes | Light (uses your pots) | Fair, burns easily below |
| Stone, plate or inverted lid | Hot surface, plus a cover | Thin pizza, flatbread | Varies | Fair |
Coal counts for a Dutch oven are explained in Dutch oven cooking. Stick bread is covered in bannock.
Which camp baking method suits you?
Do you drive or paddle to a base camp?
Yes → A cast iron Dutch oven bakes the most reliably – see the coals chart.No → Choose a light method: skillet, reflector oven or two-pot oven.Is an open fire allowed where you camp?
Yes → Ember methods and the reflector oven all work.No → Use a stove with a two-pot oven or lidded pan on low heat, or skip baking.Do you want a tall yeast loaf?
Yes → Dutch oven or two-pot oven with heat on the lid.No → Skillet bread, pizza and rolls bake faster and are easier to control.
Whichever you choose, the rules of cooking over coals instead of flames apply: flames blacken the outside before the inside is cooked, while a steady bed of embers bakes evenly. Plan more firewood than for a normal meal, because baking keeps embers going for an hour or more – the firewood calculator helps you estimate it.
Yeast bread at camp: no-knead dough mixed at home
Yeast bread needs time, not skill. The easiest camp version is a no-knead dough: a fairly wet dough with very little yeast that rises slowly for many hours. Over that time it builds the same structure kneading would, so you only need to stir. Mix it the evening before you leave and it will be ready to shape at camp the next afternoon.
No-knead dough for camp
 1Stir, do not knead
Mix flour, salt and yeast, then pour in the water and stir for about a minute until no dry flour is left. The dough will be shaggy and sticky – that is correct.
 2Rest with the lid on
Put the dough in a lidded box with room for it to double. With only a pinch of yeast it typically needs 12–18 hours at room temperature.
 3Keep it cool on the way
Once it has risen, a cool box slows the yeast down. Typically the dough keeps for a day or two cooled; it slowly turns sour and slack if it gets warm.
 4Second rise near warmth
Tip it onto a floured surface, fold it into a ball and let it rise 45–90 minutes in a warm, sheltered spot – about 1–2 m from the fire, never close enough to bake the crust.
| Ingredient | Per loaf (3–4 people) | Rule of thumb |
|---|---|---|
| Flour (wheat, or part wholemeal) | 500 g | 100 % |
| Water | 350 ml | About 70 % of the flour weight |
| Salt | 10 g (2 level tsp) | About 2 % |
| Dry yeast, slow rise | 2 g (about ½ tsp) | 12–18 h rise at room temperature |
| Dry yeast, fast rise | 7 g (one sachet) | 1–2 h rise in a warm spot |
Typical starting values. Wholemeal flour absorbs more water; add 20–30 ml. Fresh yeast: roughly three times the dry yeast weight.
How do you find a warm spot for dough at camp?
Yeast works best at about 24–30 °C. Below about 10 °C it barely works, and above roughly 50 °C it starts to die. Good warm spots at camp:
- A sealed box wrapped in a fleece or put in a sleeping bag for an hour.
- A sunny place out of the wind, with the box in the shade of your pack so it does not overheat.
- The warm side of a rock or a log 1–2 m from the fire – check with the back of your hand that it is only pleasantly warm.
- A box standing in a pot of warm (not hot) water.
Do not leave dough in a car in full sun; the inside can quickly get too hot for yeast. In cold weather simply allow more time – the dough is ready when it has about doubled and a fingertip pressed in leaves a dent that springs back slowly.
Pan bread and skillet pizza over the fire
A heavy skillet with a lid is the quickest way to bake with yeast dough at camp. Because the dough is thin, it bakes through in minutes rather than the best part of an hour. This is different from pan bannock, which uses baking powder: yeast pan bread is softer, more open and tastes like bread rather than scone.
Yeast pan bread
Press a ball of risen dough flat, about 1.5–2 cm thick, into an oiled skillet. Cover with a flat lid and set the pan on a thin layer of embers. After 8–10 minutes the underside should be golden; flip it, put the lid back on and bake for another 6–8 minutes. With a flat lid you can put a few embers on top and skip the flipping. Times are typical – lift the edge with a spatula and look.
Campfire pizza in a skillet
Campfire pizza needs a hot base and some heat on top to melt the cheese. In a skillet you get both by baking the base first and the topping second, under a lid with embers.
Skillet pizza step by step
 1Press the dough into the pan
Oil the skillet and press the dough out thinly with your fingers, slightly thicker at the edge. Thick dough stays doughy under the topping.
 2Bake the base on embers
Set the pan on a thin bed of embers for about 3–4 minutes, until the base is firm and lightly brown underneath. Lift an edge to check.
 3Add a thin topping
Spread a thin layer of sauce, then cheese and a few toppings. Wet, heavy toppings make the base soggy; pre-cook raw meat and keep it cool until then.
 4Lid on, embers on top
Close the pan with a flat lid, or a sheet of metal, and put a few embers on it. After typically 8–12 minutes the cheese has melted and the edge is crisp.
No lid? Move the pan to the edge of the fire and tilt it slightly towards the flames, so radiant heat browns the top – or slide the pizza into a reflector oven. A heavy pan matters: thin aluminium pans scorch the base in the middle. The camp cookware guide explains which pans work on a fire, and cast iron care keeps a skillet non-stick.
Campfire pizza on a stone, plate or Dutch oven lid
A flat hot surface with a cover over it also bakes pizza. The surface can be a steel plate or pizza stone on a campfire grill, an upturned Dutch oven lid standing on three small stones or its own legs, or a natural flat stone. Natural stones need care: stones from rivers, lakes and wet ground can burst when heated. Read how to choose and heat one in why stones explode before you try.
- Preheat the surface for about 10–15 minutes over embers. A cold plate gives a pale, chewy base.
- Cover it. Without a cover the top stays raw. Use an upturned pot, a large pan or a second lid, ideally with embers on it.
- Keep pizzas small, about 20–25 cm, so they fit under the cover and can be turned with one spatula.
- In a Dutch oven, a pizza bakes in about 15–25 minutes with plenty of heat on the lid and few coals below, as the Dutch oven recipe table shows.
Cake in a Dutch oven or pot
A cake in a Dutch oven follows the same heat rules as bread, only a little gentler. Batter burns faster than dough because of the sugar, so the base needs protection. Put the batter in a cake tin that stands on a trivet or a few spacers inside the oven, or line the oven with baking paper. Then use the standard baking split from the coals chart: about two thirds of the heat on the lid, one third below.

| Oven | Briquettes top / bottom | Typical time | Note |
|---|---|---|---|
| 10 in (approx. 25 cm) | 13 / 7 | 35–45 min | Fits a tin of about 20 cm |
| 12 in (approx. 30 cm) | 16 / 8 | 35–45 min | Fits a tin of about 24–26 cm |
| Wood embers | About 1 shovel below, 2 on the lid (30 cm oven) | 35–45 min | Check after 10 min, then every 10–15 min |
Briquette numbers from our Dutch oven coals chart. Rotate the oven a quarter turn one way and the lid a quarter turn the other way every 10–15 minutes.
Preheat the oven for 5–10 minutes before the batter goes in, exactly as for bread. Fruit cake, brownies, upside-down cake and simple sponge all work. Wet fruit on the bottom (an upside-down cake) needs a little less bottom heat, otherwise the sugar burns. Briquettes give useful heat for about 45–60 minutes, which is enough for one cake; for a second one, light a fresh batch in time.
No Dutch oven? A large pot with a lid and a small tin inside works too – that is the two-pot oven described below. A cake can also be baked slowly in a lidded skillet on very low embers, but it ends up flatter and needs turning.
Reflector oven camping: baking in front of the fire
A reflector oven is an open-fronted metal box with a slanted top panel, a slanted bottom panel and a shelf in the middle. Set in front of a fire with tall, steady flames, its shiny panels throw radiant heat onto the food from above and below. It is light and folds flat, which is why canoeists and old-time campers liked it. It bakes rolls, biscuits, flat cakes, cornbread and pizza well; a tall loaf is harder.

Baking with a reflector oven
 1Build a tall, flaming fire
Unlike other camp ovens, a reflector oven needs flames, not just embers – ideally about as tall as the oven. A log reflector wall behind the fire pushes more heat forward.
 2Set the distance
Place the oven on bare ground facing the fire, typically about 20–30 cm from the flames. Hold your hand at the shelf: if you have to pull it back within a few seconds, it is hot enough.
 3Turn the pan halfway
The side nearest the fire browns first. Halfway through, turn the pan 180° with gloves on. Rolls typically take 15–25 minutes in total.
 4Feed small wood often
Keep the flames even by adding thin split wood every few minutes. A dying fire stops the baking; a sudden blaze burns the front.
Improvised reflector from foil
You can improvise with a frame of green sticks covered in heavy-duty foil, leaned at an angle behind a pan on a grate, or a foil-lined pan propped at the fire. It works for browning the top of skillet bread or pizza, but it is less efficient than a real oven and needs more attention. Pack every scrap of foil out afterwards – see foil and its waste.
Safe distances with a reflector oven
- A reflector oven needs a big, lively fire. Keep it at least 5 m from tents and hammocks and at least 3 m from synthetic tarps; the tarp and fire guide explains why.
- Stand the oven on bare mineral ground, never on dry grass or leaves, and keep the area around the fire clear.
- The panels get very hot. Handle the oven and the pan with leather gloves only.
- Do not build a reflector fire in strong wind, which drives flames and sparks sideways – see wind and campfires.
Tin can oven and two-pot oven: baking with the pots you carry
If you carry two nesting pots, you already own an oven. A small tin or pot of dough sits on a spacer inside a larger pot with a lid. The air gap between the two stops the base from burning, and the large pot spreads the heat around the dough. This two-pot oven bakes small loaves, muffins and cakes on embers – or very carefully on a stove at low heat when fires are banned.
Building a two-pot oven
 1Spacer in the big pot
Put a low trivet, three metal tent pegs, a ring of foil or a jar lid in the big pot so that 2–3 cm of air remains under the inner tin. Do not use wet stones: they can burst.
 2Tin in, lid on
Put the dough in a greased smaller tin or pot, set it on the spacer and close the big pot. Leave a small gap around the tin so hot air can circulate.
 3Gentle heat below, embers on top
Set the big pot on a thin, gentle layer of embers and shovel a few embers onto the lid if it is flat. Too much heat below is the classic mistake.
 4Check after 30 minutes
A small loaf of about 250 g flour typically takes 30–45 minutes. Push a stick into the middle; if it comes out clean and the crust is firm, it is done.
What about a tin can oven?
A large clean food tin can work as the inner tin, or as a small oven with a lid of foil. Be cautious: many food tins are lined on the inside with a plastic coating, and printed or painted outsides are not meant for fire. Do not heat coated or painted tins strongly. A plain stainless steel mug or small pot is the safer choice, and it does not create rubbish.
On a stove
On a gas stove, set the flame very low and use a heat diffuser or a thin metal plate under the large pot if you have one. Cover the outside with a pot cosy only if it is made for heat, and never leave the stove unattended. Check the stove manual: oversized pots can overheat some canister stoves. Our camp stove guide covers stable setups.
Heat control and checking doneness
Most failed camp bakes have one cause: too much heat from below. A base heated directly by embers browns fast, while the top and the middle stay pale. The fix is the same for every method: move heat from below to above, protect the base with a spacer, trivet or baking paper, and turn the pot or pan regularly.

How hot is your fire?
For embers, the hand test gives a rough idea: hold your palm at cooking height and count how many seconds you can keep it there. The hand test explained lists typical heat levels. For baking you usually want medium heat below and more on top. When in doubt, start cooler: a bake that takes ten minutes longer is better than a burnt one.
How do you know bread or cake is done?

Doneness at a glance (typical)
- Yeast loaf
- Hollow sound, firm crust, core about 90–95 °C
- Pan bread / pizza
- Base golden and firm, edge crisp, cheese melted
- Cake
- Stick comes out clean, top springs back
- Rolls
- Golden all round, light when lifted
The core temperature for bread is a commonly cited baking guide, not a food safety limit: lean yeast breads are typically done at about 90–95 °C inside, while very wet or enriched doughs may need a little more or less. A probe thermometer is light and removes the guesswork. A wooden stick from a peeled twig or a toothpick works for cake: push it into the centre, and if wet batter sticks to it, keep baking.
| What you see | Likely cause | Fix |
|---|---|---|
| Black base, raw middle | Too much heat below, no spacer | Fewer embers below, trivet or baking paper, more on the lid |
| Pale top, done base | Too little top heat | More embers on the lid or turn to a reflector |
| One side dark | Wind or no rotating | Windbreak, rotate every 10–15 minutes |
| Dense, flat bread | Dough not risen enough, or too cold | Longer rise in a warm spot, check the yeast date |
| Doughy under pizza topping | Dough too thick or topping too wet | Press thinner, pre-bake the base, use less sauce |
| Ash on the crust | Embers fell in while checking | Brush the lid off before lifting, lift straight up |
Camp baking recipes as templates (2–4 people)
These are basic templates rather than exact recipes. All amounts are typical for about 2–4 people and can be scaled. Weigh dry ingredients at home into labelled bags; the food planner helps you fit bread and cake into the day's calories, and trail food planning shows how to plan whole menus. More dishes are in our bushcraft recipes.
| Bake | Ingredients | Method | Typical time |
|---|---|---|---|
| No-knead loaf (3–4 people) | 500 g flour, 350 ml water, 10 g salt, 2 g dry yeast | Rise 12–18 h, shape, second rise, bake in a Dutch oven | 35–50 min |
| Yeast pan bread (2–3 people) | 300 g flour, 190 ml water, 5 g salt, 3 g dry yeast, 1 tbsp oil | Rise 1–2 h warm, press 1.5–2 cm thick into a lidded pan | 15–18 min, flipped once |
| Skillet pizza (2–3 people, 2 pizzas) | 250 g flour, 160 ml water, 5 g salt, 3 g dry yeast, oil; tomato sauce, cheese, toppings | Base 3–4 min, topping under a lid with embers | 8–12 min per pizza after the base |
| Pot cake (4 people) | 200 g flour, 120 g sugar, 2 eggs, 100 g butter or oil, 150 ml milk, 8 g baking powder | Premix dry ingredients, stir in wet at camp, bake in a tin on a trivet | 35–45 min |
| Rolls in a reflector oven (2–3 people) | Half the no-knead loaf dough, shaped into 6 rolls | Second rise 30–45 min, bake in front of tall flames | 15–25 min, turned once |
Typical values; times depend on heat, wind and dough thickness. Check doneness instead of trusting the clock.
Variations are easy: add grated cheese and herbs to the bread dough, swap a third of the flour for wholemeal or rye (with a little more water), or add dried fruit and cinnamon to the cake batter. For eggs on longer trips, use powdered egg or replace the eggs with extra milk and a spoon of oil. Gluten-free flours need binders and behave very differently – test them at home first.
Hygiene, storing flour and cleaning up
Flour is a raw food. Food safety agencies advise not to eat raw dough or batter, because flour can carry bacteria that only baking kills. Wash your hands before shaping dough and after touching raw eggs, and keep a separate clean surface – a board or a clean pot lid – for shaping.
Storing baking supplies at camp
- Flour, sugar and premixes in double zip bags or a hard box – they attract mice and absorb moisture
- Dry yeast sealed and cool; check the use-by date before the trip
- Eggs, butter and milk in the cool box, used first
- Risen dough cool and covered; use it within a day or two
- Food stored away from the tent and protected from animals at night
How to keep these foods cold and away from animals is explained in storing food at camp. After baking, let cast iron cool before washing and never pour cold water into a hot pot – see cleaning cast iron at camp. Scrape out burnt dough while it is still warm, then wash at least 60 m from lakes and streams, strain out the crumbs and scatter the grey water as described in washing dishes at camp.
Fire safety and baking with kids
Baking keeps a fire and hot embers going much longer than a quick meal, so the basics of campfire safety matter even more. Check fire bans and the local fire danger before you light anything; rules differ by country and region, and many areas ban open fires – sometimes even charcoal – in dry periods. Bake on bare mineral ground or in an existing fire ring or fire pan, keep water within reach, and put the embers out completely afterwards: drown, stir and feel for heat.
Baking with children
Children love camp baking because the result is real food. Give them the safe jobs: weighing and stirring the dough, shaping rolls, choosing pizza toppings and doing the stick test on the cake. Adults handle the lids, embers and hot pots with gloves and a lid lifter. Mark a clear "hot zone" around the fire that children only enter with an adult, as explained in campfire rules for kids. Twist bread on a stick is the classic first bake for younger children – see twist bread with kids.
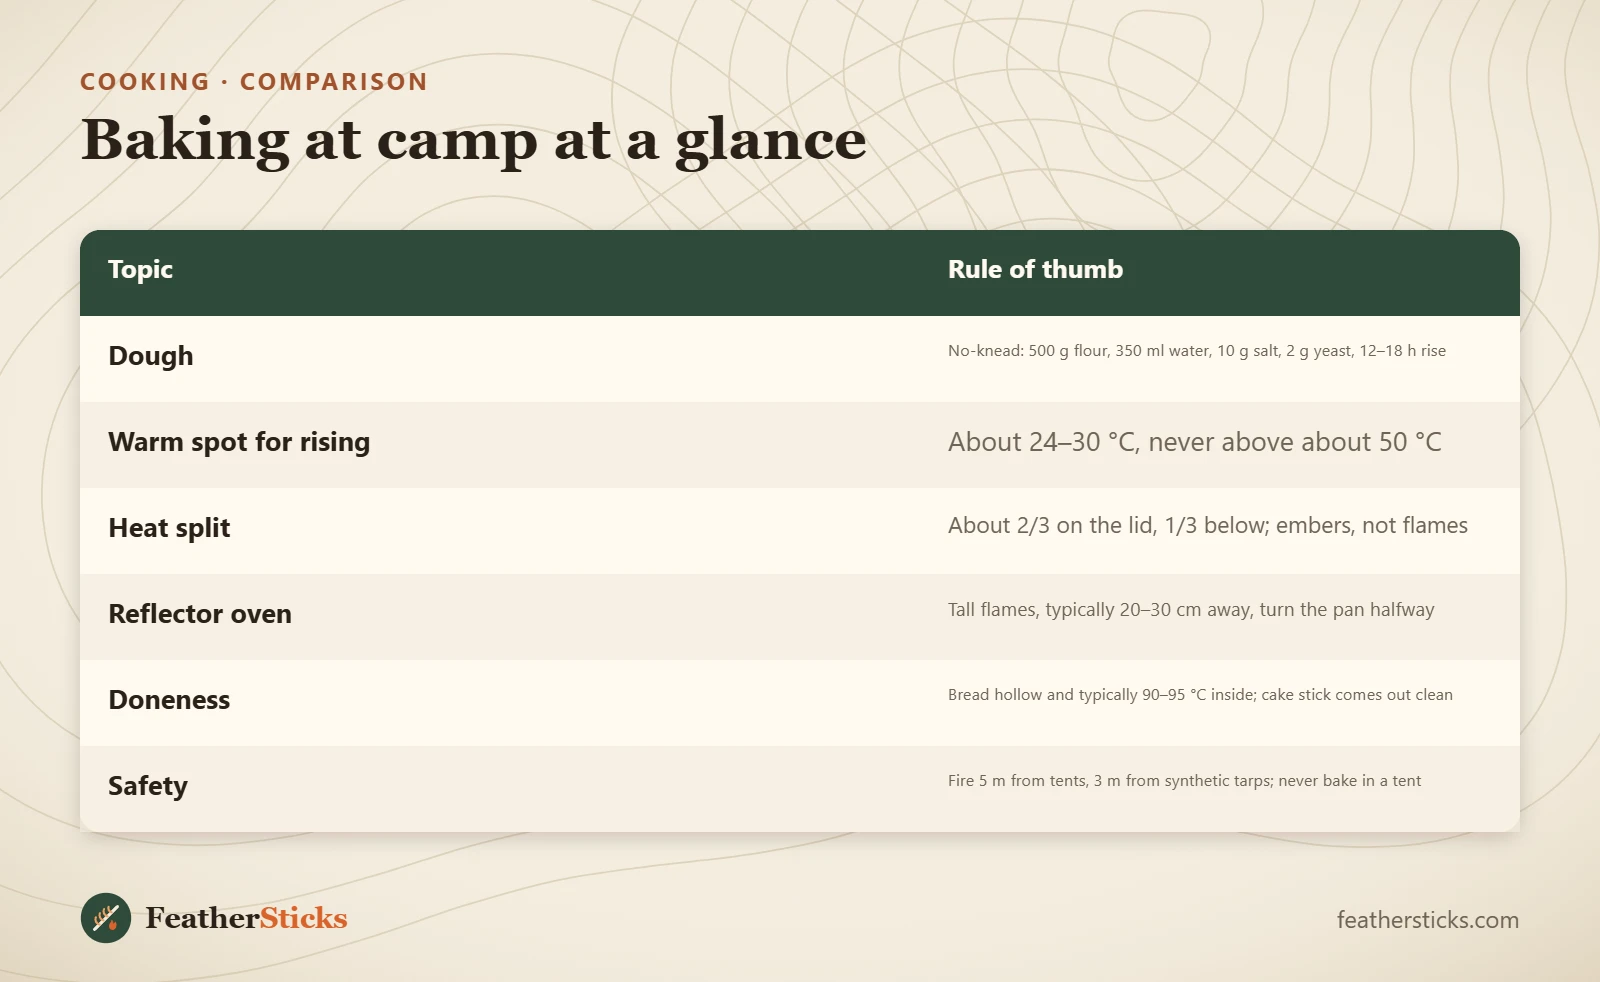
| Topic | Rule of thumb |
|---|---|
| Dough | No-knead: 500 g flour, 350 ml water, 10 g salt, 2 g yeast, 12–18 h rise |
| Warm spot for rising | About 24–30 °C, never above about 50 °C |
| Heat split | About 2/3 on the lid, 1/3 below; embers, not flames |
| Reflector oven | Tall flames, typically 20–30 cm away, turn the pan halfway |
| Doneness | Bread hollow and typically 90–95 °C inside; cake stick comes out clean |
| Safety | Fire 5 m from tents, 3 m from synthetic tarps; never bake in a tent |
Common mistakes
- Baking in flames instead of on embers, so the crust burns before the middle is cooked.
- Too much heat from below and no spacer, trivet or baking paper.
- Rushing the rise – cold dough that has not doubled bakes dense and flat.
- Pizza dough pressed too thick or loaded with wet toppings.
- Lifting the lid every few minutes and letting the heat escape.
- Heating plastic-lined or painted tins strongly.
- Leaving a big reflector fire unattended or too close to tarps and tents.
What you need
- Dutch oven, or a heavy skillet with a flat lid
- Two nesting pots and a small trivet for a two-pot oven
- Folding reflector oven (optional)
- Leather gloves and a lid lifter
- Small shovel for embers
- Lidded box or zip bags for dough and premix
- Probe thermometer or wooden skewers
- Baking paper and a little cooking oil
FAQ
How do you bake bread over a campfire without an oven?
Can you make yeast dough while camping?
How do you make pizza over a campfire?
How many coals do you need to bake a cake in a Dutch oven?
What is a reflector oven and how does it work?
How do I know when bread baked at camp is done?
Why does my camp bread burn on the bottom?
Can you bake on a camping stove?
Check yourself
Completed6 quick questions from this guide. Nothing is sent anywhere.
Related step-by-step guides
-
 1
-
 1
-
 1