Cast Iron Care: How to Season, Clean and Rescue Cast Iron at Camp
How to season cast iron comes down to one idea: wipe on a very thin layer of oil, wipe almost all of it off again and heat the pan until the oil bakes into a hard, dark, slick coating. That coating is what keeps raw iron from rusting and food from sticking, and it is the heart of any good cast iron care at camp.
This guide explains what seasoning really is, how to season at home and over a fire, how to clean a pan at camp, how to remove rust and fix sticky or flaking seasoning, and how to avoid cracks. It builds on the Dutch oven guide, belongs to the outdoor cooking hub and shares its logic with knife and axe care.
Step by step
-
1

Clean to bare iron
Scrub with hot water and a brush until all rust, residue and old flaky bits are gone. A little soap is fine before seasoning.
-
2

Dry completely on heat
Warm the pan over a fire, stove or oven until every trace of water has evaporated. Water in the pores turns into rust under the new layer.
-
3

Oil very thinly, wipe off
Rub a few drops of oil over every surface, then wipe with a clean cloth as if you wanted to remove it all. The surface should look almost dry.
-
4

Heat upside down
Bake the pan upside down for about an hour, typically at 200–250 °C, in an oven, covered grill or over steady coals. It smokes, so ventilate.
-
5

Cool and repeat
Let it cool in place, then repeat two to four times. A good base layer is dark, smooth and not tacky to the touch.
-
6

Store dry
Keep it dry with a paper towel inside and the lid ajar. Never store it damp or sealed in a bag.
What is seasoning, and why does cast iron need it?
Cast iron is porous. Under a magnifying glass the surface of a freshly cast pan looks like fine sandpaper, and in those tiny pits water and oxygen turn iron into rust within hours. Seasoning is the cure: a thin layer of oil that has been heated until it changes chemically.
When a thin film of oil is heated well above normal cooking temperatures, its molecules link up into a net. Chemists call this polymerisation; you can think of it as liquid oil turning into a very thin, hard plastic-like varnish that is bonded to the iron. The result is dark, slightly glossy, water-repellent and much less sticky than bare metal. It is not a coating you put on once and forget. Every time you fry something fatty, a little more is added, and every time you scrub hard or cook acidic food for hours, a little is worn away.
The most important detail is thickness. Oil that is too thick does not turn into a hard varnish; it stays gummy on the surface. That is why every seasoning guide, and the Dutch oven guide, repeats the same rule: many thin layers beat one thick one.

Pre-seasoned or raw cast iron?
Many new pans are sold pre-seasoned: the maker has already baked on a base layer. That layer is usually thin, so extra rounds of seasoning at home improve it a lot. Older or traditionally made pans, and flea-market finds, are often raw or stripped and need a full seasoning from scratch before the first meal.
| Pre-seasoned | Raw / stripped | |
|---|---|---|
| First step | Wash, dry, add two or three layers yourself | Wash off any protective wax or oil, then season fully |
| Typical colour | Dark grey to black | Pale grey, sometimes with a waxy film |
| Risk when new | Thin base layer can wear in spots | Rusts quickly if left unseasoned or wet |
| Best use at first | Fatty food: bacon, sausages, fried potatoes | Nothing until it is seasoned |
| Effort | Low | Four to six thin layers are common |
Some makers ship raw iron with a protective coating that must be washed off before seasoning. Follow the maker's instruction if there is one.
Which oil should you use for seasoning?
Almost any neutral cooking fat can season iron if it is applied thinly. The common advice is to pick an oil or fat with a reasonably high smoke point, because seasoning temperatures are higher than normal frying. Brand names do not matter; the type of oil and the thinness of the layer do.
| Fat or oil | What to expect | Good to know |
|---|---|---|
| Rapeseed (canola) oil | Even, dark layer, forgiving | Easy to find, a good all-round choice |
| Sunflower or vegetable oil | Similar to rapeseed | Check the label: neutral refined oils work best |
| Shortening or lard | Works well, softer feel when applied | Wipe off very thoroughly; animal fat can go rancid if layers stay thick |
| Flaxseed (linseed) oil | Very hard, glossy layer | Popular, but some people find it flakes if applied too thickly |
| Olive oil, unrefined | Often smokes and turns patchy | Better kept for cooking than for seasoning |
Linseed oil sold as a wood finish for tool handles is not the same product as food-grade flaxseed oil. Use only food-safe oil on cookware.
Whatever you choose, keep one bottle for the job and a stack of clean, lint-free cloths or paper towels. Oily cloths can heat up and self-ignite when crumpled in a pile, a point the knife and axe care guide covers in detail: lay them flat to dry outdoors, then bin them.
How to season cast iron at home, step by step
A kitchen oven gives the most even heat, so home seasoning is the best way to start a new or stripped pan. The method is the same for a skillet, griddle or Dutch oven; only the size of the tray under it changes.
Seasoning in the oven
- Wash and scrub Use hot water, a brush and a little soap. This is the one moment when soap is welcome, because you are about to put on a fresh layer anyway. Scrub off any rust, residue and loose old coating.
- Dry on heat Towel dry, then warm the pan on a hob or in the oven for a few minutes until it is hot and completely dry. Cast iron holds water in its pores, and a towel alone does not reach it.
- Apply a few drops of oil While the pan is still warm, put a teaspoon-sized amount of oil on a cloth and rub it over every surface: inside, outside, handle, rim, legs and lid of a Dutch oven.
- Wipe it all off again Take a clean cloth and wipe as if you made a mistake. The pan should look dull and nearly dry. A visible shine or drips mean too much oil.
- Bake upside down Put the pan upside down on the oven rack with a sheet of foil or a tray on a lower rack to catch any drips. A common range is 200–250 °C for around one hour, matching the figures in the Dutch oven guide. Treat these as typical values and follow your pan's maker if they give different ones.
- Cool down inside the oven Switch the oven off and let the pan cool slowly. Then repeat the whole round two to four times for a base layer; a raw pan often benefits from more.
Why upside down? Because gravity pulls surplus oil to the rim, where it pools and later turns into a sticky ridge. On an upside-down pan any extra oil runs off onto the foil. Why the thin wipe? Because a layer you can barely see is exactly the thickness that hardens properly.
How to season cast iron outdoors over a fire or on a grill
You do not need a kitchen oven. A covered charcoal or gas grill, or a bed of steady embers, can season a pan or Dutch oven. The preparation is exactly the same as at home; only the heat source changes, and steady heat is more important than high heat.
Seasoning over a fire or grill
 1Make an even bed of coals
Let flames die down and rake the embers into a flat, even bed under a grate. Flames lick unevenly and scorch some spots while leaving others bare. Follow the ember-building tips in Dutch oven on the campfire and fire lays.
 2Place the pan upside down
After cleaning, drying and oiling very thinly, set the pan upside down on the grate with the handle clear of the coals. A Dutch oven is placed upside down with its lid beside it. Typically about an hour is enough.
 3Let the smoke drift away
Seasoning smokes. Work outdoors, upwind of the pan, with space around the fire and no tent downwind. Never season inside a tent or a closed shelter.
 4Cool down and test
Let the pan cool on the grate or on a stone. Touch the surface: it should feel smooth and dry, not tacky. Repeat if it still looks patchy.
On a covered grill with a lid, hold the grill at about the same range as in the oven, typically 200–250 °C, which many thermometers on grill lids can show. Over an open fire there is no thermostat, so trust the signs instead: a faint, steady smoke, the oil film turning from wet-looking to dull, and a darker colour after each round. If the fire gets too hot and the pan starts to glow dull red, take it off. Extreme heat is not needed and can warp thin pans.
Fires are never left alone, and a hot pan on the grate is a burn risk to children and dogs. See campfire safety and check local fire rules before you start. The firewood calculator helps if you want to plan fuel for a long evening of cooking.
How to clean cast iron at camp after cooking
Camp cleaning is simpler than the folklore suggests. The aim is to remove food, not seasoning, and to leave the iron dry. The routine takes five minutes while the pan is still warm.
After-meal routine at camp
 1Scrape out while warm
Use a wooden or plastic scraper to push out food while the fat is still soft. Burnt-on bits come off more easily if you add a little water and heat the pan briefly.
 2Hot water and a brush
Rinse with hot water and use a brush or chainmail scrubber. Skip long soaking. If you use soap, use very little of a mild one and rinse it thoroughly.
 3Dry over the fire
Set the pan over the stove or coals for a minute or two until all water steams off. Towel drying alone leaves moisture in the pores.
 4Wipe on a thin oil film
While the pan is still warm, wipe a few drops of oil over the cooking surface with a cloth, then wipe again until it barely shines.
 5Store it dry
Let it cool, then store with the lid ajar and a paper towel inside. Do not seal a damp pan in a bag or box.
Soap or no soap? The honest answer
Older advice said never to let soap touch cast iron, because early soaps contained lye that could strip seasoning. Modern washing-up liquids are mild, and a small amount of mild soap on a well-built seasoning does not destroy it. What does cause harm is soaking the pan for hours, putting it in a dishwasher, and leaving it wet. Those lead to rust and to flaking seasoning.
At camp the practical rule is: use hot water and a brush first. If the pan holds a lot of fat or fish smell, a drop of mild soap is acceptable, followed by a thorough rinse and drying over heat. Keep washing water at least 60 m (about 200 ft) from lakes and streams, strain out food scraps and pack them away; our water container guide shows how to carry wash water.
What helps and what hurts
Safe for seasoning
- Scraper, brush, chainmail scrubber
- Hot water, a little mild soap
- Drying over heat
- A very thin oil film
Harms seasoning
- Soaking for hours
- Dishwasher
- Steel wool on good seasoning
- Air drying while wet
How to store cast iron so it does not rust
Rust needs water, and storage is where water sneaks in. Cast iron should be bone dry and kept in a dry place with some air around it.
- Dry place: a shelf or cupboard, not a damp shed or a cellar with condensation.
- Lid ajar: if a pot has a lid, lay it slightly off-centre or place a folded paper towel between pot and lid so air can circulate.
- Paper towel inside: it absorbs stray moisture and protects stacked pans from scratching each other.
- No damp bags: a pan wrapped in a plastic bag while slightly warm creates condensation. Use a cloth bag or a padded box, and only when it is fully dry.
- Do not store food in it: leaving stew or tomato sauce overnight can pit the surface.
The same principle applies to steel tools: a dry, aired place and a thin oil film, as in knife and axe care. A damp tent bag in the back of the car is the usual place where good cast iron meets its first rust spots. For the heavy gear that ends up in car boot or canoe, see our Dutch oven guide on weight and bags.
How to remove rust from cast iron
Rust looks dramatic but is almost always fixable. Cast iron is thick, so surface rust does not weaken the pan; only deep pitting or cracks do. The decision is how much rust there is.

Rust removal in five steps
 1Judge the rust
Light surface rust shows as orange spots or a thin orange film. If you can scratch it with a fingernail and the surface underneath feels smooth, it is light.
 2Scrub with steel wool
Use fine to medium steel wool or a stiff brush with a little water and scrub until you reach grey iron. Heavy rust may need coarser steel wool and a longer session.
 3Rinse and dry on heat
Wash off the dust, then dry the pan over heat immediately. Bare iron can show new rust within minutes in a damp climate.
 4Do not leave it bare
Seasoning has been scrubbed off in these areas. The pan is unprotected and needs to go back into the seasoning routine straight away.
 5Re-season fully
Season two to four times as described above. After that the pan is usually as good as before, sometimes better.
Light rust vs heavy rust
| Rust level | What it looks like | What to do |
|---|---|---|
| Light | Orange freckles, rubbed off with a cloth | Steel wool, rinse, dry, re-season two or three times |
| Moderate | Orange patches, rough to the touch | Steel wool and brush, longer scrub, then full re-season |
| Heavy | Dark, flaking, possibly pitted | Short vinegar soak (see below) plus hard scrubbing, then four or more thin layers |
| Cracks or deep pits | Visible crack, hole or pits you can feel | Retire the pan from cooking; do not weld or repair a cooking pot in the field |
Vinegar soak: short and with caution
For heavy rust, many people use a bath of equal parts white vinegar and water. Acid eats rust, but it also eats iron, so the soak must be short. Start with around 30 minutes, check the pan, scrub and repeat if needed; never leave it overnight. Wear gloves and eye protection, work outdoors or ventilated, and rinse the pan thoroughly with water afterwards. Dry it immediately over heat and re-season, because vinegar leaves the iron completely bare.
Skip vinegar on a pan with only light rust: steel wool does the job with less risk. And never mix vinegar with bleach or other cleaners.
Sticky or flaking seasoning: what went wrong and how to fix it
Two problems account for most failed seasoning: a surface that stays sticky and a layer that flakes off in black specks. Both are almost always caused by too much oil in one go.
| Symptom | Likely cause | Fix |
|---|---|---|
| Tacky, amber or brown surface | Oil layer too thick, or too little heat or time | Bake again at the same range for another hour; if still sticky, scrub back and start over |
| Black specks in the food | Seasoning layer flaking off | Scrub off all loose flakes with a stiff brush or steel wool, then re-season with thin layers |
| Uneven patches, dull and glossy | Oil wiped unevenly | Another round of thin layers evens it out |
| Pooled ridge at the rim | Pan baked right way up | Scrub the ridge, then re-season upside down |
| Pale spots after cooking | Acidic food or long simmering wore the layer thin | Wipe oil on while warm and add a layer or two |
If the layer is badly flaking, do not try to patch it. Scrub the pan right back to bare iron as in the rust routine and start over with thin layers. It takes an afternoon, and the result is more durable than any patch.
Acidic food and long simmering in cast iron
Tomatoes, wine, vinegar, citrus and other acidic ingredients can attack seasoning, especially during long simmering. A well-built seasoning handles a short simmer of a few minutes; a long stew of several hours is a different matter. Outcomes include a metallic taste, a grey stain on the food and pale, matte patches on the surface.
- Brown or fry meat in the pan first, then finish acidic stews in a stainless or enamelled pot if you plan to simmer for hours.
- If you cook acidic dishes in iron anyway, remove the food as soon as it is done. Never leave leftovers in the pot overnight.
- Wash, dry and oil the pan straight after an acidic dish.
- A new or thinly seasoned pan is more vulnerable; build several layers first with fatty, non-acidic food.
The Dutch oven guide lists chilli and tomato dishes as fine in a well-seasoned oven; this is consistent, because the key is that the seasoning is well built and that you clean and re-oil promptly afterwards. For hours-long simmering at camp, a plain steel pot from the cookware guide is often easier on the seasoning.
Thermal shock: how cast iron cracks
Cast iron is hard but brittle. It cannot bend to absorb stress the way steel can, so sudden temperature differences make one part expand faster than another, and the iron can crack or warp. The usual causes are easy to avoid.
- Cold water on a hot pan: let the pan cool first, or use warm water.
- A hot pan on snow, wet ground or in a stream: set it on a dry stone or a trivet.
- An empty pan over high heat: dry iron heats unevenly and fast. Preheat gently and add oil or food early.
- Dropping it: transport pans padded, never loose in a car.
A cracked pan or pot cannot be repaired in the field and should be retired from cooking, as the Dutch oven guide also points out. A small hairline crack grows with every heating.
Enamelled cast iron: a different material
Enamelled cast iron has a glass-like coating baked onto the iron, usually in a colour. You do not season it, because the enamel does the protecting. It is easier to clean and handles acidic food well, but it has its own weak spots.

| Raw / seasoned | Enamelled | |
|---|---|---|
| Seasoning | Needed and maintained | Not needed, not possible |
| Acidic food | Short simmer fine, long simmer wears seasoning | Handles it well |
| Chips | Not relevant | Chipped enamel can rust and flake into food |
| Cleaning | Brush, little soap, dry over heat | Soft brush; soaking is fine, no metal scourers |
| Over a campfire | Designed for it | Heat shock can crack the enamel; use moderate heat and avoid coals under the lid |
Do not scrape enamel with metal tools and do not heat it empty. If the enamel inside is chipped, stop using the pot for cooking; small chips on the outside are mostly cosmetic. Kitchen Dutch ovens with enamel are often not made for direct coals, as the Dutch oven guide notes in its comparison.
A small cast iron care kit for the field
You can look after cast iron with a handful of light items that fit in a small pouch next to the pan.
Cast iron field care kit
- Wooden or plastic scraper
- Stiff brush or chainmail scrubber
- Small bottle of neutral cooking oil
- Lint-free cloths and paper towels
- Fine steel wool for emergencies
- Heat-proof gloves and a lid lifter
- Spare cloth bag or padded box for transport
Weigh what you really need with the Kit Builder and plan the food side with the food calculator. Most of this kit weighs little; the iron itself is what makes cast iron a base-camp choice rather than a hiking one. Set the kitchen up away from tents as shown in camp setup, and find first dishes for a fresh pan in campfire cooking and bushcraft recipes. Wider basics are in bushcraft basics, and food storage explains why leftovers do not stay in the pot.
Cast iron troubleshooting by symptom
| What you see | Likely cause | What to do |
|---|---|---|
| Food sticks | Too little seasoning, pan not preheated, too little fat | Preheat, add fat, build more layers with fatty food |
| Orange spots | Surface rust from moisture | Steel wool, rinse, dry on heat, re-season |
| Sticky, tacky film | Oil layer too thick | Bake again; if still tacky, strip and redo thinly |
| Black flakes in food | Flaking seasoning | Scrub off loose bits, re-season |
| Metallic taste, grey food | Acidic food on thin seasoning | Re-season, use steel or enamel for long simmering |
| Dull, grey, dry surface | Seasoning worn away | Oil while warm, cook fatty food, add layers |
| Warped pan | Extreme or uneven heat | Do not force it; use a trivet or replace it |
| Crack | Thermal shock or drop | Retire the pan; do not cook in it |
How cast iron care compares with steel and aluminium camp cookware
Cast iron asks for more attention than the stainless steel or aluminium pots many hikers carry. The trade-off is heat storage and a naturally non-stick surface that improves with use. Steel and aluminium pots are light and forgiving; see bushcraft cookware for how to choose. Light stoves in hobo stoves and camp stoves work with steel pots, while cast iron prefers a steady fire or coals.
| Cast iron | Stainless steel | Aluminium | |
|---|---|---|---|
| Seasoning | Yes, built up and maintained | No | No |
| Rust risk | High if wet | Low | None, but it can pit |
| Cleaning | Brush, little soap, dry over heat | Any soap, soaking is fine | Soft sponge |
| Weight | Heavy | Light to medium | Very light |
| Thermal shock | Can crack | Tolerates it | Can warp |
If you also care for carbon steel knives or axes, the logic will feel familiar: keep the metal dry, add a thin film of oil and store it aired. The details differ, and the knife and axe care guide explains patina and rust on blades. Do not use cooking pans for tool oil or the other way round.
Fire safety and burns when seasoning and cooking with cast iron
Cast iron stays dangerously hot for a long time after it leaves the fire. A pan seasoned at 200–250 °C can burn skin within a second of contact, and it looks the same as when cold.
- Use heat-proof gloves for handles, lids and bails.
- Mark a hot pan with a stick or stone beside it so no one touches it by accident.
- Keep children and dogs well away from a hot pan and the grate.
- Do not season or cook inside a tent or enclosed space: smoke and carbon monoxide are real dangers.
- Respect fire bans and local rules; see campfire safety.
- Keep cool water and burn dressings ready; the first aid kit guide covers what to pack.
Treat a minor burn by cooling it under cool, running water for about 20 minutes and cover it with a clean dressing. Seek medical help for large, deep, blistered or facial burns, or if you are unsure.
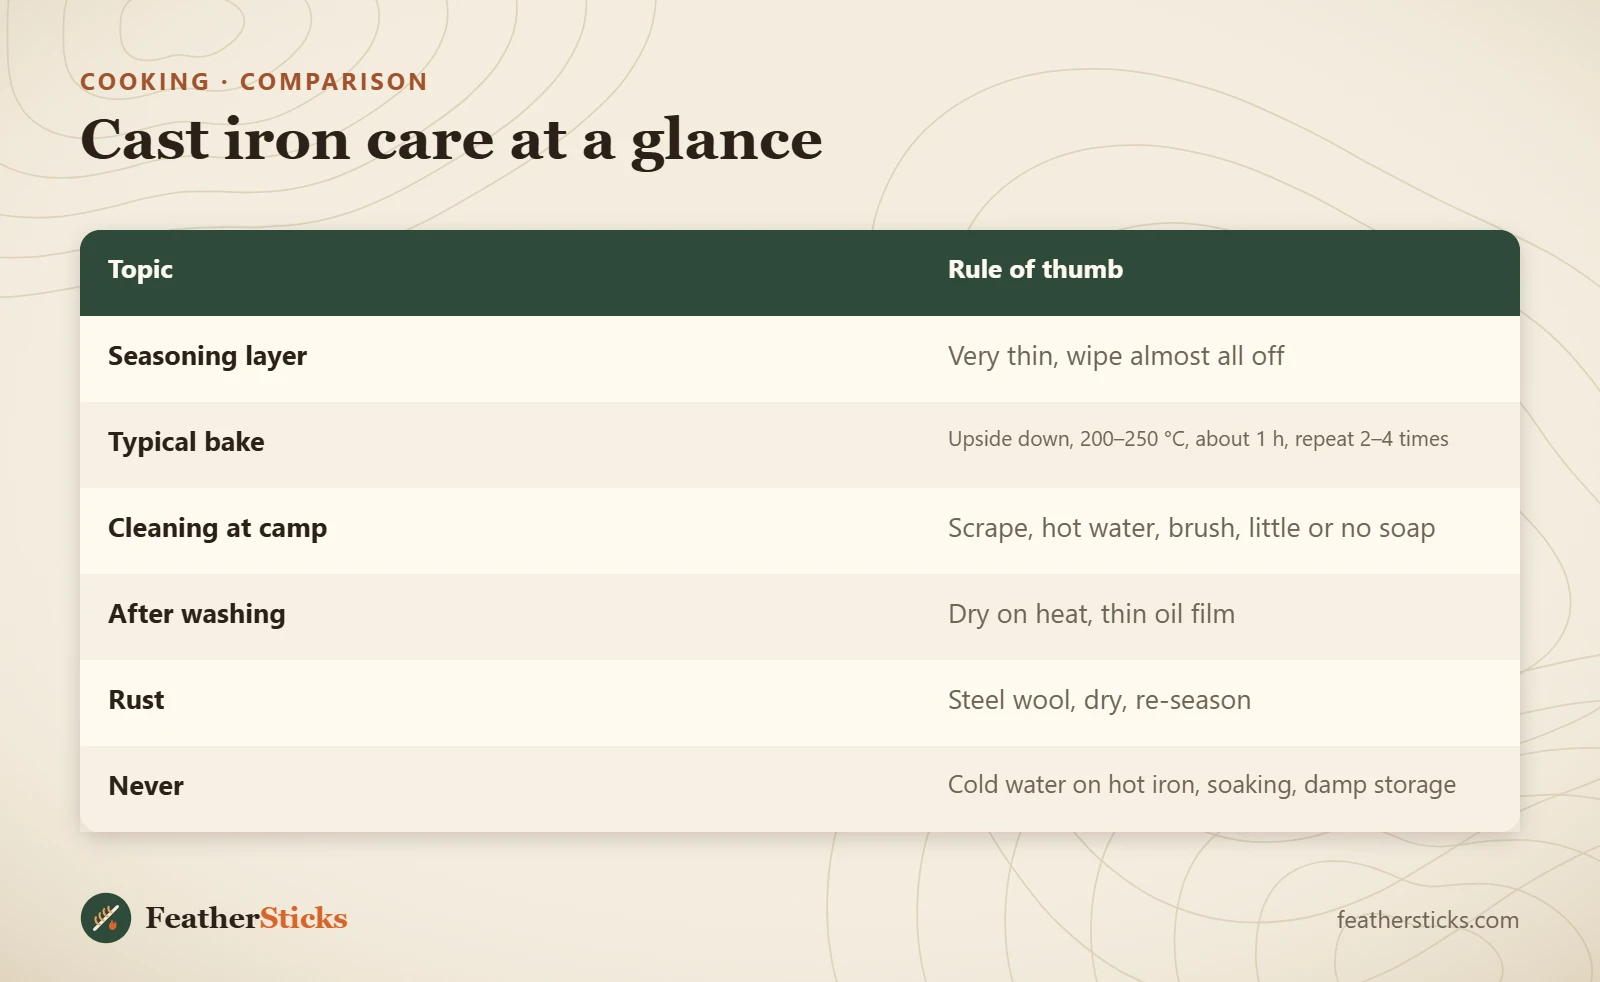
| Topic | Rule of thumb |
|---|---|
| Seasoning layer | Very thin, wipe almost all off |
| Typical bake | Upside down, 200–250 °C, about 1 h, repeat 2–4 times |
| Cleaning at camp | Scrape, hot water, brush, little or no soap |
| After washing | Dry on heat, thin oil film |
| Rust | Steel wool, dry, re-season |
| Never | Cold water on hot iron, soaking, damp storage |
Common mistakes
- Putting on too much oil, which leaves a sticky, flaking surface.
- Seasoning right way up so oil pools at the rim.
- Soaking the pan or putting it in a dishwasher.
- Drying with a towel only, without heating the pan.
- Storing it wet or sealed in a bag.
- Pouring cold water into a hot pan.
- Seasoning or cooking in a tent.
What you need
- Neutral cooking oil
- Lint-free cloths or paper towels
- Stiff brush or chainmail scrubber
- Wooden or plastic scraper
- Fine steel wool
- Heat-proof gloves
- Cloth bag or padded box for transport
FAQ
How do I season cast iron?
What is the best oil for seasoning cast iron?
Can I wash cast iron with soap?
How do I remove rust from cast iron?
Why is my seasoning sticky?
Why did my cast iron pan crack?
Do I season enamelled cast iron?
How should I store cast iron?
Check yourself
Completed6 quick questions from this guide. Nothing is sent anywhere.
Related step-by-step guides
-
 1
-
 1
-
 1