How to Reproof a Rain Jacket: Washing & Reproofing Waterproofs
To reproof a rain jacket, you almost always start by washing it. Dirt, sweat and body oils make the outer fabric soak up water, and a soaked face fabric feels exactly like a leak. Wash it with a technical cleaner, rinse it twice, never use fabric softener, then reactivate the water-repellent finish (DWR) with gentle heat if the care label allows it. Only when water still soaks in after that do you need a new spray-on or wash-in reproofer.
This guide explains the difference between the membrane and the DWR, why clean gear breathes better, how to wash and reactivate step by step, which reproofer suits which garment, what PFC-free agents mean in practice, and how to look after waxed cotton, poly-cotton tarps and canvas tents. It builds on our guide to rain gear for hiking and belongs to the bushcraft gear guides. One rule sits above every tip here: follow the care label.
Step by step
-
1

Check: beading or soaking in?
Sprinkle water on the shoulders. If it beads and rolls off, the finish works. If the fabric darkens and soaks it up, the jacket needs care – usually a wash first.
-
2

Wash with a technical cleaner
Close all zips, empty the pockets and wash the jacket on its own with a technical wash, at the temperature and on the gentle cycle the care label states.
-
3

Rinse twice, no softener
Add an extra rinse so no detergent stays in the fabric. Never use fabric softener or normal powder – residues attract water and block breathability.
-
4

Reactivate with heat if allowed
If the label allows it, tumble dry on low or iron on low with a cloth between. Gentle heat often brings the water-repellent finish back.
-
5

Reproof only if it still soaks
If water still soaks in after washing and heat, apply a spray-on or wash-in reproofer exactly as the product says, then dry or activate it.
-
6

Store clean, dry and loose
Hang waterproofs loosely in a cool, dry, dark place. Never store them damp, dirty or compressed in a stuff sack for months.
Membrane vs DWR: what actually keeps you dry
A rain jacket has two separate defences against water. Our guide to membranes and coatings explains the fabrics in detail; here is the short version.
- The membrane or coating sits on the inside of the outer fabric. It is the waterproof barrier: it stops liquid water but lets water vapour from your sweat pass outwards. It does not wear out from washing; it wears out from age, abrasion, folding and damp storage.
- The DWR – durable water-repellent finish, see the glossary entry – is a thin treatment on the outside of the face fabric. It makes rain form round drops that roll off. It does not keep you dry by itself, but it keeps the face fabric dry, and that is what keeps the jacket breathable.
When the DWR works, you see beading: round drops that run off the shoulders. When it fails, the face fabric wets out: it darkens, gets heavier and holds a film of water. The membrane underneath is still waterproof, but vapour can no longer escape through that wet film. Sweat condenses on the inside, the jacket feels cold and clammy, and many people conclude it is leaking. In most cases it is not.

| What you see | Likely cause | What to do |
|---|---|---|
| Outer fabric dark and heavy, whole inside clammy | DWR worn or dirty, face fabric wetted out | Wash, reactivate with heat, reproof only if needed |
| Inside damp after hard walking, outside still beads | Sweat condensation | Vent more, fewer layers – see why you still get wet inside |
| Wet patches only at shoulders under the pack straps | Abrasion and pressure on the face fabric | Reproof the shoulders; check the membrane for wear |
| Water line along a seam or around the zip | Seam tape peeling or zip not waterproof | Re-tape or seal at home, see the repair section below |
| Water on the inside at one spot | Hole, thorn puncture or spark burn | Patch inside and out, see field repair kit |
| Inside sticky, peeling or flaking in sheets | Coating or laminate breaking down (delamination) | Not repairable by reproofing – the jacket is at the end of its life |
A simple test at home: wash the jacket first, then stand under a shower or garden hose for a few minutes. Real leaks show up as wet spots in the same place every time.
Why dirt and body oils kill breathability
Most people wash their rain jacket far too rarely, out of fear of damaging it. The opposite is true: for most waterproof breathable fabrics, a careful wash with the right cleaner does no harm and usually restores performance, as our rain gear care section puts it.
Several things work against the finish every day you wear the jacket:
- Skin oils and sweat soak into the collar, cuffs and the inside, and from there into the face fabric. Oils make the fibres attract water instead of repelling it.
- Dirt, mud and soot sit on the surface and give water something to cling to. Wood smoke from the campfire leaves a fine, greasy film.
- Sun cream and insect repellent contain oils and solvents that can weaken the finish and, with some products, coatings. Apply them before you put the jacket on and let them dry.
- Abrasion from pack straps, hip belts and brush wears the finish off mechanically – which is why shoulders and hips are where wetting out usually starts.
Dirt also blocks breathability more directly: a membrane that is coated on the inside with sweat salts and oils lets less vapour through. As a rule of thumb, wash a jacket whenever it looks or smells dirty and whenever water stops beading.
How to wash a waterproof jacket step by step
Washing a waterproof jacket is quick and needs no special skill. What matters is the detergent, the rinse and the label. The method below is how most manufacturers typically describe it; if your care label says something different, the label wins.
What you need
- A technical wash made for waterproof outdoor clothing. It cleans without leaving residues behind. Normal powders, many liquid detergents and especially fabric softener leave substances in the fabric that attract water and can clog the membrane.
- A washing machine with a gentle or synthetics cycle, or a large basin for hand washing.
- Time for one or two extra rinses.
Washing a rain jacket in the machine
 1Close everything, empty the pockets
Close the main zip, pocket zips, pit zips and all hook-and-loop tabs so they cannot snag or scratch the fabric. Loosen the drawcords at hood and hem and empty every pocket – a forgotten tissue leaves lint everywhere.
 2Clean the drawer, use a technical wash
Rinse the detergent drawer first so no softener or powder from the last load ends up in the drum. Add the technical wash in the dose the bottle states – more does not clean better, it only leaves more to rinse out.
 3Gentle cycle at the label temperature
Wash the jacket on its own or with one or two other waterproofs. Choose a gentle or synthetics cycle at the temperature on the label – often 30 or 40 °C – and a low spin. Crowding the drum stops the garments from being cleaned and rinsed properly.
 4Rinse twice
Add one or two extra rinse cycles. Detergent residue is one of the most common reasons why a freshly washed jacket wets out again on the next rainy day.
| Symbol | Meaning | For your jacket |
|---|---|---|
| Wash tub with a number | Maximum wash temperature in °C | Never exceed it; lower is fine with a technical wash |
| Wash tub with a bar underneath | Gentle / synthetics cycle | Use the gentle programme with low spin |
| Wash tub with a hand | Hand wash only | Basin, lukewarm water, press – do not wring |
| Square with circle and one dot | Tumble dry on low heat | The usual way to reactivate the DWR |
| Square with circle, crossed out | Do not tumble dry | Air-dry; check whether ironing on low is allowed |
| Iron with one dot | Iron on low heat | Cloth between iron and jacket, no steam |
| Crossed-out circle | No dry cleaning | Solvents can damage membranes and finishes |
| Crossed-out triangle | No bleach | Also avoid stain removers with bleaching agents |
Symbols follow a common international system, but labels differ in detail. When in doubt, use the lower temperature and the gentler setting.
Washing by hand
If the label says hand wash, use a basin with lukewarm water at or below the label temperature and the dissolved technical wash. Knead the jacket gently, especially collar, cuffs and hem, then rinse in fresh water until no foam appears. Press the water out; never wring it, which strains seams and laminates.
Rain trousers and gaiters are washed the same way – brush off dried mud first. Waterproof boots need their own routine, see boots and foot care.
Reactivating the DWR with heat
Many water-repellent finishes recover with gentle heat after washing. Clean fibres plus a little warmth often bring the beading back without any new product at all. That is why the dryer, not the spray can, is the second step – but only if the care label allows heat.

Heat reactivation in practice
- Check the label A square with a circle and one dot means tumble drying on low is allowed; an iron with one dot means ironing on low. A crossed-out symbol means no heat of that kind.
- Tumble dry on low Put the clean, spun jacket into the dryer on the low or gentle setting until it is dry – as a rule of thumb around 20 minutes, sometimes more. Do not use high heat.
- Or iron on low Lay a thin cotton cloth or towel over the jacket and iron on the lowest setting without steam, keeping the iron moving. Never put the iron directly on the fabric, seam tape or prints.
- Test again Once the jacket has cooled, sprinkle water on the shoulders. If it beads, you are done. If it still soaks in, the finish is worn and needs renewing.
If the label does not allow heat, air-dry the jacket on a hanger and skip this step. Some finishes work without heat, others need it – the label and the reproofer's instructions tell you which.
Wash-in vs spray-on reproofer: which is better?
When a clean, heat-treated jacket still soaks up water, its finish is worn and you renew it with a reproofer. There are two kinds, and they behave differently.
Spray-on reproofer is sprayed onto the outside of the garment. It goes exactly where you want it – the outer face fabric – and you can give extra attention to the shoulders, cuffs, hood and seat, where finishes wear first. For membrane jackets with a wicking inner lining, spray-on is usually the better choice, because it leaves the inside untreated.
Wash-in reproofer goes into the washing machine instead of detergent, after a separate wash. It treats the whole garment evenly, inside and out. That suits garments without a membrane – softshells, windproof jackets, fleece – and single-layer coated garments where the inside does not need to wick. On a membrane jacket, a water-repellent inner lining can make sweat bead on the inside instead of spreading out and passing through, so many makers advise against wash-in for those – read both labels.
Spray-on vs wash-in reproofer
Spray-on
- Treats the outside only
- Targets worn zones: shoulders, cuffs, hood
- Best for membrane jackets and trousers
- Needs a ventilated place or outdoors
Wash-in
- Treats the whole garment evenly
- Quick, no overspray
- Best for softshells, fleece, single-layer garments
- Can make a wicking lining repel sweat
Applying a spray-on reproofer
 1Clean and – often – damp
Start with a freshly washed jacket. Many spray-on products are applied to the clean, still damp garment so the agent spreads evenly; some want it dry. Follow the product, not habit.
 2Even coat on the outside
Hang the jacket up outdoors or in a well-ventilated room, close the zips and spray an even coat over the whole outside from the distance the product states. Do not soak it until it runs.
 3Extra on the wear zones
Give a second light pass to shoulders, hood, cuffs and – on trousers – seat and knees, where pack straps, rain and movement wear the finish first.
 4Wipe drips, dry as stated
Wipe off runs with a clean cloth so they do not leave marks, then dry the jacket as the product says – some need a short time in the dryer on low to bond, others just air-dry.
| Gear | Reproofer | Notes |
|---|---|---|
| Membrane jacket or trousers | Spray-on, outside only | Wash first; heat only if the label allows |
| Softshell, windproof, fleece | Wash-in or spray-on | No membrane, so wash-in is fine |
| Coated single-layer poncho or cheap shell | Spray-on outside | Check the coating inside for stickiness first |
| Gaiters, pack covers | Spray-on | Brush off mud and let dry before spraying |
| Waxed cotton | Fabric wax, not a spray | See the waxed cotton section below |
| Poly-cotton tarp or canvas tent | Canvas reproofer | Brushed or sprayed on, pitched and dry |
PFC-free water repellents: what changes for you
For decades, most high-performance finishes were based on fluorinated chemicals (often called PFCs, part of the larger PFAS group). They repelled water and oil very well, but some of them are extremely persistent in the environment and in the body. Regulators in the EU and other regions have been restricting these substances step by step, and the outdoor industry has largely moved to PFC-free (fluorine-free) finishes. Rules differ between countries and are still changing; this is background, not legal advice.
PFC-free finishes use other chemistries – for example based on hydrocarbons, silicones or waxes. For you, the practical differences are:
- They repel water well, but oil and dirt less. Sweat, skin oils, sun cream and smoke make them wet out sooner, so they need washing more often.
- They may need renewing more often, especially in wear zones. Plan reproofing as normal maintenance, not a repair.
- Heat reactivation works for some, not all. Check the care label and the reproofer instructions.
- Match the reproofer to the finish. Most reproofers sold today are fluorine-free; follow their instructions for application and drying.
Does my jacket need reproofing?
Does water bead on the shoulders and sleeves?
Yes → No action needed – just keep it clean.No → Next question.Has it been washed with a technical wash and rinsed twice?
Yes → Next question.No → Wash it first, then test again.Does the label allow heat, and have you tried it?
Yes → Still soaking in? Reproof with spray-on or wash-in.No → Reactivate with low heat if allowed; otherwise reproof.
Waxed cotton: cleaning and rewaxing
Waxed cotton jackets, hats and bags work differently from membranes: the wax itself fills the weave and makes the cotton water-resistant. They are popular in bushcraft because they tolerate sparks far better than synthetics, as explained in waxed cotton and canvas. Their care is simple, but completely different: never put waxed cotton in the washing machine and never use detergent – both strip the wax.
Rewax when the fabric looks pale, dry or patchy, or when water starts soaking in at seams, shoulders and creases. With regular use, many owners rewax once a year, typically before the wet season; heavily used items may need it more often.
Rewaxing a waxed cotton jacket
 1Brush off dry dirt
Let mud dry, then brush it off with a soft brush. Wet mud smears into the weave.
 2Sponge with cold water
Wipe the jacket with a sponge and cold water – no detergent, no hot water – and let it dry completely at room temperature. Wax will not bond to damp fabric.
 3Warm the wax in hot water
Stand the open tin in a bowl of hot water for a few minutes until the wax softens. Never heat it on a stove, over a flame or in the fire: fabric wax is flammable.
 4Rub in thin, then cure
Rub thin coats into the fabric with a cloth, working into seams and creases. A hair dryer on low helps the wax soak in. Hang it in a warm room overnight to cure.
Wipe off surplus that stays tacky the next day; a fresh coat can mark light clothing for a few days.
Poly-cotton tarps and canvas tents: seasoning and reproofing
Poly-cotton tarps and cotton canvas tents are the fireside shelters of bushcraft: they breathe, they are quiet and a stray spark usually leaves only a small mark, as described in tarp materials compared. They are not "set and forget", though. Three things keep canvas waterproof for many years.
Season new canvas
New cotton and poly-cotton often weeps a little at the seams in its first heavy rain. Cotton fibres swell when wet, closing the needle holes and the weave. That is why many makers recommend pitching a new canvas shelter and wetting it thoroughly – in rain or with a hose – and letting it dry, once or twice, before the first trip. Our tipi guide describes the same weathering for canvas tipis. Follow your shelter's instructions.

Clean gently, never in the machine
Brush off dry dirt, needles and leaves, then clean marks with lukewarm water and a soft sponge or brush. Avoid detergents, washing machines and tumble dryers – the same rule our tent care and tarp care guides give for coated shelters. Detergent strips the water-repellent treatment out of canvas.
Reproof when it starts to wick
Canvas needs reproofing when water no longer beads, when wet patches spread through the fabric or when it drips in steady rain. Use a reproofer made for canvas and cotton. Most are brushed or sprayed onto the clean, dry, pitched shelter in dry weather, with special attention to seams, the ridge and corners, and then left to cure for the time the product states before it gets wet again. Do this outdoors, away from any fire.
In rain, do not touch the inside of a canvas wall or let gear lean against it: contact can draw water through the weave at that point. And above all: never pack canvas away damp for more than a day. Mildew stains and weakens cotton within days, as our guide to drying gear after rain explains.
| Fabric | Clean | Reproof | Watch out for |
|---|---|---|---|
| PU-coated polyester or nylon | Lukewarm water, sponge | Spray-on DWR on the outside if it wets out | Sticky, smelly coating means it is breaking down |
| Silicone-coated (silnylon, silpoly) | Lukewarm water, sponge | Rarely needed; sealer on seams | Ordinary tapes and patches do not stick |
| Poly-cotton / cotton canvas | Brush, lukewarm water, no detergent | Canvas reproofer, brushed or sprayed on | Mildew if stored damp; season when new |
| Waxed cotton (bags, covers) | Brush, cold water | Rewax when pale | Heat and flames |
General guidance; the maker's instructions for your shelter take priority.
Seam tape and small repairs
Leaks along seams and through holes are a different job from reproofing – fix them first, so the new finish is not wasted.

Peeling seam tape
Seam tape is glued over the stitching on the inside of most waterproofs. Heat, age, damp storage and harsh detergents make it lift at the ends. Small lifted sections can often be re-bonded at home with an iron on low through a cloth – only if the label allows ironing – or sealed with a seam sealer that suits the fabric. Clean and dry the seam first, apply thin coats and let it cure fully, as described in our guide to repairing torn fabric. Seam sealer needs dry, warm conditions to cure, so treat it as a home job, not a field repair.
Holes, thorn punctures and spark burns
Close small holes with a self-adhesive repair patch made for the fabric: clean and dry the area, cut a patch that extends about 2 cm past the hole in every direction, round the corners and press it on firmly from the middle out. Ideally patch both inside and outside. On a jacket that will be reproofed, apply the patch first and reproof afterwards. A spark hole in a synthetic jacket is a reminder of the rules in clothing near the fire.
When to stop repairing
If the inside coating is sticky, flaking or bubbling across large areas, or the laminate has separated in big blisters, reproofing and patches will not help. That jacket can still serve as a windproof layer, but for real rain you need a new one – our budget gear guide puts a good rain jacket near the top of the list.
Rain gear care on the trail
On a trip you cannot wash or reproof, but a few habits slow the decline:
- Shake and hang: after rain, shake off water and hang the jacket under the tarp on a ridgeline – see the tarp ridgeline – rather than stuffing it wet into the pack.
- Wipe off mud while it is wet and soft, or brush it off once dry. Do not scrub hard.
- Protect from sparks and heat: take a synthetic shell off at the fire or sit upwind, and never dry it on stones next to the fire.
- Pack it on top or in an outer pocket so you can reach it in seconds, and keep everything else dry in a dry bag or pack liner.
If your jacket wets out on a long, cold, wet day, it is still windproof and still keeps much of the rain off. Add a warm layer underneath, keep moving, and watch the feels-like temperature with the wind chill calculator. Wet and windy weather just above freezing is classic hypothermia weather – a wet-out shell is a reason to be more careful, not to panic.
How to store waterproofs
Waterproofs age in the cupboard as much as on the trail. Coatings, laminates and seam tape break down faster when they are warm, damp, dirty or creased for long periods. Good storage is easy:
- Clean and completely dry before you put anything away – dirt and sweat keep working on the fabric during storage.
- Hang loosely on a wide hanger in a wardrobe, or fold loosely on a shelf. Do not leave rain gear compressed in a stuff sack between trips.
- Cool, dry, dark: not in a damp cellar, not in a hot attic, not in a car boot in summer, and not in a sunny window.
- Breathable, not airtight: avoid sealed plastic bags and boxes, which trap moisture.
Canvas tarps and tents follow the same rules: dry fully, store loosely in a breathable bag, in a dry place. The same approach keeps your sleep kit healthy, as described in sleeping bag care and storage. Put the yearly jobs – washing, reproofing, rewaxing – on your list in the Kit Builder next to the bushcraft kit list. You do not need a perfect jacket to start: a simple, well-kept shell goes a long way, as bushcraft for beginners shows – and on wet paddling trips such as canoe camping, good care pays off twice.
Before storing rain gear for the season
- Washed with a technical wash and rinsed twice
- Water beads again – reactivated or reproofed if needed
- Seam tape and small holes checked and repaired
- Completely dry, inside and out, including pockets and hood
- Hung loosely in a cool, dry, dark place – not in a stuff sack
- Waxed cotton rewaxed if it looks pale; canvas dried and stored loose
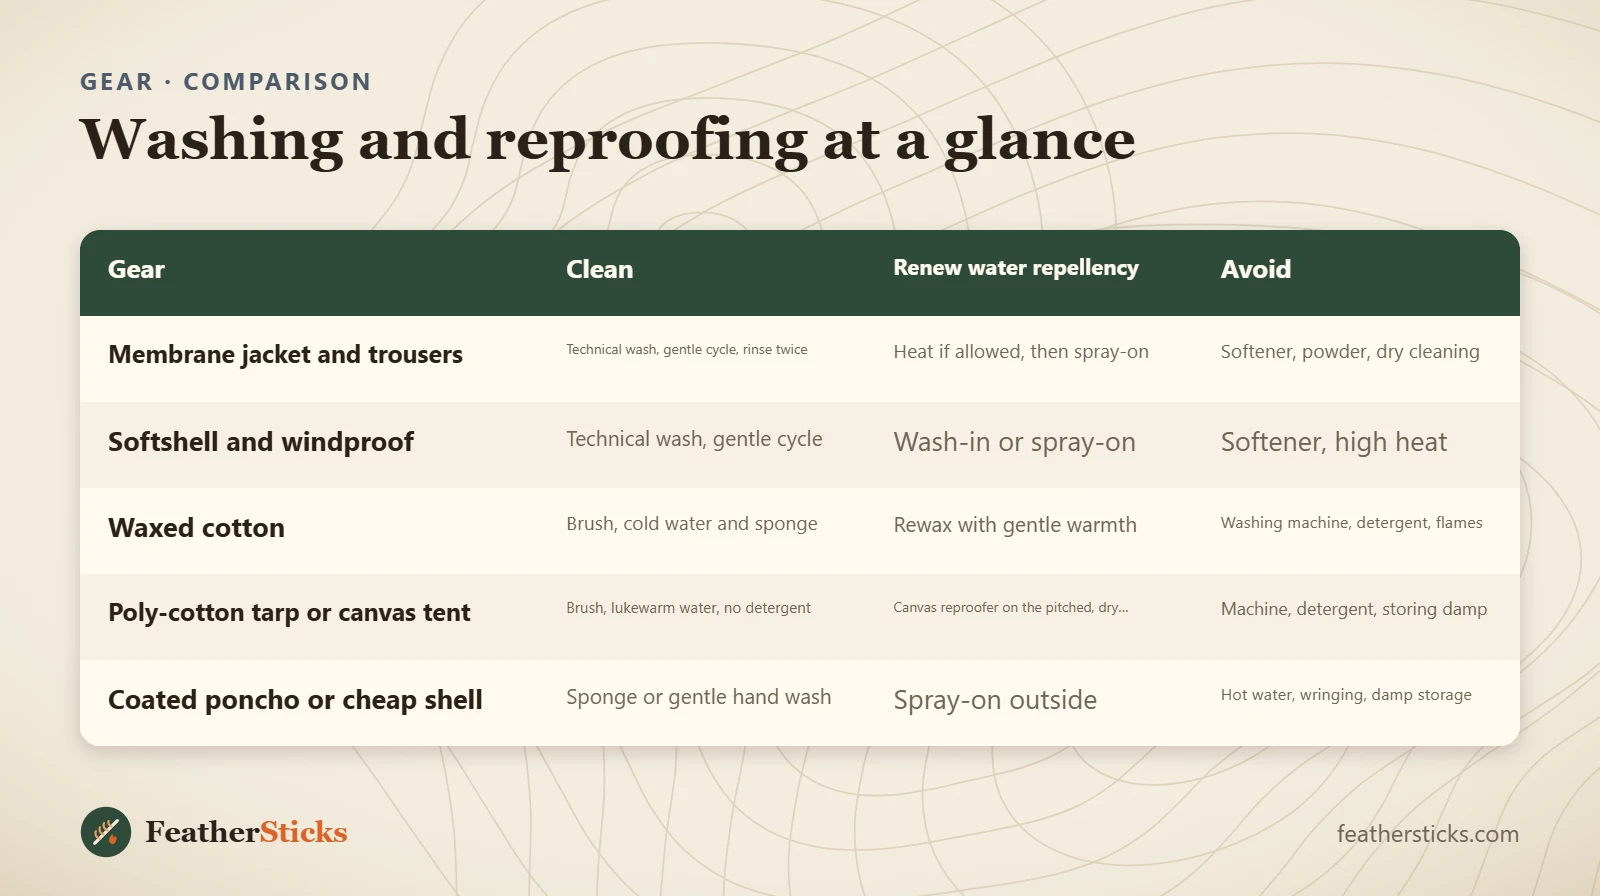
| Gear | Clean | Renew water repellency | Avoid |
|---|---|---|---|
| Membrane jacket and trousers | Technical wash, gentle cycle, rinse twice | Heat if allowed, then spray-on | Softener, powder, dry cleaning |
| Softshell and windproof | Technical wash, gentle cycle | Wash-in or spray-on | Softener, high heat |
| Waxed cotton | Brush, cold water and sponge | Rewax with gentle warmth | Washing machine, detergent, flames |
| Poly-cotton tarp or canvas tent | Brush, lukewarm water, no detergent | Canvas reproofer on the pitched, dry shelter | Machine, detergent, storing damp |
| Coated poncho or cheap shell | Sponge or gentle hand wash | Spray-on outside | Hot water, wringing, damp storage |
Common mistakes
- Reproofing a dirty jacket instead of washing it first.
- Using normal detergent or fabric softener on waterproofs.
- Skipping the extra rinse, so detergent residue attracts water.
- Using heat although the care label forbids it – or drying the jacket by the fire.
- Using wash-in reproofer on a membrane jacket whose lining should wick sweat.
- Putting waxed cotton or canvas in the washing machine.
- Storing rain gear damp or compressed in a stuff sack.
What you need
- Technical wash for waterproof clothing
- Spray-on reproofer (and wash-in for softshells)
- Fabric wax for waxed cotton
- Canvas reproofer for poly-cotton tarps and tents
- Soft brush and sponge
- Seam sealer suited to the fabric
- Round-cornered self-adhesive repair patches
- Wide hangers for storage
FAQ
How do I reproof a rain jacket?
Why does my rain jacket feel wet inside?
Can I wash a waterproof jacket in the washing machine?
Is spray-on or wash-in reproofer better?
How often should I reproof my jacket?
Do PFC-free water repellents work?
How do I rewax a waxed cotton jacket?
How do I reproof a canvas tent or poly-cotton tarp?
Check yourself
Completed6 quick questions from this guide. Nothing is sent anywhere.
Related step-by-step guides
-
 1
-
 1
-
 1